
If you have a website, it’s vital that you make sure it’s easy for Google to understand and properly index your content. When setting everything up, it’s important to adhere to SEO best practices. If you’re reading this post, you likely built your site using self-hosted WordPress.
By default, WordPress is an SEO-friendly CMS that is extendable with a wide variety of excellent plugins. You can set permalinks which are concise, and organize your content is such a way that it’s easy for search engines to understand.
One thing you can do to give your site the best chance in search is to add schema markup (also referred to as structured data). A very small percentage of sites on the web have schema markup, so it can really help you stand out among the competition.
If you’re looking for quality shared hosting for your WordPress website, we highly recommend A2 Hosting. They offer unlimited SSD space, free automatic site backups, hosting optimized for speed and 24/7/365 guru technical support.
- What is Schema Markup?
- Adding schema markup to WordPress with Schema Pro
- Schema Pro configuration
- Adding schema markup to your site content using Schema Pro (paid)
- Adding schema markup with All In One Schema Rich Snippets (free)
- Configuring schema markup on pages & posts with All In One Schema Rich Snippets
- Validating your site's schema markup
- Conclusion
PLEASE NOTE: Just because you add schema markup to your website DOES NOT guarantee that Google will display rich snippets for your site in search results.
What is Schema Markup?
Schema markup (aka structured data) is code which makes it really easy for Google to crawl, organize and display your website content.
It provides search engines with more detailed information to help them identify what your data means. Without schema markup, search engines only know what your data says, but they have to dig deeper to figure out why it’s there.
Adding schema markup to your site makes it very easy for Google to deeply understand all of your content… and its context.
Here is what schema.org says about structured data:
Most webmasters are familiar with HTML tags on their pages. Usually, HTML tags tell the browser how to display the information included in the tag. For example, <h1>Avatar</h1> tells the browser to display the text string “Avatar” in a heading 1 format. However, the HTML tag doesn’t give any information about what that text string means — “Avatar” could refer to the hugely successful 3D movie, or it could refer to a type of profile picture—and this can make it more difficult for search engines to intelligently display relevant content to a user.
Schema markup can help your site rank better for all sorts of content types, including the following:
- Review – Very useful if you review products, movies, books, music or something else on your site.
- Local Business – If you run a local business, this markup can give you a nice boost in local search results.
- Article/Blog Post – Ideal for blogs and news sites to help improve the appearance of posts.
- Service – If you are a service provider, this schema may help Google show extra information about it.
- Product – This lets you add detailed information for any products you offer.
- Course – This schema adds extra data for online or in-person courses.
- Recipe – Show your cooking recipes as rich snippets in search results.
- Person – Display specific information about a person with this schema.
- Job Postings – This would work great for job boards or if you have job openings at your company.
- Software Application – Show enhanced search results for your software applications.
- Book – Make books on your site stand out in Google SERPs.
- Event – Add structured data to your events to make them pop in search results.
- Video Object – Add schema markup to video content.
IMPORTANT: You can add all the schema markup listed above if you use Schema Pro, but NOT if you go the free route with All In One Rich Snippets.
Adding schema markup to WordPress with Schema Pro

Schema Pro is a premium WordPress plugin that lets you add structured data to all of your new and existing site content quickly and easily. It also uses the JSON-LD format for structured data, which is recommended by Google.
Many of the other schema markup plugins display an accompanying box on the front end of your site, which doesn’t look so great. While you could hide this box with a little CSS, it’s much easier if it doesn’t show up in the first place.
Schema Pro configuration
Once you’ve purchased, downloaded and installed Schema Pro, you’ll need to activate your license. You can get this info by logging into the Brainstorm Force account you created when you bought Schema Pro, and going to Account > Licenses. Copy the key and paste it in WordPress. You should see a message once you activate the plugin that you need to enter your license key.
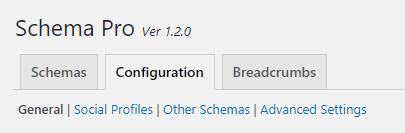
Once you’ve activated your license, go to Settings > Schema Pro, then click on the Configuration tab at the top.
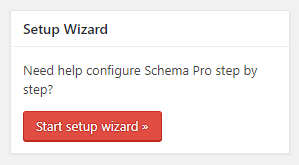
On the right side of the screen, you’ll see a Start setup wizard button. Click on it to get started.
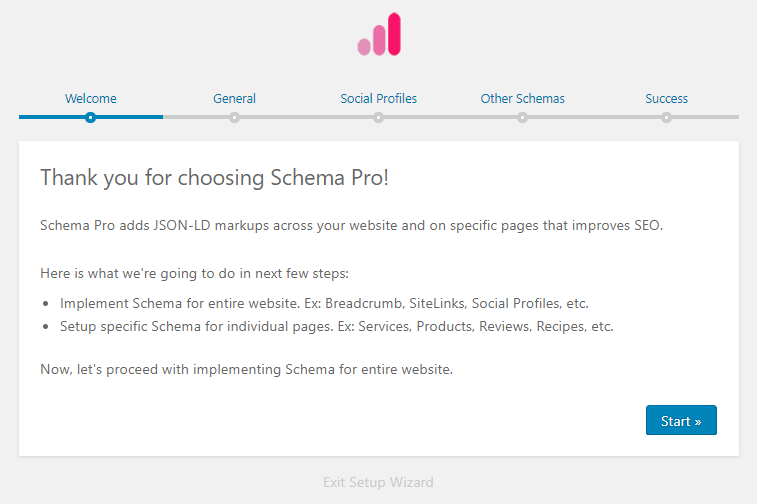
Then, click the Start button again on the next screen to configure Schema Pro’s main settings.
IMPORTANT: Some settings in Schema Markup are the same as in Yoast SEO, but they’ll be disabled by default so there won’t be duplicate markup.
General – In this tab, you can add your company logo and specify whether your site represents a business or person.

Social Profiles – Here, you can enter URLs for your various social media profiles.

Other Schemas – This section lets you specify an about page and contact page. In addition, you can choose a menu to use for schema sitelinks, and enable breadcrumbs schema and a sitelinks search box.
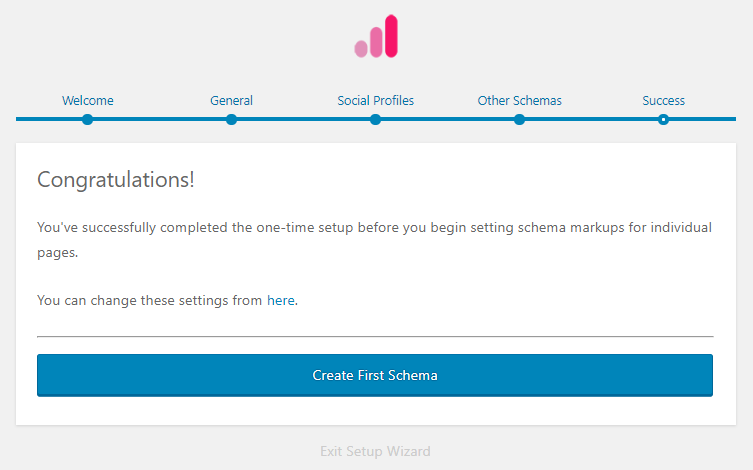
Once finished entering relevant info in all the tabs, click on the Next button. This will bring you to a Success page.
Now, you’re ready to create your first schema.
Adding schema markup to your site content using Schema Pro (paid)
When you configured the setup wizard in the previous step, you added general schema markup for your website. You still haven’t added specific markup for pages, posts and any other content. That’s what we’ll do next.
Schema Pro makes it easy to add all kinds of markup for a wide variety of content.
Overview of how it works:
- Select what type of markup you want to use.
- Apply your chosen markup to certain types of content.
- Specify the fields you want Schema Pro to use in order to generate markup for content.
Once you configure a type of schema, the plugin will automatically mark up your content according to the fields that you mapped in the settings. While it may seem a bit confusing, it’s really straightforward once you get used to it.
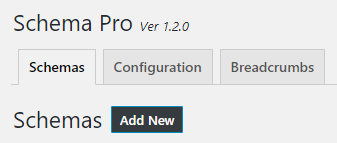
You can start creating your first markup by going to Settings > Schema Pro and clicking Add New at the top of the page.
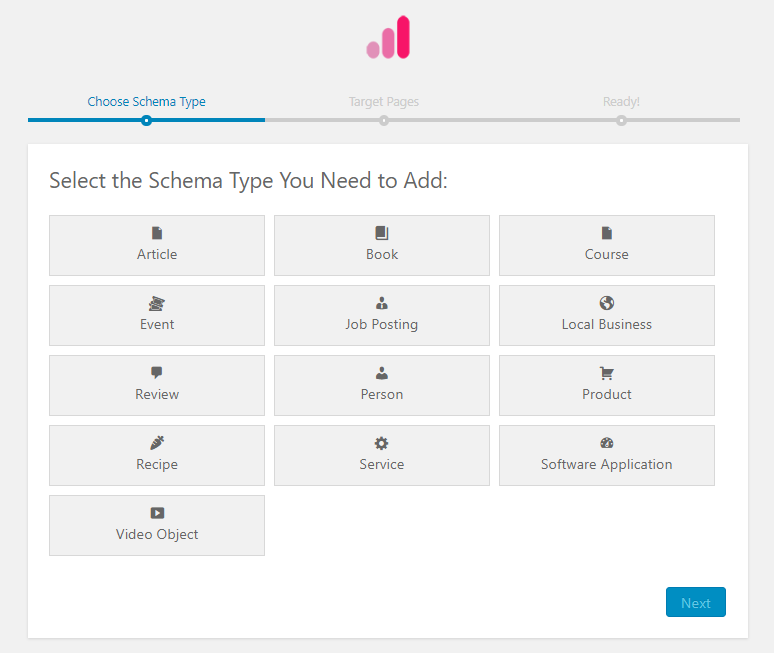
Then, choose which kind of schema markup you’d like to add.
For blog posts, you would select article. Depending on your needs, you may add a number of different schemas throughout your site.
Example: If you’re a local business owner who also writes blog posts, you’d want to add local schema to pages where you describe your services, and article schema to all your blog posts.
To keep things simple, I will guide show you how to add schema markup for blog posts.

Select Article, then click the Next button. On the next page, you can specify where you want this markup to be added.
Schema Pro makes it easy to fine tune where certain types of markup are applied. You can simply choose all pages, posts, etc. or use enable and exclusion rules to target specific pages or posts.
Since we’re adding structured data to posts, it probably makes sense to choose All Posts from the dropdown menu.

Click the Next button, and you’ll be taken to another page, where you’ll select Complete Setup.
Now, you’ll see a screen with a bunch of dropdown menus. Here, you can map out all the structured data fields to be used in your posts.
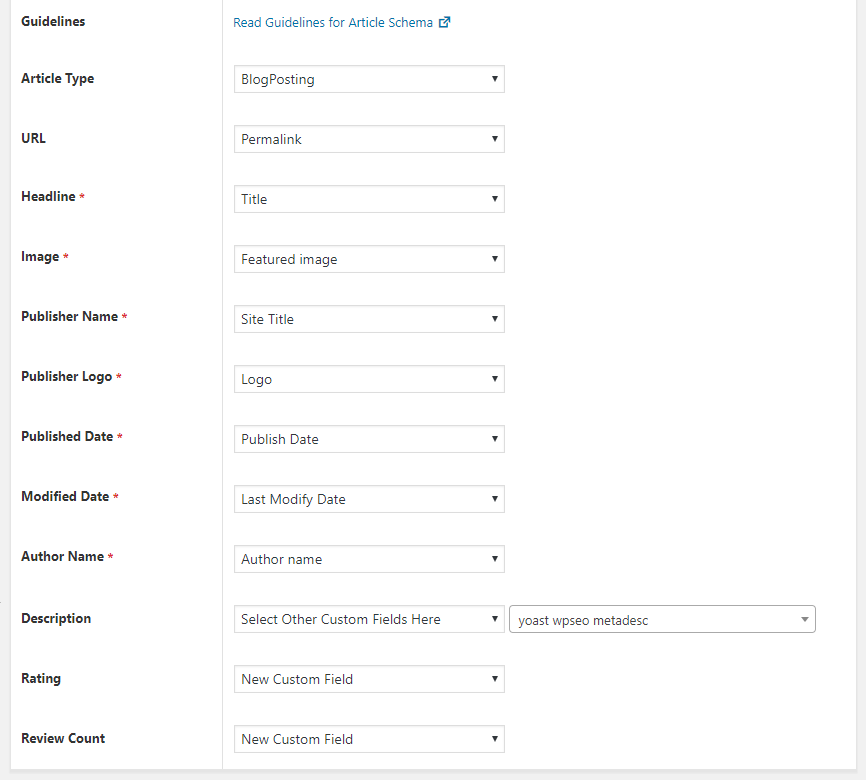
In Article schema, you have the following fields to configure:
- Article Type – Choose from General, NewsArticle or BlogPosting.
- URL – For this, you’ll want to select Permalink.
- Headline – Here you can choose Title. If you use Yoast SEO and have a different SEO title set, you can pick Select Other Custom Fields Here and use the yoast wpseo title.
- Image – Select Featured Image or manually add an image if you create special square images for schema markup.
- Publisher Name – Site Title is a good choice for this field.
- Publisher Logo – Select Logo from the dropdown.
- Publish Date – Choose Publish Date for this field.
- Modified Date – Select the Modified Date in this area.
- Author Name – Pick Author name from this dropdown.
- Description – Here, you can choose between Content to grab an excerpt from the beginning of your post. If you’re using Yoast SEO, you can click Select Other Custom Fields Here and then yoast wpseo metadesc. This will use the meta description you’ve configured for each post.
- Rating – Choose New Custom Field and then you can enter this on individual posts if you’d like.
- Review Count – Select New Custom Field and configure this on individual posts.
You’ll want to configure all items with an asterisk as they are required to give your site the best chance to show rich snippets in search results.
Repeat the process above for all types of schema that you wish to add to your site. Once you get used to it, Schema Pro is the easiest and most flexible way to quickly add structured data to your site.
Adding schema markup with All In One Schema Rich Snippets (free)

If you don’t want to spend money adding schema markup to your site, you can use the free All In One Schema Rich Snippets plugin instead. With this option, you’ll need to add structured data to each post and page individually within the WordPress editor. It will display a Configure Rich Snippet box below the main content area, where you can select the relevant schema and configure it.
Since this plugin is free, it is not quite as robust as Schema Pro. You can’t just set it and forget it with All In One Schema Rich Snippets. Every time you create a new page or post, you’ll have to remember to configure schema markup for it.
It’s free though, which is pretty groovy.
At the moment, it supports the following 8 schema markup types:
- Review
- Event
- People
- Product
- Recipe
- Software Application
- Video
- Articles
To get started, go to Plugins > Add New in your WordPress dashboard. Search for, install and activate All In One Schema Rich Snippets.
Next, click on Rich Snippets in the left-hand sidebar to go to the plugin settings page, where you’ll see a few different tabs.
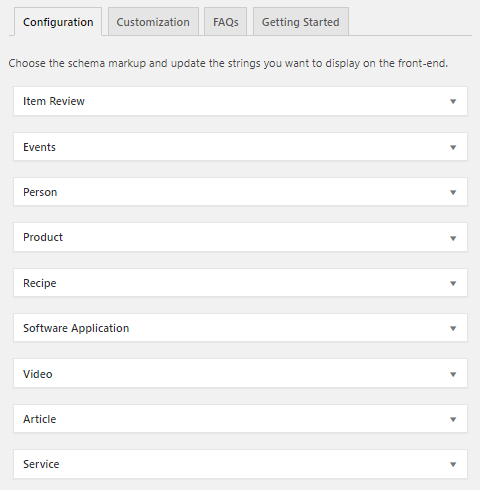
Configuration – You don’t need to adjust anything in this tab, but you can if you want. This simply determines the labels that will be used in your snippet boxes.
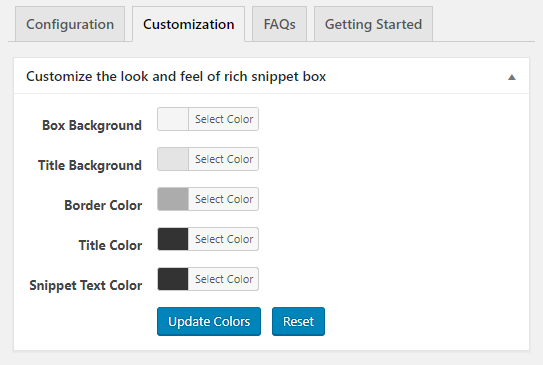
Customization – In this area, you can change the color of the rich snippet box which will show up at the bottom of pages and posts where you’ve added schema markup (see example below).

PRO TIP: You can hide the rich snippet box by adding the following CSS in Appearance > Customize > Additional CSS.
#snippet-box {
	display: none;
}
You can disregard the How to Use and FAQs tabs.
Configuring schema markup on pages & posts with All In One Schema Rich Snippets
Like I mentioned above, you’ll be adding structured data within the WordPress editor. You will see a new box near the bottom of the page.
To add schema markup to any pages or posts, simply choose the relevant type from the dropdown and fill in the details.
In the screenshot below, I am using the Event schema.
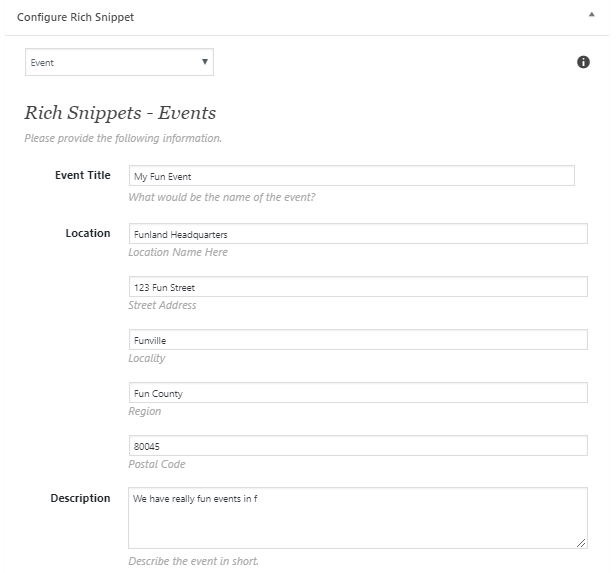
While you don’t have to fill out every field, it’s ideal if you do. Enter as much info as is relevant to your specific event, and hopefully Google will display a rich snippet for your site in search results.
Hopefully? Yes, because even if you add schema markup to your site, it’s up to Google whether they show it or not.
When you publish something, you will see a rich snippet box (that we configured above) at the bottom of the page, which contains that page or post’s schema markup.
Validating your site’s schema markup
You may think that you’re finished once you’ve added all relevant schema markup to your site’s pages and posts… but there’s one last step.
Make sure to validate your website’s schema markup using Google’s Structured Data Testing Tool. Simply go there and enter a URL, then click Run Test. You will see the results and whether there are any warnings or errors.
Conclusion
Which plugin should you choose to add schema markup to your WordPress site?
Schema Pro is the better, more robust plugin, hands-down. It is super-flexible, and you don’t have to configure schema markup for every post and page individually. You can essentially set it and forget it… but take some time to validate a few of your schemas to make sure that they’re error-free.
All In One Rich Snippets is a good free alternative, and will let you add schema markup relatively easily. It doesn’t have as many schema markup types built in, and you’ll have to spend some time going through your site content to add relevant schema where needed.
If you have any questions or comments, feel free to leave them below. I will try my best to help you out and point you in the right direction.
If you found this post helpful, please share it and spread the word!
Want more content like this? Sign up for my newsletter to receive helpful WordPress Tutorials, Tips and Tricks.


Actually, I am working on my website very hard to get sharp results, but so far no improvement, but I have learned a lot from this page, and hope it will help us to grow.
I am working for my client to improve in SERP results and Schema Markup is definitely gonna help me. I would like to ask one thing that these schema markups will help with Open Graph results as well. I Have Just Setup “All In One Schema Rich Snippets” Plugin on my website. But I have a doubt on how to make sure Google is picking up the correct aggregated reviews as in schema markup the reviews are hard coded.
My quick questions are; how to make sure that the reviews are true for local business? How much time does it take to show up rich snippets for my search results? Anyways, thanks for sharing schema Markup will definitely help my business.
Hi Prisha, thanks for your question. In order to add accurate reviews for a local business, you should gather reviews from any places where you have them online and add them up, then divide by the number of reviews. This will give you an average. As far as Google showing rich snippets for your results, that’s up to Google. Just because you add schema markup to your site doesn’t mean that Google will show rich snippets your search results.