If you have a website, it’s super important that you back it up on a regular basis. In this post, I’ll show you how to install and configure BackWPup to create free backups of your WordPress site, and sync them with DropBox.
Making a website backup is one of the best ways to protect your WordPress site from a number of unfortunate events that could happen, including:
- your website being hacked.
- user error, inadvertently messing something up and breaking your site.
- a web server malfunction which results in the loss of site data.
Make sure that you are protected, and back up your site on a regular basis. Take a moment, and think about how you’d feel if you lost all of your website content and had no way of retrieving it. It would really suck, right?
While there are countless premium plugins you can use to backup your site, there are also some free options.
I use BackWPup on all of my sites, and it works really well. You can use it to create both partial and complete site backups, and even automate it to run at specified intervals (daily, weekly, monthly, etc).
I run automated backups of all my sites every week, and keep the most recent 3 backups for each site in a folder on my DropBox account. BackWPup is great because you can essentially set it and forget it.
If you’re looking for quality shared hosting for your WordPress website, we highly recommend A2 Hosting. They offer unlimited SSD space, free automatic site backups, hosting optimized for speed and 24/7/365 guru technical support.
If you prefer visual tutorials, check out the video below for basic BackWPup setup instructions:
Before we begin, you will need to install and activate the BackWPup plugin. Once you activate the plugin, you will see a welcome page and new item at the bottom of the left sidebar in the WordPress dashboard.
If you have any questions, leave a comment and I’ll try to help you out.
Full website backup
To create a new backup job, click on Add New Job in the expanded BackWPup left sidebar menu.

Then, on the next screen, select Add new.
On the General tab under Job Name, call the backup whatever you’d like. Your site name is the most logical choice, but you can choose anything. This name will only be for identification purposes, nothing else.
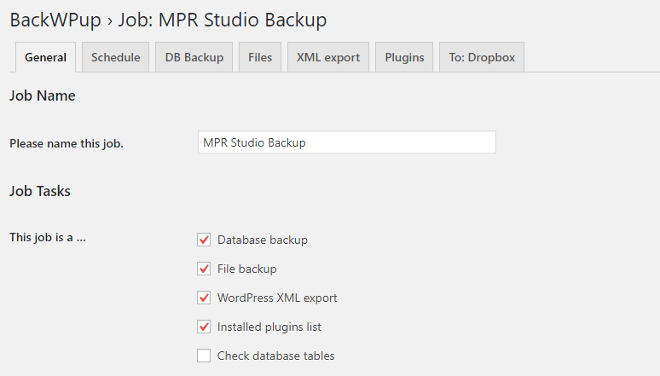
In the Job Tasks area choose which items you’d like the software to backup. You can choose any (or all) of the following:
- Database backup – this backs up your MySQL database, where your site’s users, posts, pages, products, orders and other important information can be found. Make sure this is selected as it is crucial.
- File backup – backs up all your WordPress files, themes, plugins and uploaded media items.
- WordPress XML export – selecting this will export certain info from your database to an XML file, making it easy to transfer posts and pages to another WordPress installation. This is much simpler than retrieving posts and pages from your MySQL database, especially for beginners.
- Installed plugins list – this simply creates a list of your plugins and saves a text file for reference. If you are backing up your database and files, you don’t really need this option selected. On the other hand, text files are tiny so it won’t have much of an effect on the size of your backup.
- Check database tables – with this selected, BackWPup checks for corrupt data in your MySQL database during the backup process. If it finds any problems, it attempts to repair them, depending on the options you have set in the Database Check tab.
Selecting everything except Check database tables is sufficient for your site backup.
Under Archive Name in the Backup File Creation area, you can leave the default file naming structure.
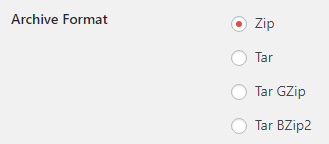
Below that, you will see Archive Format. The default selection is Zip, but you can choose other types if you’d like to use a different compression method.
After you choose which kind of archive file you want, go to the Job Destination section. Here, you will choose where you want to store your backups.
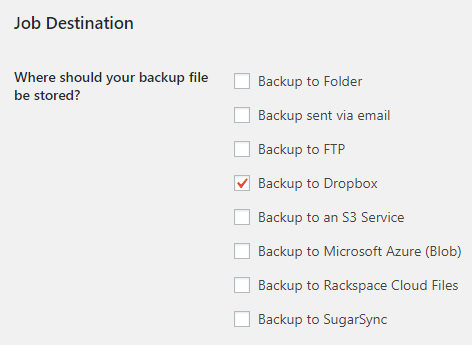
Choose one or more of the following:
- Backup to Folder
- Backup sent via email
- Backup to FTP
- Backup to Dropbox
- Backup to an S3 Service
- Backup to Microsoft Azure (Blob)
- Backup to Rackspace Cloud Files
- Backup to SugarSync
I use and highly recommend DropBox. You can sign up for a free account with a 2 Gb limit, which should be more than enough space for your site backups (I recommend keeping the 3 most recent backups to save space).
In the above options, Backup to folder refers to a folder on your FTP server, not your computer. It’s a terrible idea to backup your website to the same place where you have WordPress installed, so DON’T DO IT.
Just use DropBox, it’s easy to set up and totally free.
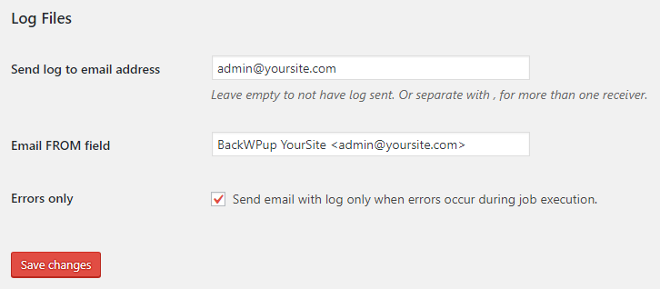
Last but not least in the General tab, you’ll see the Log Files section with the following fields:
- Send log to email address
- Email FROM field
By default, both of these fields will use the admin email address you entered in the General Settings of your WordPress dashboard. Leave the default in the Email FROM field, but feel free to change the Send log to email address field if you’d like the log files sent to a different address.
I suggest checking the Errors only box at the bottom, so you only receive emails if something goes wrong with your backup.
Schedule your backups
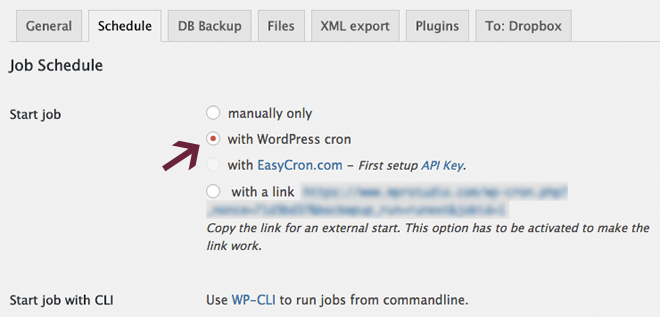
Under the Schedule tab, you can specify how often you want to backup your site. The easiest way to automate site backups is to choose the with WordPress Cron option.
I set my sites to backup weekly, and that works for me. They are scheduled to run at 4:00 am, which is ideal because I am never working on my site at that time. Choose a time in the middle of the night when you aren’t doing anything to your site.
If you add content on a daily basis, you may want to back your site up more frequently. Alternatively, you can perform a daily Database backup and a weekly backup of your entire site.
If you’d rather not schedule automatic backups, you can backup your site manually as well. When you manually run a backup, you can see the progress of the job, and make sure everything is going smoothly.
BackWPup creates a working log file, which can come in handy if the backup fails – it will display the reason for failure. If the backup is taking forever, there is likely a problem and you can abort the job.
Pro Tip: It’s a good idea to run a manual backup before you schedule automatic ones. This way, you can be sure that the backup jobs are working properly.
After you choose your backup frequency, you can then select which items you want to backup.
Backup your database
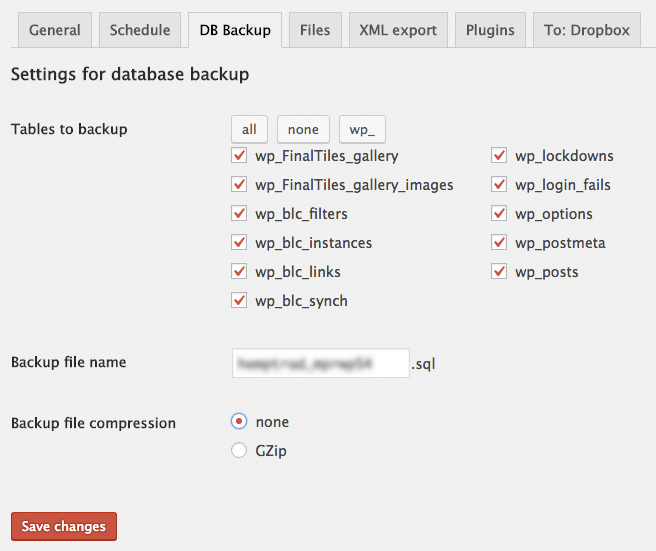
Go to the DB Backup tab and choose which database tables you want to backup.
Some WordPress plugins create their own tables in your database, some of which are probably unnecessary. If you know what you’re doing, feel free to uncheck them. Leave them all selected if you’re not sure what you’re doing.
You can just leave the Backup file name alone as it defaults to the name of your MySQL database.
At the bottom, you can choose to compress the backup file if you’d like (I don’t).
File backup
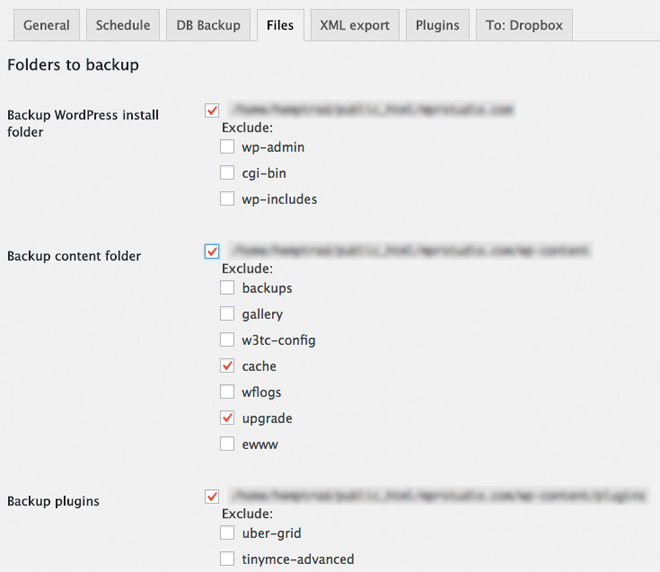
In the Files tab, you have the option to select which directories you want to include in your site backup. BackWPup will backup your WordPress install folder, content, plugins, themes and uploads by default.
You don’t need to backup core WordPress files because in the event of serious website problems, you can simply reinstall WordPress. If your site is hacked, you’d want to use a fresh copy anyway. You should, however, backup your uploads folder in wp-content.
You can also deselect the Backup root folder option and any others inside wp-content that you don’t need. Plugins create their own folders where they store plugin data (configuration, etc.). You can backup these folders if you’d like, but don’t necessarily have to. In the event of a website malfunction, you can simply reinstall and re-configure these plugins.
If you have themes installed that you are not using, you can deselect them as well.
When you select folders to backup, you’ll have the option to exclude certain folders within those directories.
At the very bottom of the Files tab page, you will see a Special options section. Here, you want the Include special files option to be checked.
It will ensure that the following files are backed up: wp-config.php, robots.txt, nginx.conf, .htaccess, .htpasswd, favicon.ico, and Web.config from root if it is not included in backup.
Pro Tip: To be on the safe side, you can just stick with BackWPup’s default settings in this tab (and the others as well). It’s better to backup too many items than to not have something you need in order to easily restore your site.
XML export
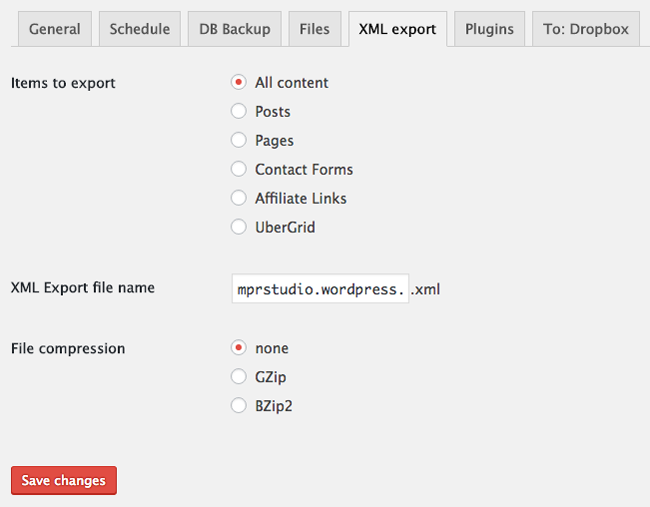
Next, go to the XML export tab. BackWPup’s default settings are good, so just leave everything as is.
While it’s not necessary to backup an XML file of all your site’s posts, pages, contact forms and other miscellaneous items, it’s easier to restore everything from an XML file than to dig around in your MySQL database.
Plugins
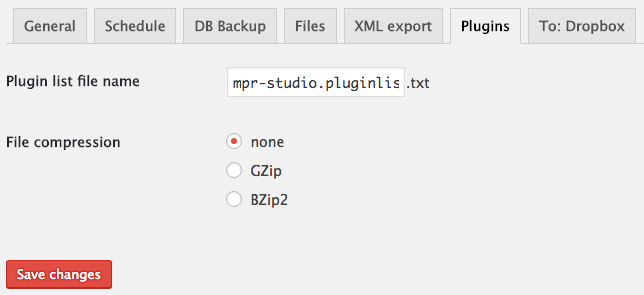
If you followed this guide, then you put a check mark in the box next to Installed plugins list under Job Tasks in the General tab.
You can leave the default settings in the Plugins tab as well. All it does is create a list of plugins and saves them in a text file.
Syncing your backup to DropBox
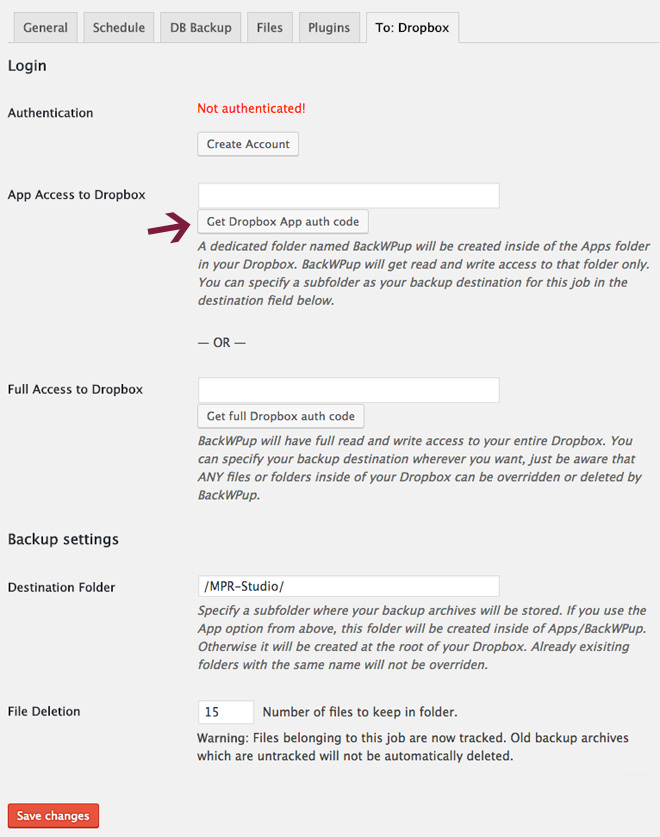
If you chose DropBox as your backup location, you will see a tab called To: DropBox.
Sign up for a DropBox account if you don’t already have one.
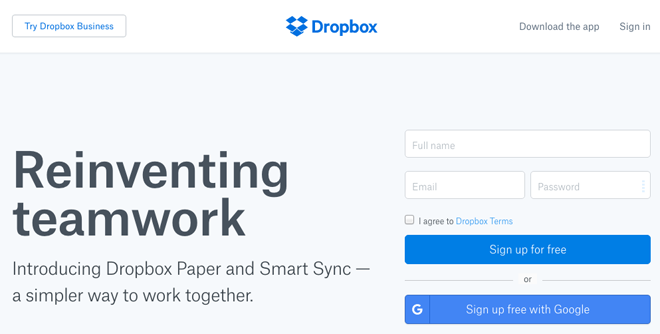
Simply enter your full name, email and password. Check the box letting ’em know you agree to their terms and click Sign up for free. Alternatively, you may sign up with your Google account.
You must grant BackWPup access to a folder in your Dropbox account in order to properly sync the backups. To do this, simply click on App Access or Full Access.
I suggest choosing App Access because BackWPup doesn’t need access to your entire DropBox account, but only to one folder where it stores the backups.
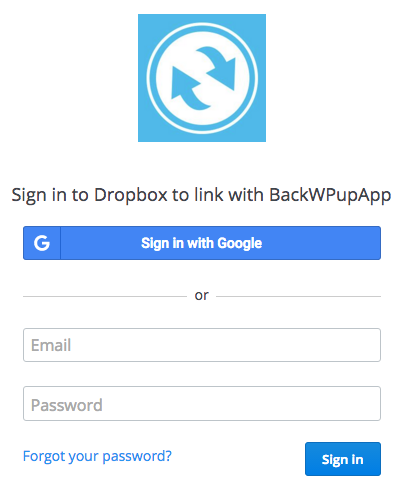
It will open a new tab and take you to the Dropbox website. Enter your email address and password to login to your Dropbox account.
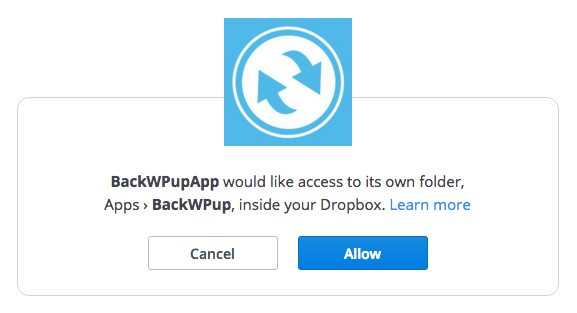
Once you login, Dropbox will ask whether you grant BackWPup permission to access your account. Click the Allow button.
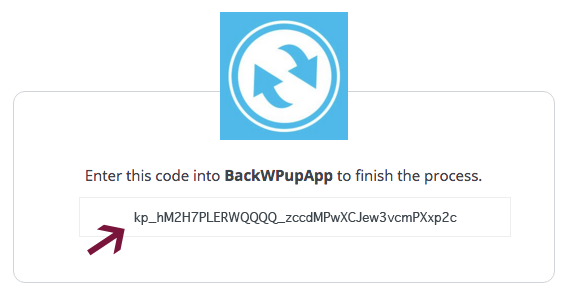
You will then be taken to a screen with a long authorization code. Copy the code.
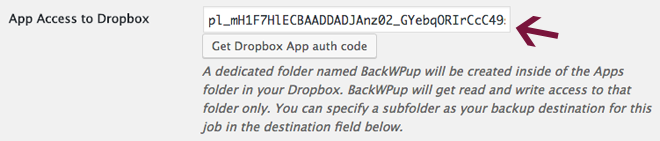
Paste the code in the box to the right of App Access to Dropbox and click Save Changes at the bottom of the tab.

If you have followed the steps above, your account is now authenticated. Your backups will be safely stored in a folder on your Dropbox account.
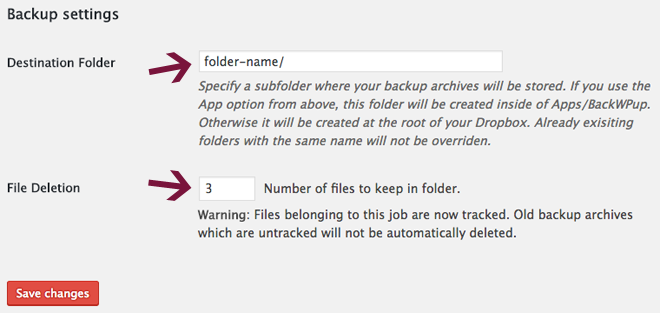
In the Backup settings area of the To: Dropbox tab, you can set your Destination Folder and specify the number of backup files to keep in your Dropbox folder (under File Deletion).
The default number is 15, but this is overkill in my opinion.
I run a weekly backup of my site, so I set the number to 3. This means that the 3 most recent backups are kept and older ones are deleted. Keeping only the past few backups helps you save space on your Dropbox.
Partial site backup
If you add content to your site daily or even a few times per week, then I suggest you perform a partial site backup on a daily basis.
You don’t need to backup your entire site every single day, but only its MySQL database (which contains your site’s pages, posts, comments, etc.). You can backup your entire site once per week, and perform partial backups every single day.
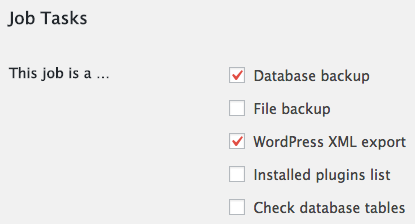
To do this, simply create a separate job for your database backup. Instead of selecting all the items except Check database tables like you did for the complete site backup, only select Database backup and WordPress XML export. Then click the Save changes button.
If you know your way around a MySQL database, you can skip the WordPress XML file export. It just makes it easier to import all your site’s pages, posts and comments in case you need to restore your website.
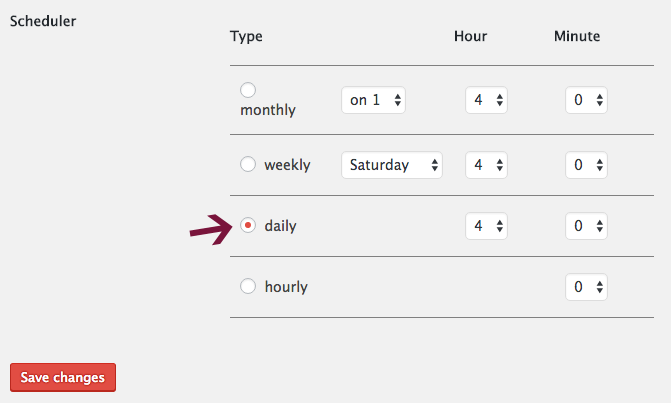
In the Schedule tab choose daily in the Scheduler area, and set the time for early in the morning (or any time when you’re not working on your site). Then, click Save changes.
In the DB Backup tab, make sure all the tables are selected and click on Save Changes.
Error messages and troubleshooting
Backup jobs don’t always run smoothly, and there’s a chance you may run into problems. Below, I’ll go over a few common problems and provide possible solutions for them.
Job has started, but not responded for 10 seconds
BackWPup checks to see if each backup job was started within the last 10 seconds.
If the job is unresponsive, you will see the following error message:
Job “name of your backup job” has started, but not responded for 10 seconds.
If you get this error, go to BackWPup > Settings > Information. Copy the text next to Server self connect and contact support.
- If you’re using the free version of the plugin, request help on WordPress.org’s support forum.
- With the premium version, you can use BackWPup’s dedicated support.
If you see any of the following error messages, it’s likely that your web host is blocking access to the wp-cron.php file:
- Not expected HTTP response
- WP Http Error
- Failure when receiving data from the peer
Contact your hosting provider and see if they can provide you with technical assistance. You can also try a workaround and add an alternate Cron command by adding the following to your wp-config.php file:
define( 'ALTERNATE_WP_CRON', true );
If your site is in maintenance mode, BackWPup will not be able to access WordPress files and folders, and could give the following error codes:
- Not expected HTTP response
- Status-Code: 500
Ensure that your site is not in maintenance mode and see if the errors persist.
Job restarts due to inactivity for more than 5 minutes
This error appears when BackWPup sees that your backup job status hasn’t changed in 5+ minutes. Usually, this happens when the monitoring process stops the backup script when it is taking too long or using too many resources.
In most cases, this error can be fixed by adjusting the Maximum script execution time under Settings > Jobs. 25 seconds seems to work well in the majority of cases, but you may have to test out a few different settings.
File size cannot be retrieved. File might be too large…
If you see the following error, then the backup folder contains a file that is too big to backup:
File size of "filename" cannot be retrieved. File might be too large and will not be added to queue.
If you are running 32 bit PHP, files larger than 200mb can cause the backup to fail. Please upgrade to 64-bit PHP version if possible. Your hosting provider should be able to assist you with this. In most cases, upgrading to 64-bit PHP will take care of this problem.
WARNING: Link not following
If BackWPup has discovered a symlink, it will exclude it from your backup to prevent problems. Including a symlink in your backup would result in an endless loop.
You will receive the following error message if it has found a symlink:
WARNING: Link /folder_1/folder_2/.../folder_n not following,
Symlinks aren’t real directories, but merely references to a directory located somewhere else.
If you receive this error, you can try two things:
- Exclude the directory indicated in the backup manually. You can only do this if the directory is not one that is needed to perform the backup. For example, the log directory is mandatory and couldn’t be excluded. Go to BackWPup > Jobs and select the relevant job. Click on the Files tab and you will see options to exclude certain files. Please note: the Files tab will only be visible if you selected File backup under Job tasks in the General tab.
- You can also include the actual folder in the backup if you need to backup the whole directory. To do this, go to the Files tab and specify the absolute path of the directory to backup under the Extra folders to backup section. Determining the folder is kind of trick, so you may want to contact your hosting provider for assistance.
Backups don’t seem to run as scheduled?
BackWPup uses WordPress Cron to run scheduled backup jobs. If you encounter problems with WordPress Cron, you can select the with EasyCron.com option instead.
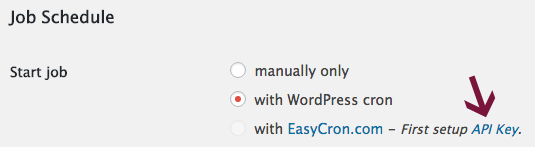
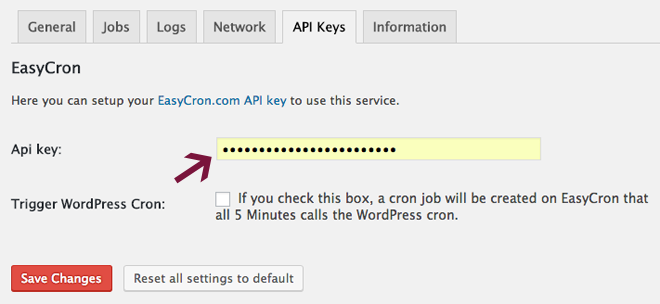
In order to enable EasyCron.com, click on API Key. You will be taken to the API Keys tab in BackWPup’s settings area.
Your API Key will be automatically generated. Don’t forget to click the Save Changes button at the bottom of the tab.
Now, head back to the Schedule tab by clicking Jobs, then Edit under the job name. Make sure with EasyCron.com is selected, then configure the scheduled backups under Schedule execution time. Click Save Changes when you’re done.

Conclusion
BackWPup is an extremely useful plugin to help you easily create both full and partial backups of your WordPress site. These backups can be used to restore your site in the event of a website disaster.
With its wealth of features, the free version of BackWPup is more than enough for the majority of WordPress sites out there. If you need added functionality, you can opt for the paid, premium version which includes differential backup, automatic updates and priority technical support, among other things.
Do you have a question or something to add? Leave a comment below and I’ll respond as soon as possible.
I aim to make my tutorials as thorough as possible, so please let me know how I can improve them.
If you found this post helpful, please share it and spread the word!
Want more like this? Sign up for my newsletter to receive helpful WordPress Tutorials, Tips and Tricks.


I am currently using Updraftplus Backup/Restore plugin. My Hostserver is InMotion.
UpdraftPlus Backup Warning: The scheduler is disabled in your WordPress install, via the DISABLE_WP_CRON setting. No backups can run (even “Backup Now”) unless either you have set up a facility to call the scheduler manually, or until it is enabled. Here is Inmotion link, which I already followed but the issue is still not resolved:
https://www.inmotionhosting.com/support/website/wordpress/disabling-the-wp-cronphp-in-wordpress. Where does the problem lie? in WordPress or In my hosting server InMotion? Before switching to BackWPup, do I need to get the aforesaid fixed first?Thanks for your comment. I know that disabling WordPress cron can affect creating backups, but am not sure if it will in your case. Your best bet is to reach out to InMotion and see what they tell you. Hope that helps!
I reached InMotion support through chat and the support tech wrote, ” I have the define(‘DISABLE_WP_CRON’, ) set to false for you now. This will allow the cron to run.” This has fixed the issue, as a result I no longer of any warning/error message on my Updraftplus Backup/Restore screen.
That’s good to hear. Glad you got it resolved and that you’re able to back up your site now.
I just found out: “Untested with your version of WordPress”
BackWPup – WordPress Backup Plugin
It should still work just fine.
Thanks Marshall, very thorough as Alexander mentioned :)
I love tutorials that leaves no stone unturned!
You’re welcome Paula. I’m glad you found it useful!
Thanks a lot for your really cool and detailled tutorial! We mentioned you on our website for best tutorials and videos of BackWPup in a blog post: https://inpsyde.com/en/backwpup-tutorials-website-backups/?noredirect=en_US
Thank you very much, we really appreciate that! Really great work!
No problem, glad you liked it. Thanks for the awesome plugin, it’s super helpful!