If you’re a blogger, then you probably already know how important it is to add relevant, quality images to your posts. Photos, illustrations and other imagery help make your content more appealing and break up blocks of text nicely. You should always use at least one image per post, and multiple images if your posts are long.
Not only do images make your content more enjoyable to read, they can also help you with on-page SEO. In this post, you will learn how to make sure that all images you use on your site are optimized in regards to file name, size, alternative text (super important!), topic relevance, placement and more.
If you’re looking for quality shared hosting for your WordPress website, we highly recommend A2 Hosting. They offer unlimited SSD space, free automatic site backups, hosting optimized for speed and 24/7/365 guru technical support.
If you prefer video tutorials, check out the one below by Bjorn of WPLearningLab.
In this comprehensive, step-by-step tutorial, you will learn everything you need to know in order to properly optimize your website images for SEO.
Let’s get started, shall we?
Selecting the right image
Before you start optimizing images, you’ll first need to find the right ones for your post (or page). A good image will have the same subject/s as your blog post, help emphasize your writing and effectively enhance your reader’s experience.
If you’re a decent photographer and have the ability to capture images that are relevant to what you’re writing about, go ahead and shoot your own stuff. If not, simply look online for images that match your written content.
There are many websites with free stock photos that you can use, including the following:
- flickr (extensive creative commons collection)
- pexels
- pixabay
- unsplash
- stockvault
- FREEIMAGES
- public domain archive
You can also use Google’s Advanced Image Search, and perform various searches to narrow down your results: all these words; this exact word or phrase; any of these words; none of these words. I usually just enter my search term in the all these words box and it seems to work well.
Next, you can further narrow down your results by the following: image size; aspect ratio; colors in an image; type of image; region; site or domain; SafeSearch (you can use this to filter out explicit results); file type (.jpeg, .png, .gif, etc.); and finally usage rights.
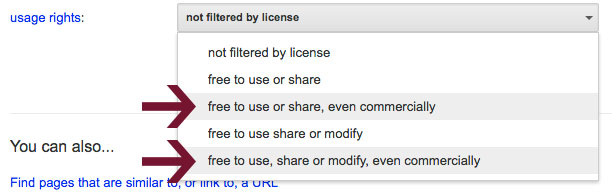
Under usage rights, you want to filter the results by either “free to use or share, even commercially” or “free to use, share or modify, even commercially.”
This is a pretty helpful trick to find quality images you can download, resize and use in your blog posts.
With some search terms, you may not be able to find images that you can freely reuse commercially. It really depends what you’re looking for.
Please Note: Before you reuse content found through Google’s Advanced Image Search on your website, check that its license is legitimate and read the complete terms of reuse. In some cases, the license may require you to give credit (in the form of a link or otherwise) to the original image creator.
Choosing the best file format
When sizing images for web, there are a few different file formats that you can use. I almost always use JPEG or PNG files, but have created a couple animated GIFs in my day as well.
When selecting the most appropriate file format for your images, you should choose the one that keeps the file the smallest. Generally speaking JPEG files are going to be smaller than PNGs, but that’s not always the case.
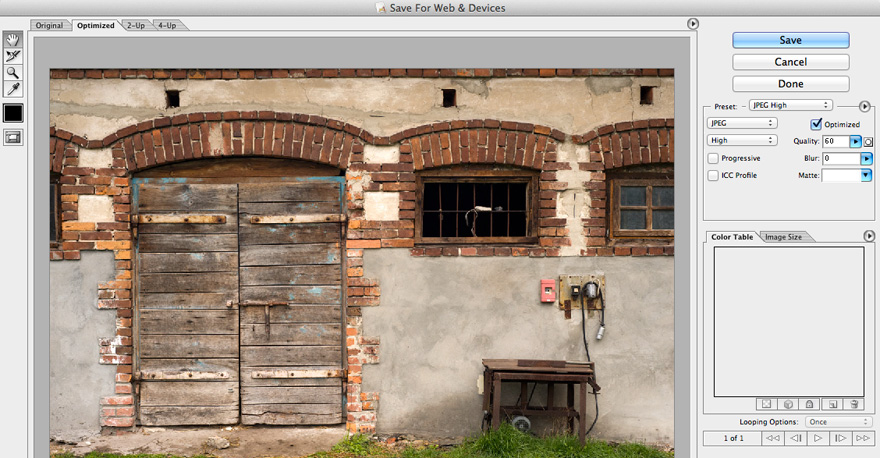
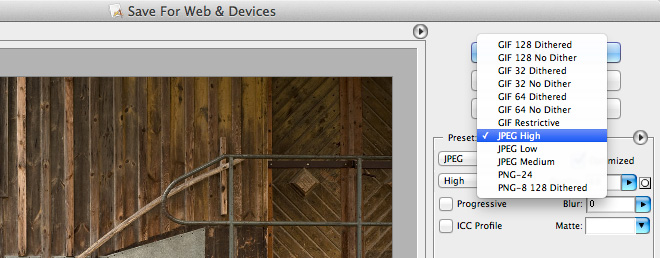
What I Do: Using Adobe Photoshop, I size my image for the content area width of my post or page, then choose Save for Web & Devices. Once in that window, I switch between JPEG-High and PNG-24 and see which one yields the smallest file type. For photos, JPEG is always smaller and should be used. For graphic text or other imagery, PNG is often smaller.
Mixing it up
Try to keep an open mind when looking for website images (and generally in life as well). DON’T just look for photographs, but try and mix it up a little bit by using various types of artwork on your site.
Use a nice mixture of the following types of imagery:
- illustrations, paintings and drawings
- charts, graphs and tables
- infographics or other graphics you design yourself
- animated GIFs
- screenshots (these work especially well for tutorial posts)
By varying the kinds of images you use, you make your content more visually appealing and thus more interesting for your visitors (assuming your written content is high-quality).
Using descriptive file names

When you save images to use on your website, you should take care to name them in a descriptive fashion. You want to make sure you use keywords relevant to the image and content you’re writing about.
Keywords should always appear in a natural fashion, whether in file names, alternative text, blog posts or page titles. Don’t ever stuff keywords in any of your content, as it will provide no benefit and may even result in a Google penalty.
If you have an image of a smiling child, it’s much better to name the file smiling-child.jpg than to simply leave the original file name (e.g. _DSC0428.jpg). Make sure that when you name your files you separate words with a dash (name-your-file-like-this.jpg), because that dash is interpreted as a space by Google (and Bing too).
Accurately naming your images is one way to help Google find them more easily. This means better overall visibility for your website in the search engines. All of these optimized images add up to help your website perform better.
Writing captions when needed
You can use captions on images as well, but only if including them provides valuable information for your readers. When people skim through your posts, they tend to look at images and read the captions beneath them. Make sure you use that opportunity to capture their attention by writing catchy, informative captions to accompany your images.
Don’t worry about including captions with every single image you use in your blog posts. Some are meant for illustrative purposes only, and absolutely DO NOT need a caption. With each image you use, think about whether a caption will provide value for your website visitors. If the answer is no, then you don’t need one.
Making sure you use alt text
Alternative text (alt text for short) is an attribute which is added to an HTML image tag. It appears inside an image container and helps describe the image to search engines when it cannot be displayed.
Alt text is also used by screen readers that help those who are visually impaired more easily navigate the internet.
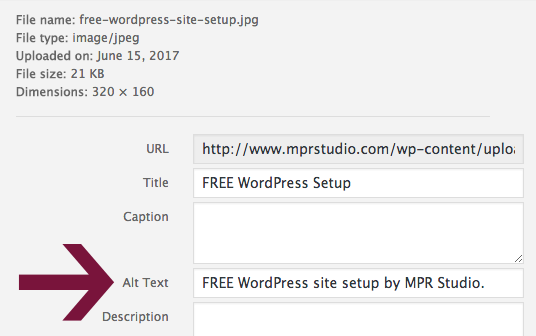
The descriptive alt text (bolded) in the following image link helps identify the picture for search engines (do people really use anything besides Google?)
<img src=”https://www.mprstudio.com/wp-content/uploads/babe-ruth-original-new-sepia.jpg” alt=”Add sepia tone to an image in Adobe Photoshop” />
So, make sure you add descriptive alternative text to the images on your site, and include keywords in a natural fashion.
Paying attention to image placement
When you add images to your post, make sure that you put them near related text content. I make a habit of using multiple subheadings, and place related imagery near all of them. It’s a good way to break up the text, and helps make blog posts easier to read and more visually appealing.
Sizing images correctly
Website speed plays an important role in both SEO and user experience, so it’s imperative that your site is quick for your visitors. Images play a huge role in the speed at which your website loads, so make sure you size them properly.
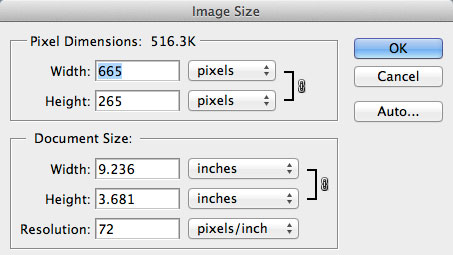
If you upload images that are sized at 4288 x 2848 pixels and display them at 600 x 400 pixels by tweaking the source code, it will seriously slow down your website (and take up a lot of server space unnecessarily). Do your site visitors a favor, and save your images in the correct size for your content area.
Since you’re using WordPress, all images that you upload are responsive by default. This means you should size your image for the content width of your desktop site, and it will be served at smaller sizes for visitors on all devices, including tablets and smartphones. This is great functionality that WordPress introduced in version 4.4 which ensures that unnecessarily large files are not loading on devices with smaller screens.
Here’s what I do
I use Adobe Photoshop to size my images, then choose Save for Web & Devices and select either jpg or png depending on what kind of image it is and which file type is smaller. Then, I use EWWW Image Optimizer to further compress my image files. It is a free plugin that works great and even lets you bulk optimize images.
Compressing your files
After properly formatting your images, you can further reduce file size by compressing them. There are a few different ways to do this, and since you’re using WordPress, you can just use a plugin.
There are a number of different plugins available, including the following:
EWWW Image Optimizer – This is my go-to plugin for compressing image files, and I highly recommend it. Any images you upload to your media library will automatically be optimized, and you can use their bulk optimize tool to compress any files that were uploaded before installing and activating the plugin.
You can choose between varying degrees of both lossless and lossy compression, and even no compression. I don’t know why they’d have a no compression option, but I don’t use it and certainly don’t claim to know everything. Some things are a mystery.
Smush Image Compression and Optimization – WP Smush is available in both free and premium versions. It also automatically compresses all images uploaded to your media library and has a bulk optimization option, which enables you to optimize 50 files at a time with the free version.
The free version of WP Smush uses lossless compression, but if you purchase the pro version, you can use lossy compression (referred to as Super-Smush) which further reduces file sizes with a minimal loss of image quality.
Kraken.io – Through Kraken’s API, you can optimize .png, .jpg and .gif files. In order to setup the plugin, you must first sign up for a free account at kraken.io. Once you register, you’ll receive an API and secret key that you can use across multiple WordPress websites.
Kraken’s default settings ensure your images are compressed using a smart lossy compression technique, which was created to drastically reduce file size without a drastic reduction in image quality. You can manually enable lossless compression in settings.
Compress JPEG & PNG images – Unlike the other plugins already mentioned, this one ONLY offers lossy compression methods. It does not offer too many configuration options in settings, but lets you choose the maximum resolutions for images that you upload and pick exactly which image sizes you want to compress (e.g. thumbnail, large, etc.).
Also, it gives you the option to preserve some metadata associated with the images, including copyright, creation date and GPS location. This is not recommended, as this info adds to the file size and the whole idea behind compressing your images is to make them smaller, not larger (duh).
Why should I compress my website images?
- Your website pages will load faster, making your visitors ecstatic. Quicker website speed can also lead to increased revenue, especially if you’re running an ecommerce store.
- Site backups will take less time due to smaller file sizes.
- You’ll be saving 100s of kilobytes per image, and therefore will use less bandwidth.
Please Note: Lossy image compression methods will help you create smaller files sizes, but you will want to compress a few images to check image quality before you bulk optimize your entire media library. Make sure the image quality is good enough for your needs, and that there are no noticeable flaws in the compressed files.
In addition to the plugins I mentioned above, there are a variety of online image compression tools you can use, including:
Conclusion
As you have learned in this post, optimizing your images for SEO involves a number of steps and things to consider. Take time to properly prepare images on your website and make it easy for the search engines to index them.
To recap, you want to keep the following things in mind:
- Choose the right type of image for your content.
- Select the proper file format (JPEG, PNG or GIF).
- Use a unique mixture of images (photos, illustrations, charts, infographics, etc.).
- Use descriptive file names with keywords and dashes between each word.
- Insert image captions, but only if they add value for the reader. You don’t have to use them all the time.
- Make sure to enter alternative (or alt) text to your images. Explain the image with keywords in a natural way. Never stuff keywords anywhere!
- Keep image placement in mind. In a short post, put the image at the top. If your post is longer, consider putting images near every subheading.
- Size your images for the content width of your posts/pages. Don’t upload giant files, only to display them at a small size.
- Use a plugin or online tool to compress your image files and make them even smaller.
I hope this post has provided you with helpful information which you can use to easily optimize all of the images on your website.
Don’t stop there, make sure you optimize all your website’s posts and pages for SEO as well. Follow this WordPress SEO Checklist to get started.
If you have any questions or comments, please leave them below. I will do my best to help you out.
Do you need help creating a WordPress website? Sign up for your FREE WordPress Setup today.
If you found this post helpful, please share it and spread the word!
Want more like this? Sign up for my newsletter to receive helpful WordPress Tutorials, Tips and Tricks.


Thanks for the normal and simple explanation. I made a few mistakes with my photo content on my site, but with the help of your explanations, I figured out exactly what I needed to do. Thank you!
Glad my tutorial helped you out.
First of all, thanks for the nice tips. I too believe, Alt Tag plays a most important role in SEO things because the search engine cannot read the image but it can read the text which is nothing but Alt Tag.…
Also, everyone should make sure to insert the title into the images by using HTML code for SEO purposes. The images can help site owners to increase traffic and also sales. I have used Picasa for image re-sizing and it has worked out great so far. After image compression, it creates an ability to reduce blog loading speed and I think it’s better for SEO as well.
I have to admit that I do concern myself with the keyword in the image, the image file size, and open graph. These Image SEO tips help me a lot to find images in a better way. I hope this might be useful for my blog.
Great article! you have covered everything about image SEO. Keep up the good work..!!
Thanks Prisha, glad you found it useful.
Does not having a alt tag affects the seo or we do it for user experience i.e when images does not load than readers can read alt tag.
Using alt tags is good for both SEO and user experience. It helps show search engines information about the image, and displays text for users if for some reason the image doesn’t load. It’s recommended to use alt tags for all images on your site, and to describe your images in a natural fashion.
for reducing the size of images – I usually start with a image twice the size of the image I want and then compress it.
Thanks for chiming in. Why do you start with an image which is twice the size of the final image size and compress that?
Actually I try and start with the largest image that is the correct aspect ratio. Compression should be your final step and the tools especially photoshop are really good at making visually pleasing compressed images. Reducing the image size before you edit them or make final compress just results in loss of visual quality.
Appreciate you leaving comments with your image sizing method. Thanks!