Do you have a Wix website that you’re looking to move over to WordPress? This in-depth tutorial will walk you through the entire Wix to WordPress migration process, step-by-step.
A drag-and-drop builder which lets you easily create simple sites, Wix is a popular choice among do-it-yourselfers. It is easy to use and manage, but also quite limited in the functionality it offers. If you find yourself needing extra features for your website, it can become rather costly as well.
If you’re looking for increased flexibility and a wealth of features, self-hosted WordPress is a much better option.
IMPORANT! Migrating your site from one CMS to another IS NOT simply a matter of moving over the content. It is essentially building a brand new website from scratch.
If you’re looking for quality shared hosting for your WordPress website, we highly recommend A2 Hosting. They offer unlimited SSD space, free automatic site backups, hosting optimized for speed and 24/7/365 guru technical support.
Here are a few reasons to make the switch from Wix to WordPress:
- Ownership – When you use the Wix platform, you don’t own your website, hosting, domain name or content (check out the terms and conditions on Wix). With WordPress, you have complete ownership of everything on your website.
- Design Options – Using Wix, you have around 500 HTML templates that contain code which cannot be edited. The Theme Directory at WordPress.org has over 5,000 themes and there are 1000s of premium themes as well.
- Flexibility – Wix provides a very basic cookie cutter platform, which limits your site in many ways. WordPress is open source, and thus allows for endless possibilities. One of the reasons it is so popular is because it can be fully customized to fit your specific needs.
- Search Engine Optimization – While Wix sites can certainly be SEO-friendly if set up correctly, WordPress offers amazing SEO plugins (Yoast SEO) that can really help you truly optimize your site and its content.
- Plugins and Apps – Wix currently offers a couple hundred free and premium applications in their App Market. There are over 35,000 WordPress plugins that can add a wide range of functionality to your site.
- Cost – Wix offers a free version, but the annoying Wix ads will drive you nuts. Their paid plans vary from $10-25 per month based on your needs. With WordPress, you will pay around $10/year for domain name registration and a few dollars per month for hosting (varies, but don’t go with the cheapest host because your site speed will suffer).
If you prefer visual tutorials, you can also check out the video below:
In this post, I’ll show you how to take your existing Wix website and move it to self-hosted WordPress.
Pre-migration steps
Before you migrate your Wix site to WordPress, you’ll need to do a few things. Follow the steps below to make sure you’re totally ready for the move.
Making a list of Wix URLs
If you’re using a premium domain on Wix (without .wix.com in the URL) and your site receives a good amount of traffic, then you should make note of all your page and post URLs.
Simply navigate through your site, copy the URLs for each page and post, then paste them as a list in a text document. This way, you can easily setup redirects after you’ve transferred your site. This will ensure that anyone who visits any of your old Wix URLs will land on the new WordPress equivalent.
If your Wix site doesn’t receive much traffic, then you can totally disregard this step. Instead, focus your energy on building more quality traffic to your new and improved website.
Purchasing hosting
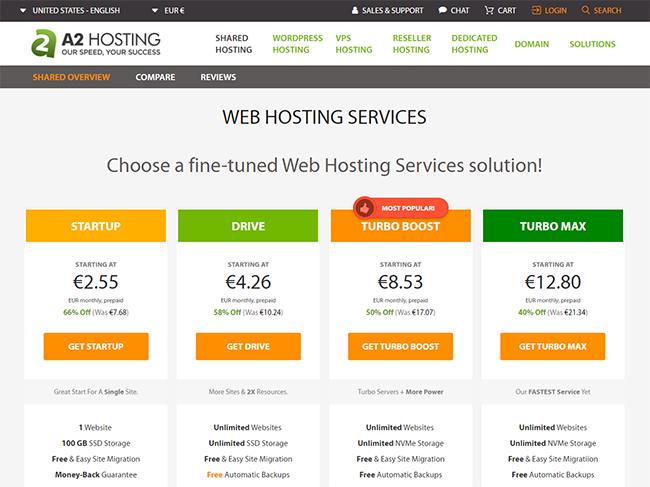
First, you will need to purchase web hosting for your new site. While I’ve never used their services, I have heard good things about A2 hosting when it comes to shared hosting.
UPDATE: While I personally used to use and highly recommend SiteGround’s shared hosting, they’re total garbage now and you should STAY FAR AWAY! Their support has really fallen apart (sometimes they completely disable online chat support), their prices keep going up and they have mysterious CPU overages that cause 500 internal server errors even if you have sufficient server resources.
Setting up a temporary domain

Were you using a premium domain name on Wix (without .wix.com in the URL)? If so, you will likely need to set up a temporary domain in order to move all of your content over. Since your old site is still live, this temporary site will be on a different URL for now. If you’re unsure how to set up a temporary domain, get in touch with your host (after you signup of course) and they’ll help you out.
If you had a free site on Wix (with .wix.com in it), then you don’t need to set up a temporary domain. You will, however, need to register a domain name. Your old free domain was hosted with Wix, and you will need to look for a new one.
Installing WordPress
After you purchase hosting, you’re ready to install WordPress on your site. Most quality hosts offer a 1-click installation option in cPanel, and it’s really easy to use.

Click on the WordPress Installer and you’ll be guided through the setup.

Next, click on Install at the top left.
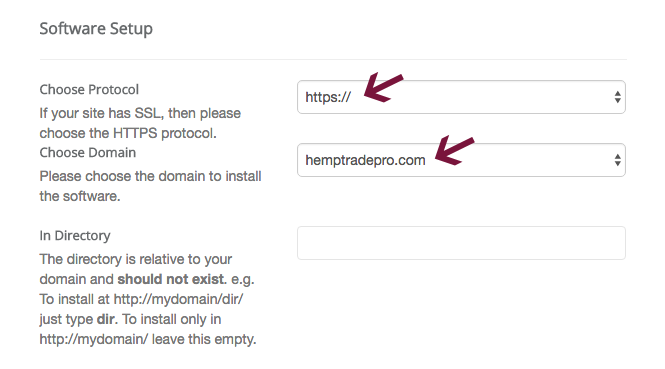
Choose your protocol:
- http://
- http://www.
- https://
- https://www.
I just added SSL to a bunch of my sites, and I highly recommend it. Let’s Encrypt provides free SSL certificates, so there’s no reason not to make your site secure.
Google claims that having SSL installed on your site is a small ranking factor. Basically, if two sites are the same in terms of quality and SEO, the one which uses https:// will outrank the one which doesn’t.
After your choose your protocol, select your domain from the dropdown list.
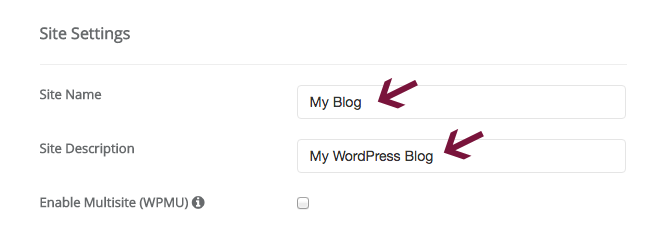
Enter your site name and description under Site Settings. You can always change this stuff later, so don’t worry about it too much.
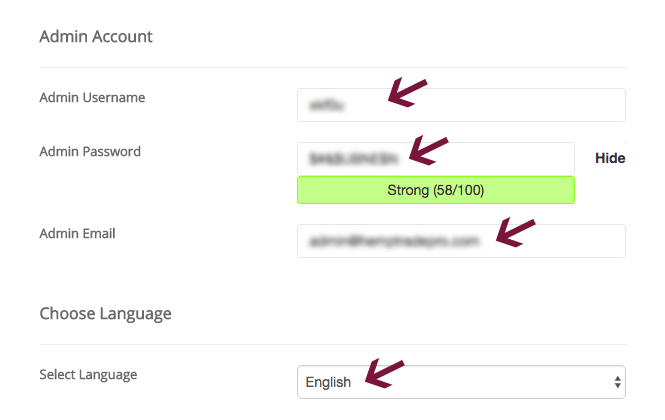
Under Admin Account, enter your Admin Username. For safety purposes, don’t use admin as your username. Softaculous will automatically create a username and password, but feel free to change them if you’d like.
In Admin Email, enter the email address where you’d like to receive notifications.
Choose the language of your installation, and disregard everything else.
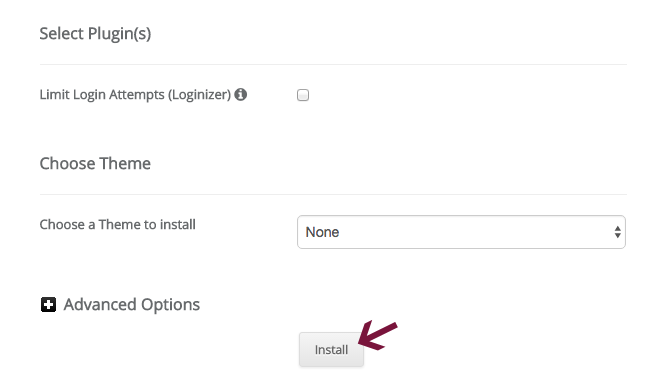
Click the Install button and let the installer do its thing.
If you’d like more detailed instruction on setting up WordPress, check out our comprehensive WordPress setup guide.
Wix to WordPress migration
Now that you’ve taken care of all the preliminary steps, you’re ready to start the Wix to WordPress migration process.
There are a few different methods to move all your content, and you can even use free online tools and plugins to help with the process.
In this post, I’ll go over numerous migration options, including fully manual (copy & paste), semi-automated and full-service, outsourced migration.
Manual migration (copy & paste)

One way to migrate your Wix site to WordPress is to do it manually. Basically, you copy the content on your Wix site, and paste it into WordPress. This method works very well if your site is relatively small, let’s say no more than 20-30 total pages and posts.
If you’re going to convert your site manually, you have a couple options regarding the creation of pages:
- Create the pages that you will need before you start the copy and paste process.
- Make pages one by one as you move all your content over.
You can add all the pages manually by going to + New in the menu or you can speed up the process by using the Bulk Page Creator plugin.
The plugin allows you to create multiple pages at once. Simply enter a comma-separated list with no spaces and it will create all your pages for you.
This plugin will only help you create pages, not blog posts. With posts, you can simply import your Wix XML file.
Copy & paste page content
Now that you have all of your pages created on your new WordPress site, you’re ready to move your content over.
Moving text
We’ll start with moving the text. To do this, you simply need to copy the text from each page of your Wix site and paste it into your WordPress site’s equivalent page.

When pasting text into WordPress, make sure you’re in the Text editor, not the Visual editor. If you paste text into the Visual editor, it can add all kinds of weird formatting.
Moving images and other media
You have a couple options when it comes to moving your images from Wix to WordPress.

Importing images manually
You can manually save all images on your computer and upload them to your Media Library in WordPress.
It will be easiest to move all your copy and images from pages at the same time.
You can follow this simple process for each page:
- Copy and paste the text from old Wix page to new WordPress page.
- Save that page’s image/s to your computer – Right-click and Save Image As or drag the image to a folder on your computer.
- Upload the image to your WordPress Media Library.
- Insert the image in the proper page.
With posts, you can go through them and save all the images in a folder. After you import your XML file, you can add images to each post.
It’s important that you optimize your images for the web. If you need to resize them before you upload them to WordPress, go ahead and do that.
Importing images with a plugin

If you’d rather not download all of your images individually, you can try using the Import External Images plugin instead.
It works by examining the HTML source code of any post or page, and finding any img tags. It then grabs these images and automatically uploads them to your new WordPress site.
- First, install and activate the plugin.
- Then, go to Media > Import Images. If you’d like to exclude some domains from being crawled for HTML img tags, enter them.
- Click on Save and you’re done.
While this plugin has not been updated in over 3 years, you can give it a try if you have a bunch of images to move over.
With smaller sites, it’s probably easiest to just move your media over manually for each page and post as you go along.
Word of advice: While the manual method may take more time, it gives you the ability to inspect all the media items and make sure they’re sized appropriately for your new site.
Import XML file for posts
With WordPress, you’re able to import a wide array of content from other platforms. Wix – and the majority of other web platforms – provides an RSS feed which you can use to easily import your blog’s posts.
To import your XML file into WordPress, do the following:

First, you will need to save your Wix RSS feed on your computer as an XML file. In order to view your RSS feed, simply click the RSS button on your Wix website. Your feed will open as an XML file in your browser. From here, simply go to File > Save Page As > choose a file name and change the file ending from .txt to .xml. You can simply call it feed.xml and save it on your desktop to keep things simple.

Now, you need to import that XML file into WordPress. Go to Tools > Import in the WordPress dashboard. In this table, click Install Now under RSS and let it do its thing.

After the installation is complete, click on Run Importer.
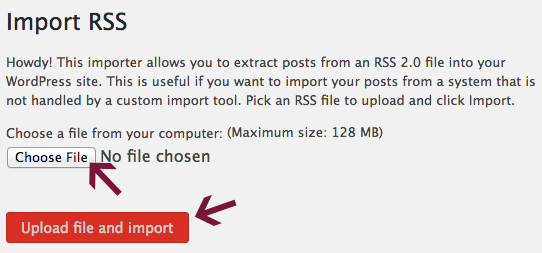
On the next screen, select Choose File and locate the Wix XML file on your computer.
Finally, click Upload file and import.
This should properly import all your WordPress posts, but sometimes you’ll need to clean things up a bit.
You should check to make sure all of your posts have been imported properly under Posts > All Posts in your WordPress dashboard sidebar.
Occasionally, your entire feed may not import properly on the first try. If this happens, simply edit your XML file and remove the posts that were successfully imported.
Then upload the file and import it again.
Semi-automated conversion
If you’d rather not use the manual migration method, you can use a semi-automated online service or pay someone to perform the migration for you.
CMS2CMS is perhaps the most well-known online migration service, and they offer both free do-it-yourself and paid full service migration options. They perform migrations between most major content management systems.
Do-it-yourself CMS2CMS migration

Before you attempt to migrate your site in its entirety with CMS2CMS, give the demo a try. It will give you a good idea what to expect when you run the complete migration.
IMPORTANT: The demo migration will ONLY move up to 10 pages of your site content, which may work for small sites. If you want to move more content, you’ll have to pay for it.
First, you will need to create an account or login with your facebook or google account. Then, you’ll enter your website details and run the demo migration.
Enter the source (Wix) and destination (WordPress) URLs, as well as a bunch of other items, including:
- Migrate media items (images, PDFs, etc.)
- Optimize new URLs for SEO
- Delete target data (erases all current content on WordPress site if you have any).
- Suggested design options
- Redirect URLs (you can do this later with a plugin)
Once you’ve chosen all options that you want, click Start Migration. CMS2CMS’s demo will only move 10 pages of content and related media items. If you are happy with the demo migration, you can proceed to the complete migration, which is NOT free.
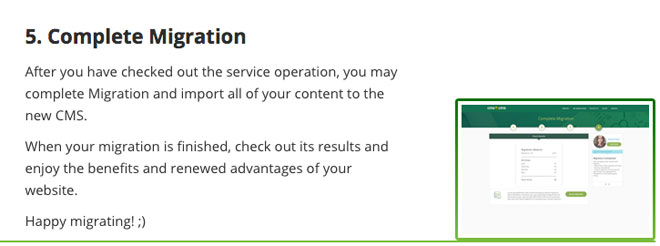
While their do-it-yourself migration doesn’t include any technical support, you can purchase migration insurance which lets you restart the migration within different time periods:
- 7 days for $5
- 14 days for $7
- 30 days for $9
There is always the possibility that something will go awry with the migration, so spend a few bucks on the insurance just in case.
Full-service, outsourced migration

If you’re not comfortable with technical stuff and would rather leave it to professionals, you can hire CMS2CMS to perform the migration for you. Their premium packages start at $299, and you may pay more depending on the size of your website.
Post-migration steps
Now that you have successfully migrated your site from Wix to WordPress, you will need to take care of a few things.
Selecting a theme
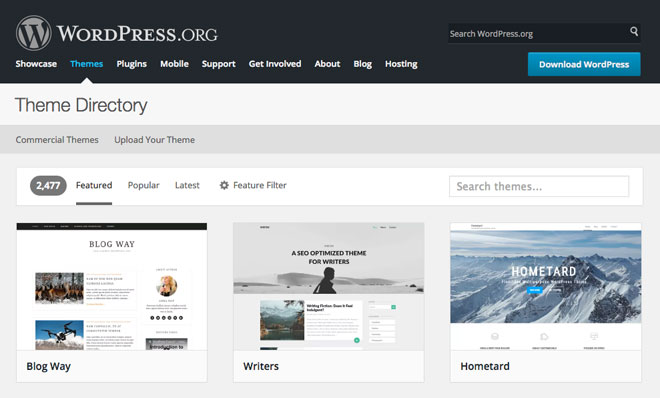
When switching platforms, you need to choose a new theme for your site. Unfortunately, you cannot use the same template you were using with Wix unless you hire a developer to create a custom theme which mimics it. Don’t do this because it’s not worth the money or time.
It’s much easier – and less expensive – to just choose a fresh theme for your shiny new site.
You may have chosen Wix for its simple drag-and-drop website builder.
If this is the case and you’d like to use a site building tool on WordPress, you can choose among the following:
Keep in mind: Many drag-and-drop themes and plugins tend to add bloat (unnecessary code) to your site, which can seriously hurt its performance.
Do a little research before you decide which drag-and-drop theme or plugin you want to use.
The above-mentioned WordPress website builder themes will certainly be different than what you used on Wix, so you will have some learning to do.
Alternatively, you can choose to use a pre-built theme, and adapt your content to it.
There are over 5,000 free themes available in the WordPress Theme Directory, and countless free and premium themes offered on other sites, including:
- Themeforest
- Colorlib
- Elegant Themes (makers of the popular Divi theme)
- themefuse
- Themezilla
Creating your menus
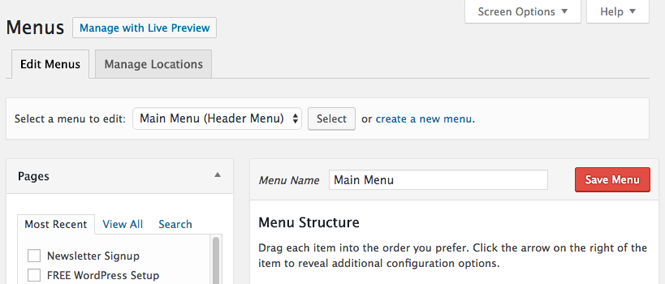
After you migrate all of your content, you’ll need to recreate any navigation menus you were using. It’s important to make sure your visitors can easily navigate through your site by having a well-organized main menu.
WordPress makes it super easy to create a new menu. Simply go to Appearance > Menus, give your menu a name and click Create Menu. Then, you can add whatever pages, custom links, posts and other items you want to it.
After you’ve created your menu, you’ll need to specify where you’d like to display it on your site. Themes may have different names for the Main Menu, including Top Menu or Header Menu.
To add your new menu to the main navigation menu area, go to the Manage Locations tab. Click on the dropdown field to select the name of your menu and hit Save Changes. You can then take a look at your homepage to ensure the menu is working correctly.
Setting up contact forms, widgets and galleries
Any contact forms, widgets or photo galleries that you were using on your Wix site will need to be recreated now that you’ve moved over to WordPress.

Contact Forms – Contact Form 7 is one of the absolute best plugins for creating a variety of forms, and it’s totally free. You can configure an autoresponder for all of your forms, and even connect them to Mailchimp, which is really helpful for newsletter signups and other calls to action. I use Contact Form 7 on all of my sites, and highly recommend it.
Some other contact forms you may consider using:
Widgets – Widgets are content blocks on your site and can often be found in your website’s sidebar and footer, among other places. Different themes have widget areas in various places and they can easily be added and removed under Appearance > Widgets. Some themes also let you adjust widgets in the Customize area.

There are numerous widgets you can add to your site, including the following:
- Archives – shows a monthly archive of your site’s Posts.
- Audio – adds an audio player.
- Calendar – displays your site’s Posts visually in a calendar.
- Categories – a list or dropdown of categories.
- Contact Details & Maps – shows contact details and a map.
- Content – displays text and/or images in a flexible grid.
- Custom HTML – adds HTML code.
- Custom Menu – adds a custom menu.
- Image – shows an image.
- Meta – displays Login, RSS and WordPress.org links.
- Pages – shows a list of your website’s Pages.
- Posts – displays your site Posts in a flexible grid.
- Recent Comments – shows recent comments on your site.
- Recent Posts – shows a list of your most recent Posts.
- RSS – displays entries from an RSS or Atom feed.
- Search – a website search form.
- Tag Cloud – displays your most used tags.
- Text – used to display text or HTML.
- Video – displays a video from your media library or a video hosting site (e.g. YouTube, Vimeo, etc.).
In addition, there are custom widgets that are theme-specific. Once you activate your desired theme, think about what kind of functionality you need on your site. Then, you can add widgets that match your site’s specific needs.
Galleries – If you were using photo galleries on your Wix site, you’ll need to recreate those now that you’ve moved.
WordPress supports galleries natively, but it doesn’t work very well and you’re better off using something else.
Some themes have really nice galleries built-in, but many do not. Depending on which theme you choose, you may or may not have the ability to natively build nice-looking galleries with it.
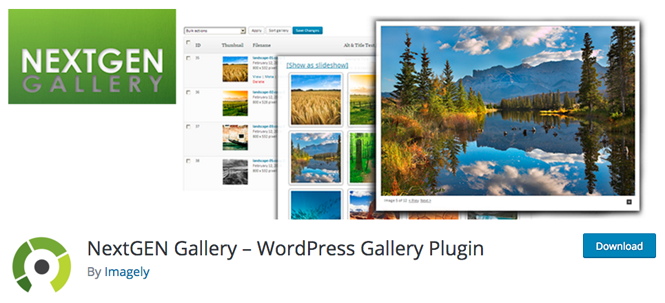
There are a number of awesome free gallery plugins, including the following:
I use NextGEN Gallery, and highly recommend it. It’s been around since 2007 and has over 15 million downloads.
Don’t forget to optimize your images before uploading them and using them in a gallery.
Installing essential plugins
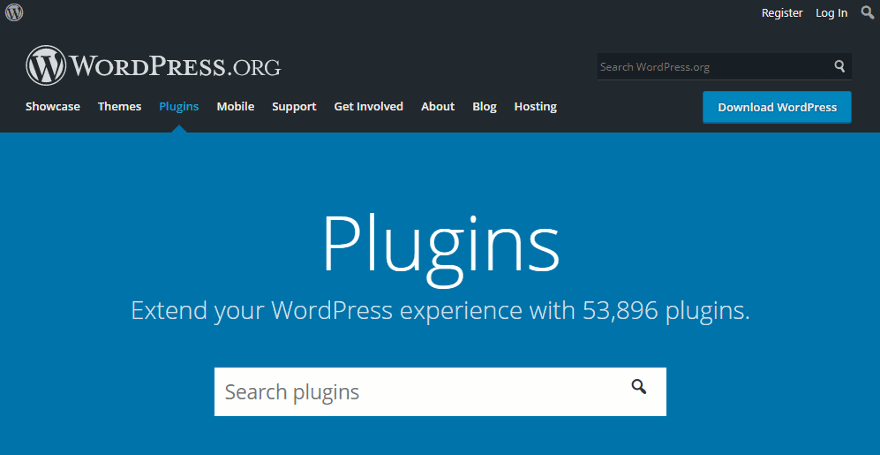
One of the things that makes WordPress such an amazing CMS is the variety of amazing plugins you can use, including those for security, SEO, site speed and much more.
To get started, you should install the following must-have FREE plugins:
- Yoast SEO – Helps you optimize your website’s on-page SEO.
- Wordfence – Effectively protects your site against malicious activity.
- BackWPup – Useful backup plugin with which you can schedule automatic partial and complete site backups.
- W3 Total Cache – Caching plugin which speeds up your site a great deal.
If you’d like to learn more about these essential plugins and their features, check out this post.
There are so many plugins to choose from, it can be hard to decide which ones you should use. Generally, it’s not a good idea to go crazy and install a whole bunch of them, but rather install only those which you really need.
When choosing a plugin, it’s important to check when it was last updated and read some reviews about it.
Updating your permalinks

When setting up how URLs are displayed on your new WordPress site, make sure that you use short, concise permalinks. You want to create your new WordPress site with best practices in mind, and that includes how your site URLs are structured.
If your Wix site used a simple permalink structure, you can use the exact same structure on WordPress. Go to Permalink Settings and select Post name, then click on Save Changes. If your URLs were long and not optimized, I recommend radically changing things.
Did your old site get a good amount of traffic? I’m certain you were tracking it with Google Analytics or some other tracking software, right?
In the event that your old site was receiving a decent amount of traffic, you can redirect your old URLs to the newly-optimized ones. To do this, you’ll use the Redirection plugin. This way, when someone visits one of your old pages or posts, he/she will be redirected to the new page or post equivalent.
If your old site sucked and received very little traffic, you’re better off just forgetting about redirects. Instead, focus on attracting quality visitors to your new WordPress site.
Checking and fixing internal links
After moving your site, you should take a look at all of its internal links. This includes any links to your site’s pages, posts and media items. If you updated your permalink structure, you will inevitably have a few broken internal links. Make sure you go through all posts and pages, and edit any links that need to be corrected.
If you’d rather not go through every page and post hunting for broken links, you can let the Broken Link Checker plugin do it for you. Once installed, it will look for links in all your site’s pages, posts, comments and other content.
If it finds any broken links, the plugin will show them in two places:

In the Broken Link Checker module in your WordPress dashboard
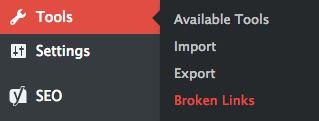
Under Tools > Broken Links.
Broken Link Checker is super helpful – it even lets you update broken links directly through the plugin’s interface instead of navigating to the source to make changes.
I recommend keeping this plugin even after you’ve fixed any broken links. Sometimes outbound links on your site stop working, and it’s good to update or remove them.
Update – I no longer recommend keeping this plugin activated after you use it to find and fix all your broken links. I learned that it can slow down your site a great deal, so should only be activated when you need to find broken links.
A better alternative to keeping this plugin installed and deactivated is to use the Free Broken Link Checker online tool. Simply check your site every so often (once every month or two) and see if any of your outbound links have stopped working.
Transferring your domain
Did you have a premium domain registered on Wix? If so, you can go ahead and transfer it now that you’ve moved your site.
In order to transfer your domain from Wix to a new domain name registrar, follow these simple steps:
- Sign in to your Wix account
- Go to Subscriptions
- Click Domains in the dropdown
- Choose the relevant domain
- Select the Advanced tab
- Choose Transfer away from Wix
- Click Send Code
Wix will email you a code which will authorize the domain transfer to your new registrar.
If you were using a free Wix site (.wix.com in URL), you will need to register a new domain name.
Here are some domain name registrars worth checking out:
*The registrars mentioned above also offer web hosting.
Making sure your site works properly
If your Wix site was very large, it’s likely you used a few plugins to help migrate your site content to WordPress. While plugins are a great time-saver, they don’t always work perfectly.
It’s always a good idea to take a look through your new site to make sure everything is working properly. Double-check all internal links, menu items and media files to make sure there are no problems.
Frequently Asked Questions
Will I need to choose a new design when I move from Wix to self-hosted WordPress?
When should I cancel my Wix hosting account?
Can I keep my domain name registered with Wix and just not host my site there?
Can you recommend free WordPress plugins that I should install right away on my new site?
How about hosting? Which web host should I choose for my WordPress website?
Conclusion
Moving your website from one CMS to another can be frustrating and time consuming, but it’s well worth it. I hope that this guide is a helpful resource for anyone migrating from Wix to WordPress.
Did I miss something? Is there anything you care to add? I tried to make this tutorial as thorough as possible, but please let me know if it could be improved.
If you’re struggling with your site migration, please leave a detailed comment below. While I can’t guarantee to fix your problem, I will try to help or at least point you in the right direction.
If you’re looking to move your site from other platforms to self-hosted WordPress, check out these other migration guides:
- Weebly to WordPress
- Squarespace to WordPress
- Blogger to WordPress
- Joomla to WordPress
- Drupal to WordPress
- WordPress.com to self-hosted WordPress
- Medium to WordPress
- Tumblr to WordPress
If you found this post helpful, please share it and spread the word!
Want more like this? Sign up for my newsletter to receive helpful WordPress Tutorials, Tips and Tricks.



What a great post – thank you! I look after a community group website on a voluntary basis and have recommended they move from Wix to WordPress. I’ve now got the WordPress version of the website ready to go live but have not yet asked the domain name holder to point the domain name at the new site as I am unsure about email implications. Through a premium mailbox subscription on Wix, Google GSuite currently provides the community group’s email address. The new hosting company will provide email addresses for free so I want to move the email address away from GSuite. Do you have any advice about this? I’d prefer not to wait until the Wix mailbox subscription expires in November.
Hi Laura,
You’re welcome. I think your best bet would be to ask the new web host about moving email from Gsuite to their servers.
Hi, I want to enquire, is it okay if I make my new design on WordPress first and then transfer the domain from Wix when the new design is done?
Hi Sukhpreet. Yes, you can set up a temporary URL to install and build your WordPress site. Then, you can move all your content over and transfer it to the proper URL once you’re finished.
Hi,
I think you have missed a big part. I have been struggling to get my full XML file from the RSS feed for ALL OF MY POSTS, however, Wix has limited the number of posts that show up in the RSS feed to only 20 posts! that means my remaining 491 posts are not in the XML file
I really hope you can show me the work around!
Hi Bamdad,
I am not sure why you can’t get your entire XML for all your posts on Wix. Have you tried reaching out to Wix to see if they can help?
Wix’s documentation says then now limit the RSS feed to the last 20 posts. I’m having the same issue. Were you able to solve this? If so, how?
Hi David. That’s unfortunate. I guess I’ll update my tutorial. In that case, you could always manually copy and paste the post content from Wix to your new WordPress site. I will see if I can find any alternate ways to solve it.
When I receive a code from Wix to migrate the domain what is the next step. I’m unable to shift my domain to WordPress
I am pretty sure the code you’re referring to is to move the registration of the domain. You don’t necessarily need to do that to move from Wix to WordPress. As far as not being able to “shift your domain to WordPress”, have you purchased a hosting package yet? You need to get hosting before you install self-hosted WordPress, then proceed with moving your site. Hope that helps!
Big question I think you missed. After building the entire new site and transferring all the content to the “temp” domain. you mention transferring old wix domain to new host…but how do you then point the temp domain and website to the old wix domain?
Hey Kevin,
You don’t necessarily need to move your domain to a new registrar. All you’d need to do is update DNS to point to your new host. Then, you can install a blank copy of WordPress there, and use the All-In-One WP Migration plugin to move your temporary site to the proper URL. Feel free to reach out with any more questions.
Thank you so much for this post, it has been instrumental in migrating my site.
I have one small question for redirects for each blog post.
I’m using a temporary domain on my new WordPress site as I manually migrate everything over from my old Wix site. So how do I set up the redirects? I don’t want to redirect my old blog posts to the new temp domain because I’m eventually going to get rid of that once I finish migration.
Hi Allison,
I’m glad my post has been useful in migrating your site! Regarding setting up redirects, I would simply write down all the old page/post urls (e.g. mywixsite.com/post-that-needs-to-be-redirected.html or whatever), then you can easily set up redirects to your new site once it’s on the proper url.
Hope that helps!
Thank you for providing this information! I do have a question for you though.
I had purchased 1 domain and also 7 mailboxes (Under that domain name) with Wix.
Isnt there a way to transfer the domain, and the mailboxes to a new private hosting service (In my case bluehost) and keep the email flowing? I understand that no matter what our email will temporarily go down but we really cant afford to have it go down for 7 days.
Do you have any advice for me?!
Hi Zach, thanks for your question and sorry for the late response. Since you likely already paid for hosting with Wix for a year, you can leave the domain registered there, but point the DNS to your new host. Once updated, you can re-create the email accounts at your new host and everything should be running smoothly. Hope that helps!
Hi! I had a new site built though wordpress and it has a different domain address than my previous Wix domain. Is there a way to just forward vistors directly to my new domain when they search my old WIX domain? Essentially a redirect?
Thank you!
Hi Kathleen. If you were using a domain with wix.com in it, then unfortunately you CANNOT set up a redirect. Hope that clears things up.
Thank you! This information is great and very detailed but it might be a bit more than I can take on myself. Any recommendations for outsourcing the transfer? my site is https://www.thestagingteam.com
I would like to move over to wordpress but I have a few backlinks and some traffic I dont want to lose so I would love to hire someone that knows how to do it.
My pleasure Rebecca. I would be more than happy to help you move your content and create a new WordPress site, and will ensure that you don’t lose traffic by keeping the same URL structure on your new WordPress site. You can learn more about my WordPress web design under Services in my menu. Hope that helps!
Great ! and really useful ! I have been planning to switch my wix premium to wordpress. This post is just simply invaluable for me. Thanks !
Hi Swagata, I’m glad you found it useful. All the best in 2019!
Thanks Marshall for this awesome post. Really makes things clear and focused. Tell me, once I transfer the domain from Wix- This means my old wix website will not be active right? I would have one wordpress website website that’s published?
Thanks in advance.
Hi Dhivian, thanks for your comment. The answer is yes. Once you transfer your site away from Wix or update your domain’s DNS if registered elsewhere, your URL will point to your new WordPress site, not your old Wix one. Make sure that you cancel any Wix services that you don’t need once finished with the migration. Hope that helps!