Are you looking to set up Google AMP (Accelerated Mobile Pages) on your WordPress website? It’s a great way to improve the speed at which your site loads on mobile devices, and can even give you a boost in search results.
In this post, you will learn how to properly install and configure Google AMP using one of two different plugins – the AMP Plugin by Automattic or AMP for WP.
I will also cover the pros and cons of using AMP, so you can make an informed decision about whether you want to add it to your site or not.
If you’re looking for quality shared hosting for your WordPress website, we highly recommend A2 Hosting. They offer unlimited SSD space, free automatic site backups, hosting optimized for speed and 24/7/365 guru technical support.
For those of you who prefer video tutorials, I’ve included two of them below. One is for setting up the AMP Plugin by Automattic, the other for AMP for WP.
AMP Plugin by Automattic
AMP for WP
What is Google AMP?
Google’s Accelerated Mobile Pages is an open-source initiative which relies on bare minimal HTML and limited Javascript. AMP content is hosted in Google’s AMP cache, which is then served to your visitors instantly when they click on your result in search engines.
The AMP initiative is supported by both Google and Twitter, and the goal of the project is to make web content load faster for mobile users. Accelerated Mobile Pages work properly on every application, browser and web viewer.
Google AMP Benefits
- AMP greatly improves the user experience for mobile visitors with slow internet connections. It makes your content lean and fast, which means your visitors won’t have to wait for your site to load. This should naturally lead to more traffic, provided your content is helpful.
- Google is encouraging usage of AMP by giving them a boost in mobile search results. Adding AMP to your site will help improve your SEO efforts.
- Site content which complies with AMP standards has the chance to appear in the carousel at the top of Google mobile search results, which could greatly improve your site’s exposure.
- Having AMP on your site will reduce the load on your hosting servers, which will help improve website performance.
Drawbacks of Google AMP
- Since AMP uses a limited set of HTML, JavaScript and CSS, you may not be able to easily add certain features and widgets to your content. Adding AMP could prevent you from adding CTAs (calls to action), share buttons and other dynamic scripts. Note: With AMP for WP, there are more options for adding various functionality. I highly recommend checking it out to see how it works with your site.
- The AMP plugin by Automattic only supports Google Analytics. I don’t really think this is a drawback, but some people do. The AMP for WP plugin has more analytics options, including: Segment Analytics, Piwik Analytics, Quantcast Measurement, comScore, Effective Measure, StatCounter, HiStats Analytics, Yandex Metrika and Chartbeat Analytics.
- It can limit opportunities for advertising on your site. While ads are allowed in AMP content, adding them is more difficult than on a ‘normal, non-AMP mobile’ page. Google is working to expand supported ad types, so we’ll see where this goes. Note: The AMP for WP plugin supports a variety of ad formats, and they have a premium extensions to expand ad capabilities further.
- If you decide to install and configure AMP on your site and then change your mind later and remove it, you’ll want to setup 301 redirects back to the non-AMP posts. This is not a big deal, but something to consider before installing AMP.
Option #1: Setting up AMP using the AMP Plugin by Automattic
In order to set up AMP on your WordPress site, you’ll first need to install the AMP plugin. Go to Plugins > Add New and search for AMP. Once you find it, simply install and activate it.
Then, head on over to Appearance > AMP to see what your site looks like on mobile devices using Accelerated Mobile Pages.
Since AMP uses stripped down HTML and CSS, you won’t have much in regards to visual options (at least using this particular AMP plugin). You can change the color of the header background and link color, as well as the header text color. In addition, you can choose a light or dark color scheme.
If your theme supports it, the AMP plugin will also use your site’s icon.
After you configure your settings, make sure to save your changes. At the moment, the AMP for WordPress plugin only supports posts and NOT pages. Note: The AMP for WP plugin mentioned below lets you use AMP for both posts and pages.
To see what a post looks like as an Accelerated Mobile Page, go to it and add /amp/ to the end of the URL like so:
Depending on the content of your site, you may or may not want to use AMP. If adding it drastically changes the functionality and appearance of your blog posts, you may opt to hold off for now.
If a large percentage of your site traffic is mobile, it may be worth sacrificing some visual design and functionality for improved user experience.
Think about it and decide what works best for you. It is really easy to install and activate AMP, then see what your posts look like. If you don’t like it, simply deactivate and uninstall it.
Adding Glue for Yoast SEO & AMP

By default, Automattic’s AMP plugin uses metadata which may not be ideal. Yoast built a helpful plugin that lets you adjust this metadata and use AMP in conjunction with Yoast SEO.
Post types
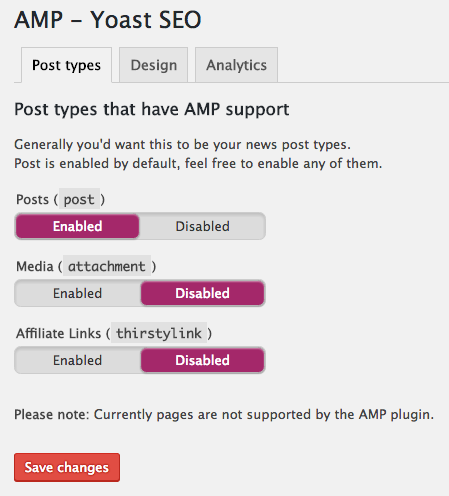
To set options for the plugin, go to Yoast SEO in the left sidebar and click on AMP.
In the Post types tab, you can select which items you’d like to have AMP support. The default settings seem to be okay here, so you can just leave it as is.
Design
AMP Icon – Choose an icon you’d like to use for AMP (must be at least 32 x 32 pixels).
Default image – You can also choose a default image to be used when a post doesn’t have an image associated with it (must be at least 696px wide). Of course, you should make sure each post has its own unique image.
Content colors
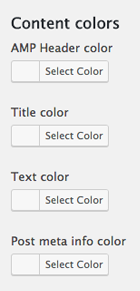
AMP Header color – Choose a color for your AMP header background.
Title color – Select a color for your post titles.
Text color – Set a color for the body copy of your posts.
Post meta info color – Choose a color for the meta info displayed at the top of your post, including the author name and date published.
Links
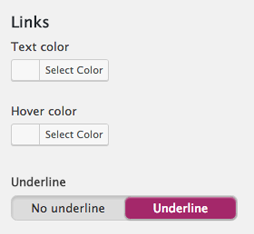
Text color – Choose a color for your links.
Hover color – Select a hover color for your link text.
Underline – Choose whether links are underlined or not.
Extra CSS and Extra code in <head>
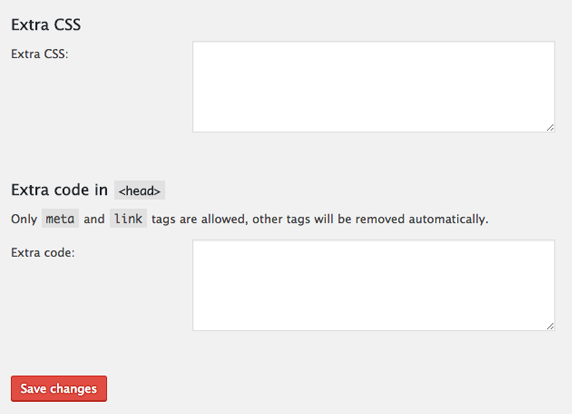
Extra CSS – Insert extra CSS code here.
Extra code in <head> – Add any meta and link tags in this area.
Analytics
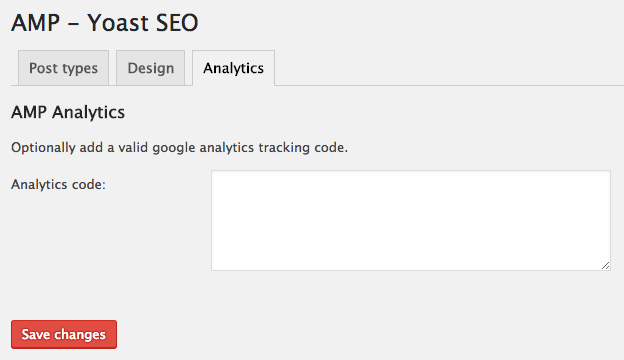
In the Analytics tab, you can enter an AMP-specific JSON version of your Google Analytics script.
Note: Generic Google Analytics scripts will not work with the AMP framework, so it makes things a little more complicated… and whole lot less fun.
To add Google Analytics to your AMP posts, add the following lines of code to the Analytics code field. Make sure you replace UA-XXXXX-Y with your unique Google tracking ID (e.g. UA-5295510-2 or similar).
<amp-analytics type=”googleanalytics”>
<script type=”application/json”>
{
“vars”: {
“account”: “UA-XXXXX-Y”
},
“triggers”: {
“trackPageview”: {
“on”: “visible”,
“request”: “pageview”
  }
 }
}
</script>
</amp-analytics>
Adding this code within Glue for Yoast SEO & AMP may or may not work for you. To see if your code was added to your AMP posts, do the following:
Visit one of your amp posts (e.g. myneatosite.com/cool-post/amp/) and view the page source. Search for “analytics” and if you see the code, then you successfully added analytics to your AMP posts.
If for some reason the code was not added to your AMP posts, try the next method.
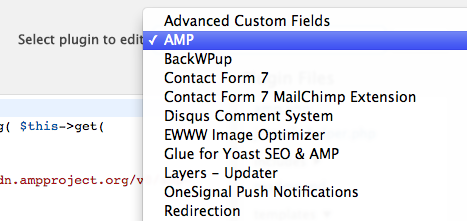
Method #2
While this method is a little more complicated, it should definitely work.
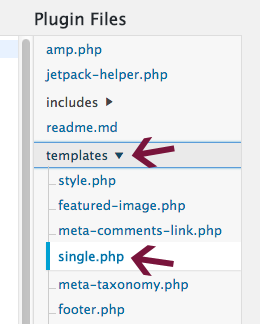
In your WordPress dashboard, go to Plugins > Editor, then choose AMP from the dropdown menu (see screenshot below) and click the Select button.
Then, under Plugin Files at the right-hand side of the screen, click on Templates and go to single.php.
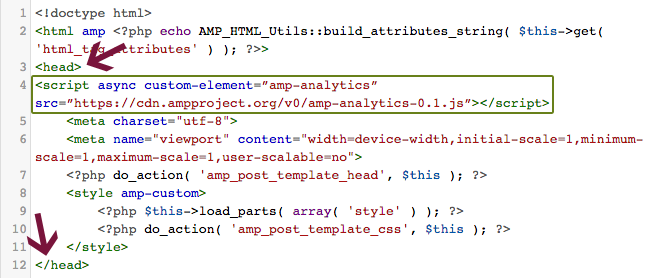
In order for your script to work properly, you’ll need to place the following AMP script in the head area of this file between the <head> and </head> as shown in the image below.
<script async custom-element=”amp-analytics” src=”https://cdn.ampproject.org/v0/amp-analytics-0.1.js”></script>
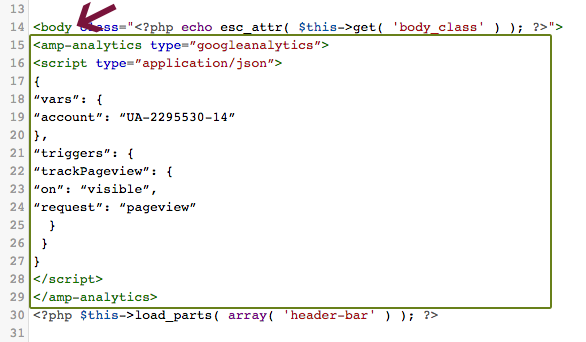
After you add the first script, you need to add the following code right after the opening <body> tag:
<amp-analytics type=”googleanalytics”> <script type=”application/json”> { “vars”: { “account”: “UA-XXXXX-Y” }, “triggers”: { “trackPageview”: { “on”: “visible”, “request”: “pageview” } } } </script> </amp-analytics>
Once you carefully add the code, click the Update File button at the bottom of the page.
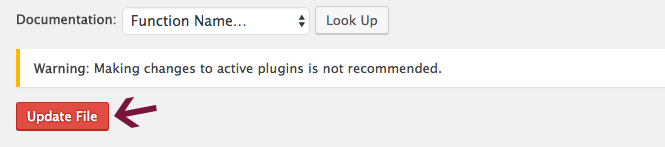
Please note: You can break your site if you have incorrect code in any of these files, so add the code with caution. Also, there is a chance you may not be able to edit the file in the WordPress dashboard area.
In this case, do the following:
- Download the file through an FTP client. Go to wp-content > plugins > amp > templates and download the single.php file.
- Then, make a copy of the original file just in case you break something when you add the scripts.
- Next, open it in a text editor, add the 2 pieces of code and save the file.
- Finally, upload the single.php file where you downloaded it from, and overwrite the old one.
Option #2: Adding AMP with the AMP for WP plugin
If you’d like advanced design and functionality options, as well as easier Google Analytics integration, you should strongly consider using the AMP for WP plugin.
This plugin works by itself now, so just use it OR the AMP plugin by Automattic, but NOT BOTH.
AMP for WP gives you advanced options, including the following:
Logo in the header – Display your logo in the header of your AMP pages and posts, instead of your site title in text format.
Support for pages – Add AMP to your site’s pages, in addition to blog posts.
Multiple design options – Configure how your AMP content looks, with 3 different built-in options available. You can also create your very own custom AMP templates to use.
Advertising – Add Google AdSense to your AMP content, so you can make revenue from advertising on your site.
Social buttons – Easily add and configure social sharing buttons to your AMP posts and pages, including sticky ones that are always visible at the bottom of the screen.
To get started with AMP for WP, simply install and activate it. You will now see an AMP menu item in your WordPress dashboard.
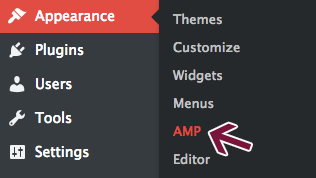
The easiest way to configure the layout/design of your AMP pages is to go to Appearance > AMP.
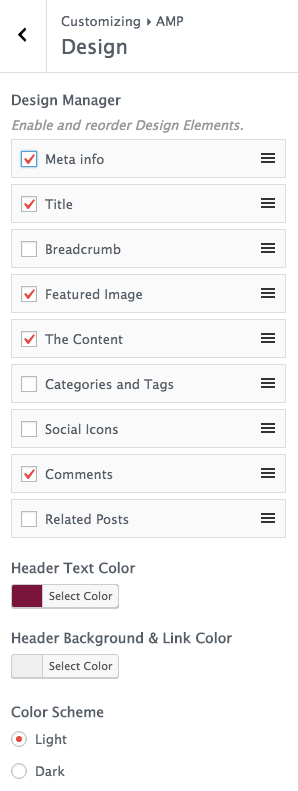
This will open the customizer, where you can enable and reorder the following elements:
- Meta info
- Title
- Featured Image
- The Content
- Categories and Tags
- Social Icons
- Comments
- Related Posts
You can also choose a Header Text Color and Header Background & Link Color here.
Now, on to some of the other settings in the AMP for WP plugin.
Let’s go through the Settings tab to configure some of the plugin’s options.
General
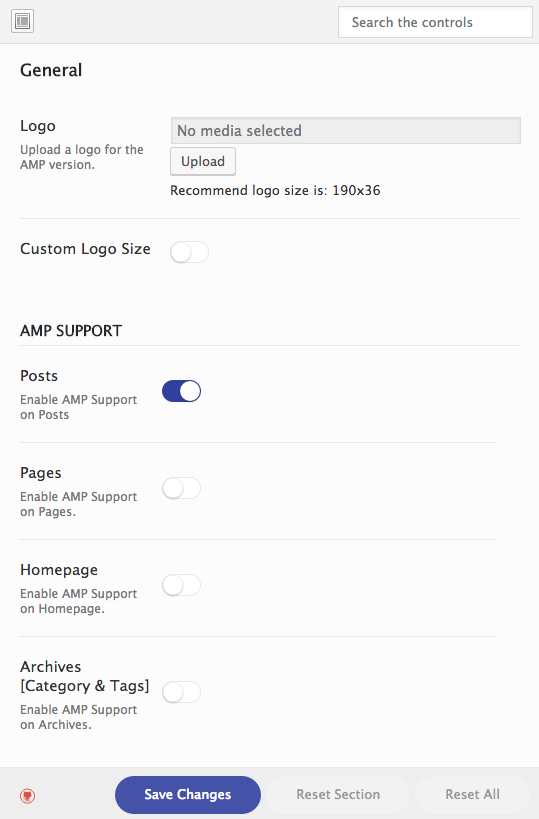
Here you can do the following:
- Upload a logo for the header of your AMP content.
- Set a custom logo size if you’d like.
- Enable AMP for Posts.
- Enable AMP for Pages.
- Enable AMP for your Homepage.
- Enable AMP support for Archives.
When I uploaded a logo for my AMP content, it looked really bad so I decided not to use it. Upload your logo and see what it looks like.
With this plugin, you can enable AMP for pages as well as posts. Depending on your page content, this may or may not work well out of the box.
In addition, you can enable AMP for your homepage as well. I tried this, and for my particular site it didn’t work well.
With all these options, try them out and see how they work for your site.
Page Builder
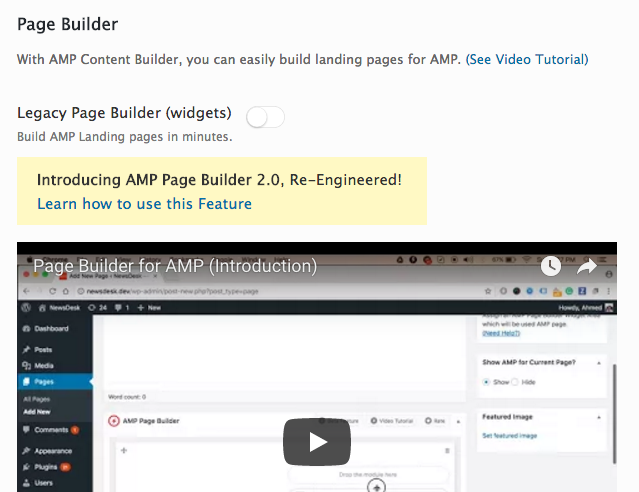
AMP for WP has a Page Builder you can use to easily build landing pages for AMP.
I did not use this on my site, but you may want to give it a try.
Advertisement
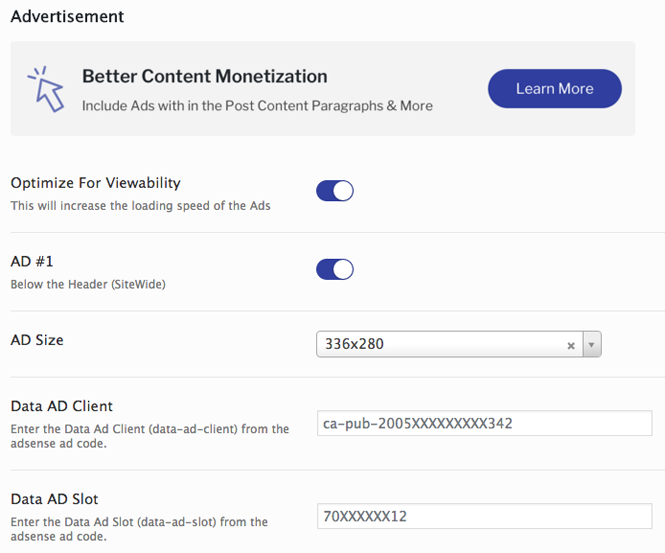
In the Advertisement tab, you can add AdSense code in various areas in your content, including:
- Below the header (site-wide)
- Below the footer (site-wide)
- Above the post content (single posts)
- Below the post content (single posts)
- Below the title (single posts)
- Above the related posts (single posts)
It also lets you choose from a variety of standard display ad formats. If you’d like additional advertising functionality, check out their Advanced AMP ADS extension.
SEO
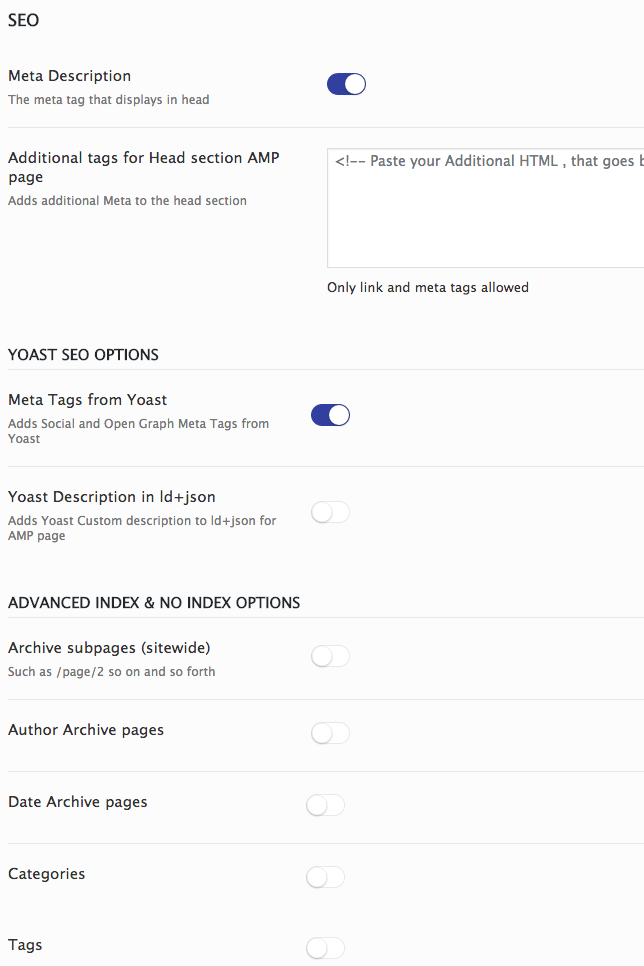
In the SEO tab, you can make sure that your Meta Descriptions are displayed in the head section of your AMP content, and add other link and meta tags there as well.
Under Yoast SEO Options, I recommend turning on the Meta Tags from Yoast slider. I dunno about the other one, but I left it turned off.
By default, all the items under Advanced Index and No Index Options are enabled. I turned them all off because I have all these items noindexed in my Yoast SEO settings anyway.
Note: You may want to configure all of these settings differently for your site, so think about it and adjust them if needed.
Performance
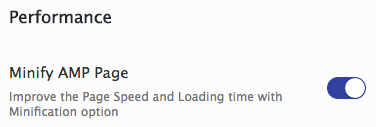
Under the Performance tab, you should set Minify AMP Page to enabled as it further improves page speed.
Analytics
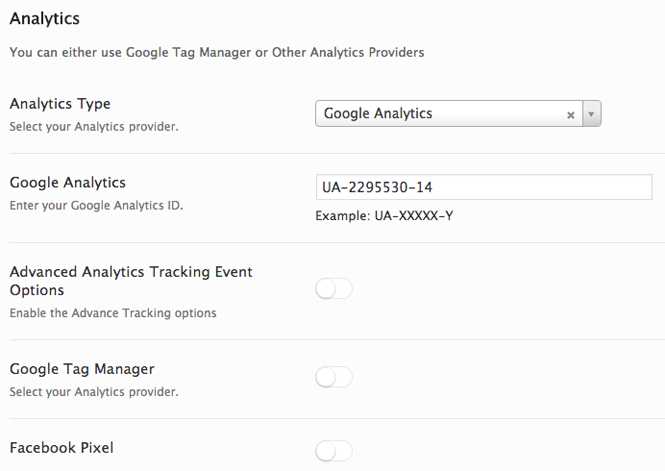
In the Analytics tab, choose your analytics provider from the dropdown and add the ID for whatever you selected in the box below.
Additionally, you can add:
- Advanced Analytics Tracking Event Options
- Google Tag Manager
- Facebook Pixel
Structured Data
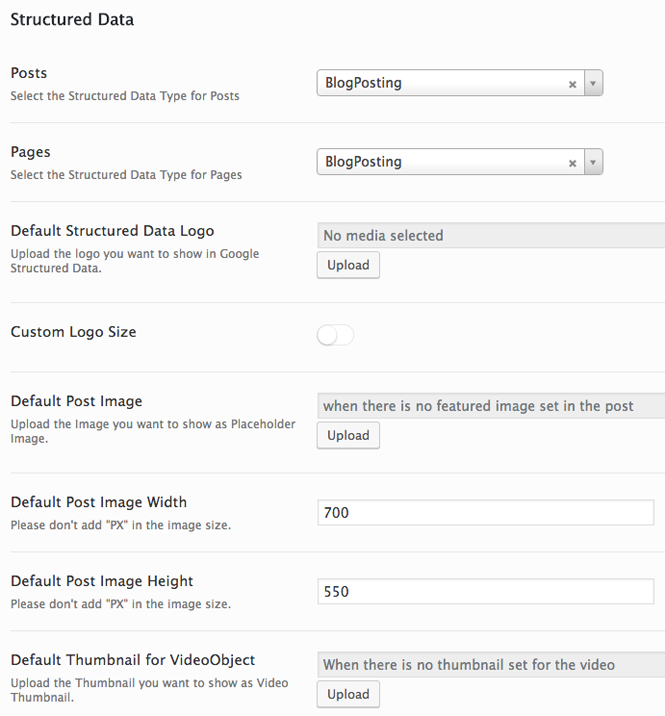
In the Structured Data tab, you can set options for the following:
- Choose structured data type for posts and pages.
- Upload a default logo to show in Google, and use a custom size if you’d like.
- Upload a default image to use on posts.
- Specify image width and height for your default image.
- Upload a default thumbnail to use for video objects.
Notice Bar
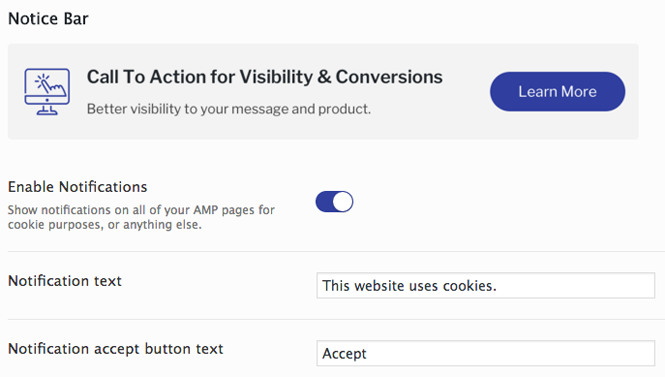
In the Notice Bar tab, you can enable notifications on all of your AMP content. This can be used to notify your visitors that your site uses cookies to track their activity or something else.
Push Notifications
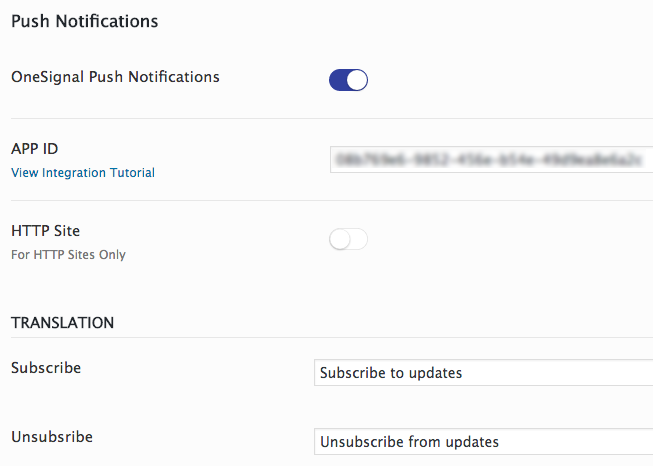
If your site uses OneSignal for Push Notifications, you can integrate it with your AMP content by entering an APP ID. In addition, you can customize the Subscribe and Unsubscribe text displayed on your content.
Contact Form
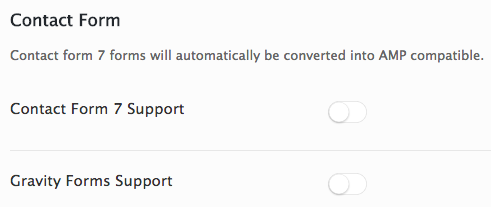
In the Contact Form tab, you can integrate forms created with Contact Form 7 or Gravity Forms.
Please note: You will need to purchase premium extensions to add AMP-friendly contact forms.
Comments
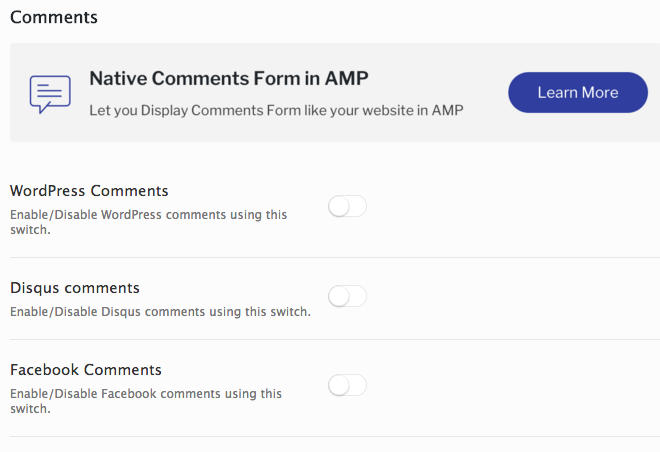
In the Comments tab, you can enable comment systems, including:
- WordPress comments – If you’re currently using the default WordPress comments, just enable the first option and select how many comments you want to display (the default is 10).
- Disqus comments – You’ll need to enter your Disqus Name URL and create a Disqus host file (see instructions).
- Facebook comments – If you’re using Facebook comments on your non-AMP content, enable Facebook comments and enter the number of comments to show.
Instant Articles
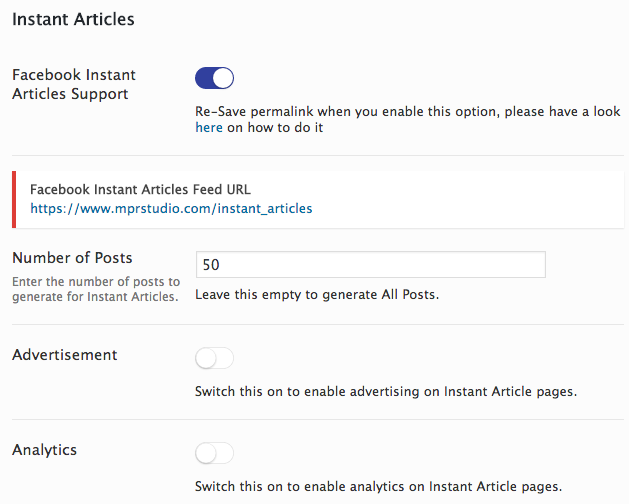
In the Instant Articles tab, you can enable Facebook’s Instant Articles.
You can then set the following:
- The number of posts to generate for instant articles (leave empty to generate all posts).
- Enable advertising on Instant Article pages.
- Turn on analytics for Instant Article pages.
Hide AMP Bulk Tools
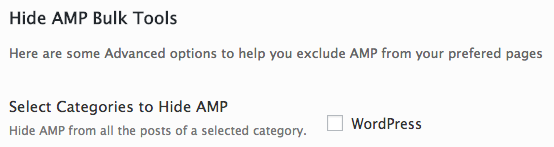
In this tab, you can select certain categories to exclude from AMP if you’d like to.
Advanced Settings

If you’re an advanced user, you can configure extra items in the Advanced Settings tab. The only items I enabled were Mobile Redirection (which automatically redirects visitors on mobile devices to my AMP content) and Plugin Update Notification Bar.
You can add the following in this tab:
- Enter HTML in the Head.
- Enter HTML in the Body (at the beginning of the body tag).
- Enter HTML in the Footer.
- Automatically add AMP in the menu URL.
- Remove the category base in AMP (I set this in Yoast SEO’s settings so left it alone here).
- Remove the tag base in AMP.
- Add featured images from custom fields.
- Add featured images from content. If there is no set featured image, enabling this will grab the first image in your post and make it the featured image.
- Duplicate featured image.
- Show meta box in post editor to anyone with posting privileges or only to administrators.
- Development mode in AMP.
- Enable/disable the plugin update notification bar.
It’s likely that you won’t use many of these options, and just leave the default settings.
Translation Panel
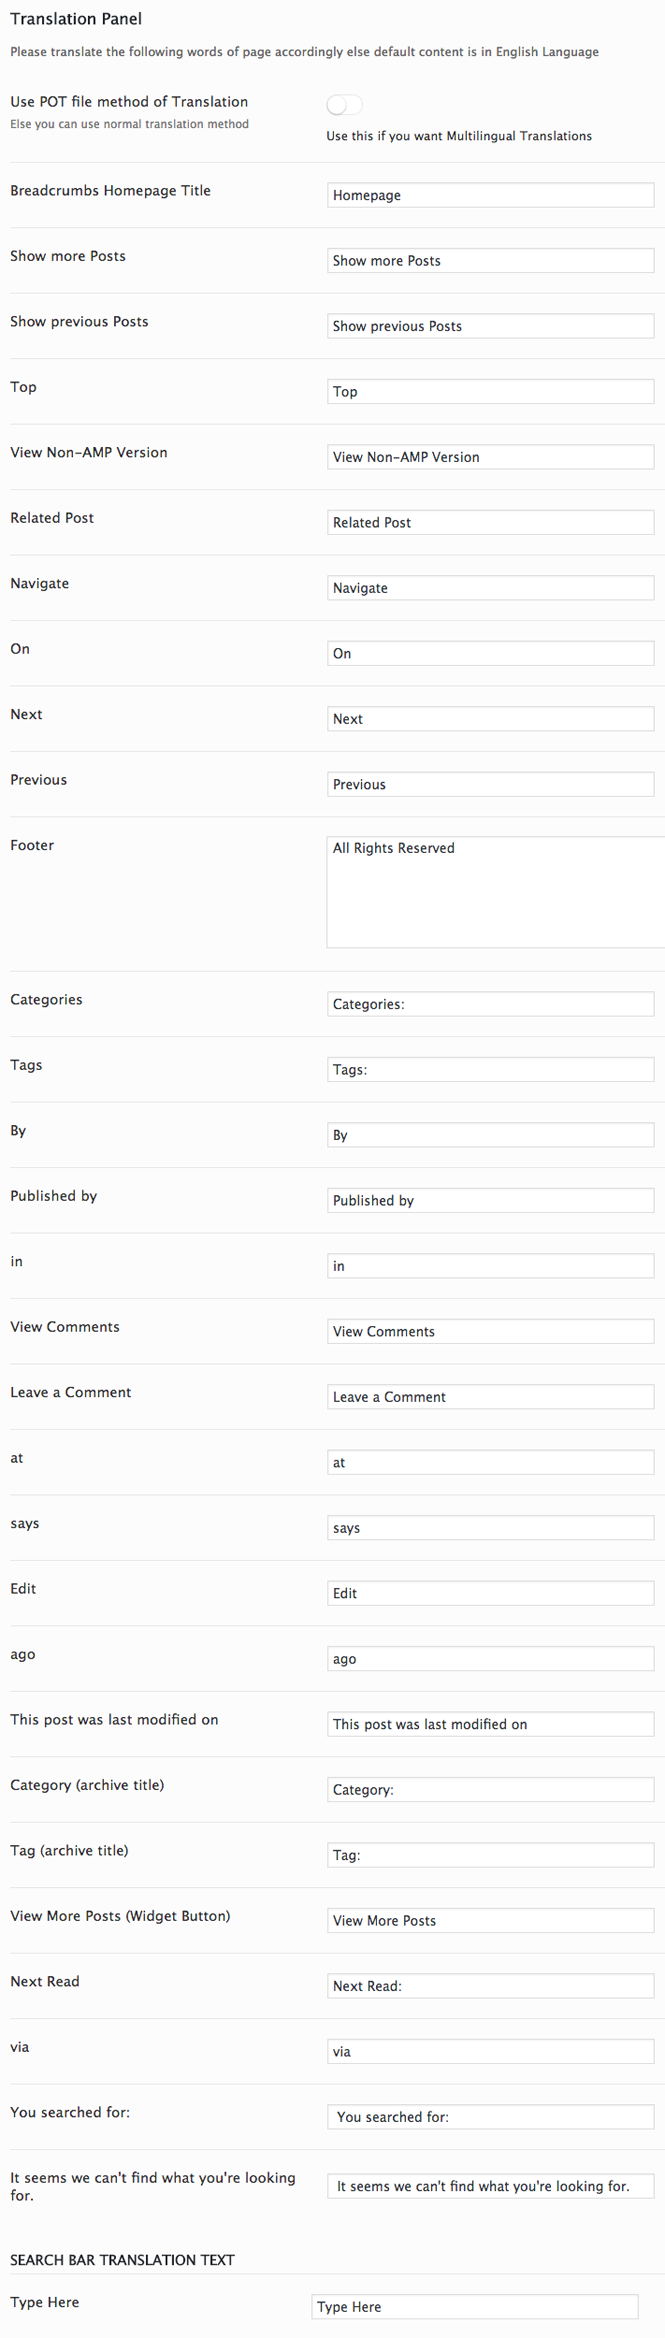
In this panel, you can choose to use the POT file method if you have multilingual AMP content. In this case, you could use a plugin like Loco Translate to translate all of the strings for all languages used in your AMP content.
You can also change all the default text for a whole bunch of different items (see screenshot above).
Based on the AMP theme you’re using, some of these items may not even show up in your content. In most cases, you’re fine just leaving the defaults as they are.
Now that we’ve gone through the various sections in the Settings tab, let’s move on to the Design section.
Themes
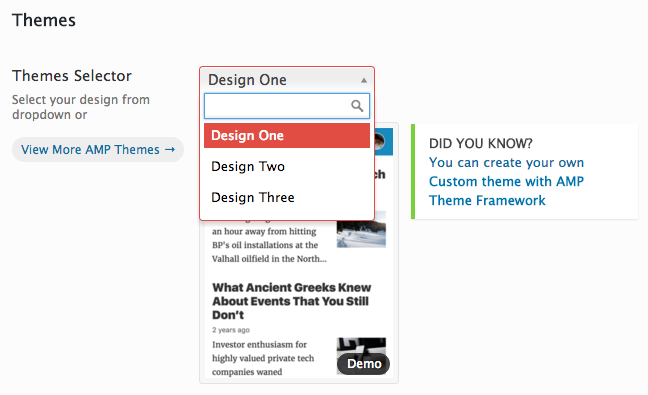
In the Themes section, you can choose from 4 default themes for your AMP content.
You can also view and download a few more themes here. Both the Blogging and Minimal themes are free, but the Newspaper theme is not.
Global
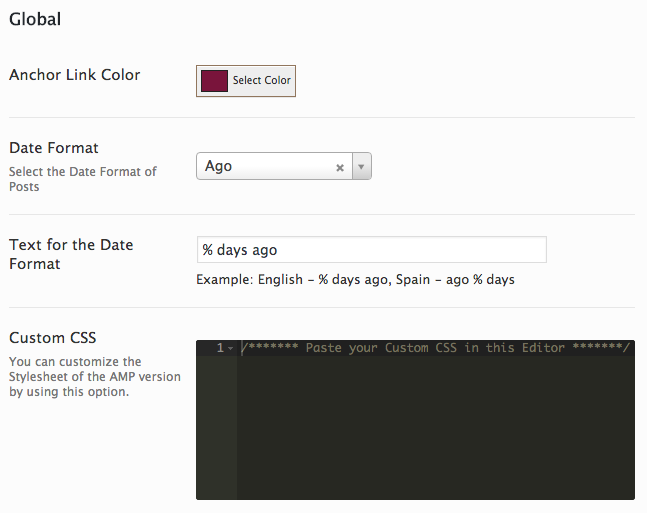
In the Global tab, you can choose a color for your anchor links and set a date format for post meta info.
Also, you can add any custom CSS you’d like to completely customize your AMP stylesheet.
Header
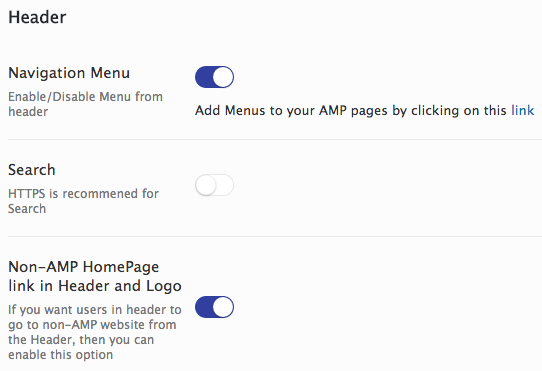
Here, you can enable or disable a few different header items in your AMP content, including:
Navigation Menu – choose whether to display a mobile menu in the header of your AMP pages/posts.
Search – enable this if you’d like to let your AMP visitors search your site in the header.
Non-AMP Homepage link – set whether you’d like your logo or sitename in the header to link to your non-AMP site.
Homepage
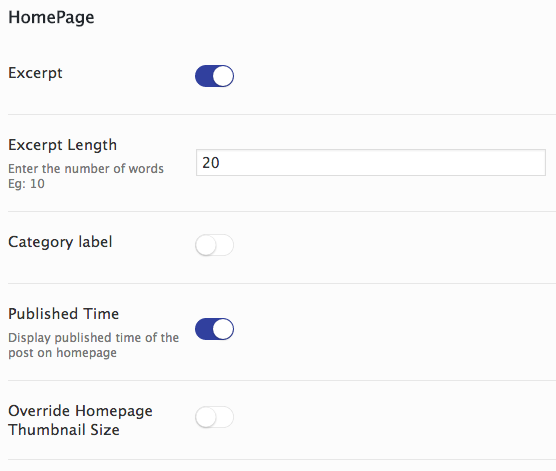
Set different options for your homepage in this section:
- Choose whether to display an excerpt or not, and specify the word count for it.
- Enable or disable a category label and show or hide the publish date on your homepage.
- Lastly, you can choose to override the thumbnail size on your homepage.
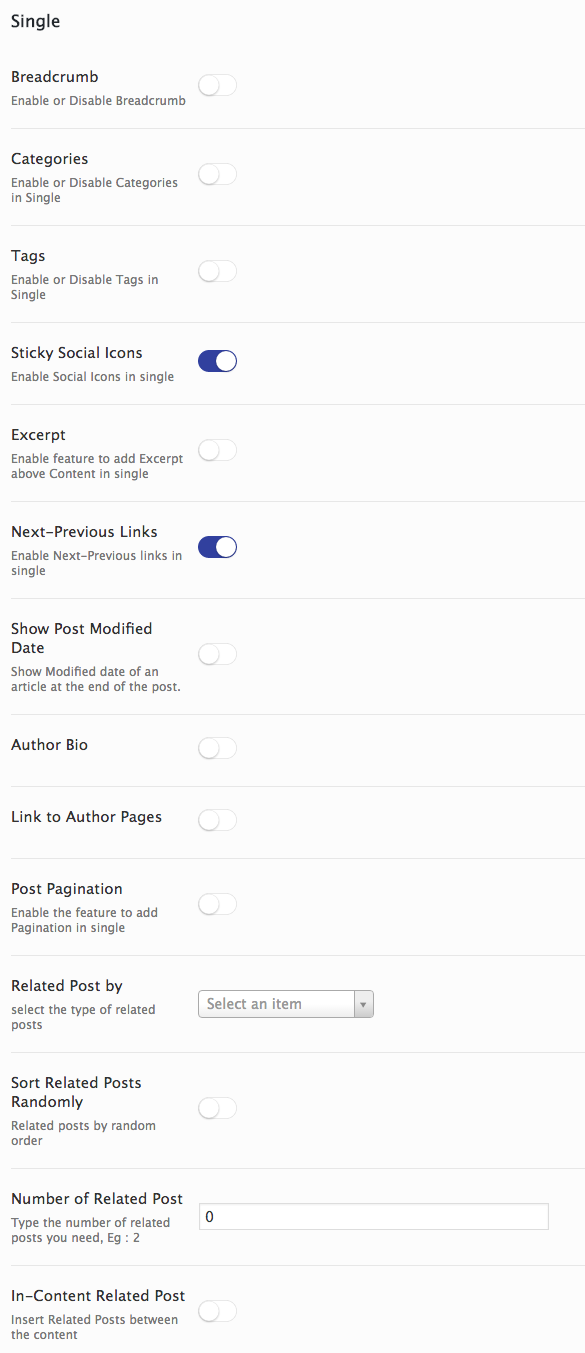
In the single tab, you can configure various options for single AMP post formatting and display.
Breadcrumbs – choose whether you want to show breadcrumbs or not.
Categories – display the post category.
Tags – show tags associated with your post.
Sticky Social Icons – enable/disable sticky social icons at the bottom of the mobile device screen.
Excerpt – you can add an excerpt above the content of single AMP posts.
Next-Previous Links – let your visitors easily navigate between your posts by displaying next and previous links at the bottom of single posts.
Show Post Modified Date – display the date your post was last modified at the end of your post.
Author Bio – include an author bio.
Link to Author Pages – display a link to your author archives.
Post Pagination – include pagination in single posts.
Related Post by – select how the plugin chooses related content to show at the bottom of your posts.
Sort Related Posts Randomly – you can also choose to display related posts in a random way.
Number of Related Posts – select the amount of related posts you’d like to display at the end of your post.
In-Content Related Post – choose whether to insert related posts in your content as opposed to at the end.
Footer

Here, you can choose to enable or disable both the link to your non-AMP page and a back to top link in the footer of your AMP content.
Page
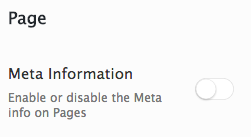
Choose whether or not to include meta information on AMP pages.
Social
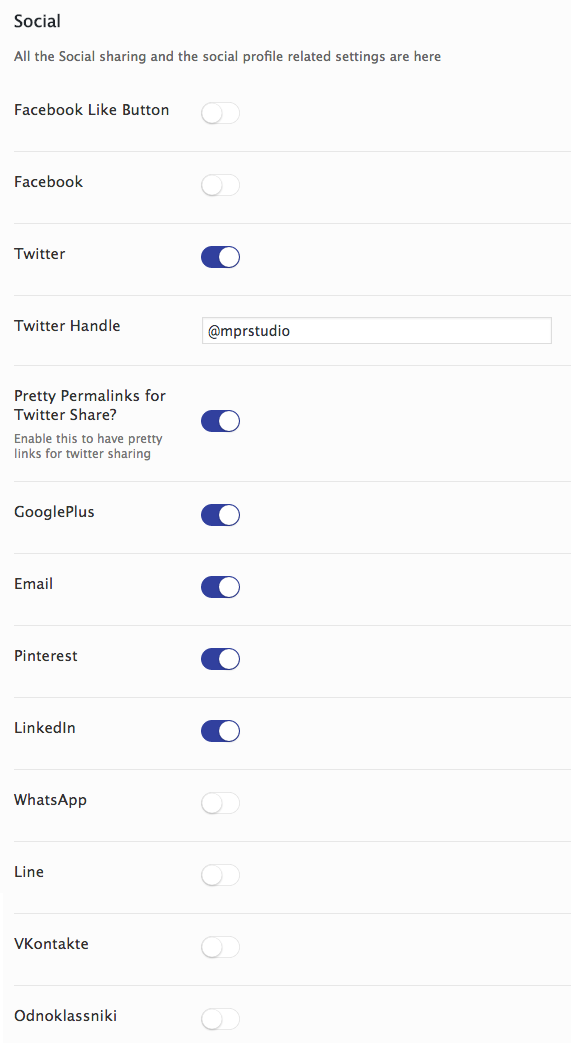
In the Social settings, choose which social networks you’d like to display in the sticky share bar at the bottom of mobile devices.
Misc
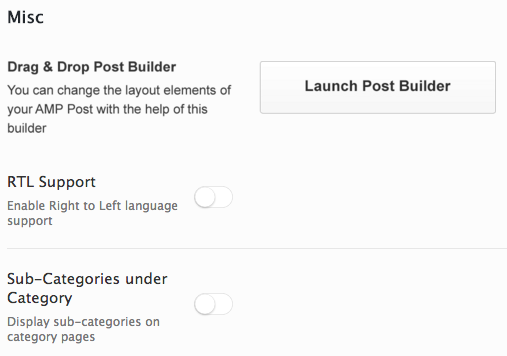
In the Miscellaneous tab, you can do the following:
- Use their drag & drop post builder to adjust the layout of elements in your AMP posts.
- Enable right-to-left language support.
- Include subcategories on category pages.
Extensions
There are a wide variety of powerful extensions you can purchase to add extra functionality to your AMP content, including the following:
Advanced AMP ADS – You can choose from 7 different ad formats, and can even use link ad units from Google AdSense. With this extension, you can insert advertising modules from any ad network in the middle of your AMP content. You can also use sticky ads, which stay on top of your content even when your visitors scroll. Cost = $29.99.
AMP Cache – A caching system which further improves the load time of your AMP content. According to AMP for WP’s tests, it will make your AMP content load up to 50% faster.
Cost = $89.99.
Gravity Forms – Lets you integrate Gravity Forms with AMP content. It works with the form builder and includes proper validation. Cost = $79.99.
Contact Form 7 – Lets you integrate Contact Form 7 with AMP pages and posts. It works seamlessly with the form builder and various fields with proper validation. Cost = $39.99.
Email Opt-in Forms – Add opt-in forms so mobile visitors can sign up for your email newsletter. It gives you the option to create unlimited forms and customize them with various color options. You can automatically display them or manually insert them via shortcode. Cost = $79.99.
AMP WooCommerce – Integrate your WooCommerce online shop with AMP for improved mobile usability with just one click. It works on the shop, as well as the product, cart and archive pages. AMP for WP claims it’s the most advanced eCommerce AMP plugin available. Cost = $79.99.
AMP Teaser – Show AMP visitors an excerpt of your full post and a button which leads to the full, non-AMP content. This was created because some publishers are hesitant to fully adopt the AMP platform. Cost = $19.99.
Custom Post Type – Lets you easily enable custom post types, and even supports those which are custom coded or generated by 3rd party plugins. Cost = $19.99.
Call to Action (CTA) – This extension features two types of CTAs, a box and a bar. The CTA box lets you create a box which can be placed above, below and within your AMP content automatically or manually. The CTA bar is a notification bar which sits at the bottom the of mobile screen and lets you display a message sitewide. Cost = $29.99.
Comments Form – With this extension, you can easily add native WordPress, Disqus or facebook comments to your AMP content. In order to use this, you must have an SSL certificate installed on your site. Cost = $29.99.
ACF for AMP – This extension allows you to display Advanced Custom Fields data in your AMP content, and doesn’t require advanced technical skills. Cost = $29.99.
AMP Ratings – Easily add ratings for products and custom post types to your AMP pages and posts. It can be used in conjunction with the following plugins:
- KK star ratings
- WP-PostRatings
- WP Review
Cost = $19.99.
DFP for AMP – With this extension, you can add DoubleClick for Publishers advertising support in AMP with just one click. Insert DFP ads in any advertising slots in your AMP content or add them as a sticky ad. Cost = $19.99.
All the prices for premium extensions listed above are for 1 website, and include 1 year of updates and support.
AMP Frequently Asked Questions
Won’t AMP content be considered duplicate?
Should I setup redirects to my AMP content?
Will AMP only work on mobile devices?
Where can I learn more about AMP?
Should you install AMP on your site or not?
When choosing whether to install AMP or not, you should ask yourself a few questions, including the following:
What will my posts and/or pages look like in AMP format?
In order to determine what your posts look like using Accelerated Mobile Pages, simply install either AMP or AMP for WP and activate it. Then, go to any post and add /amp/ to the end of the URL.
Note: You may have to clear your cache or open an Incognito window to see your new AMP format.
What about site functionality?
Is there necessary functionality on my site that possibly WILL NOT work with AMP and will the improved speed make up for other functions not working?
What percent of my current traffic is from visitors on mobile devices?
This can be checked in the Home tab in the left sidebar of your Google Analytics account. It’s likely worth installing and configuring AMP for your website because it can help you increase your site’s mobile exposure, which would naturally lead to more traffic.
Conclusion
Adding AMP to your site is a great way to improve user experience for mobile visitors. That being said, there are a few things to take into consideration before making a decision to add it to your site.
Hopefully, this guide has shed some light on Accelerated Mobile Pages, and shown you step-by-step instructions so you can easily add it to your WordPress website.
If you have any questions, please feel free to leave a comment below. I will do my best to help you out, but cannot guarantee to fix your problem.
If you found this post helpful, please share it and spread the word!
Want more content like this? Sign up for my newsletter to receive helpful WordPress Tutorials, Tips and Tricks.


Nice tutorial it is, but I want to use AMP on specific posts, not for the entire website how does it possible in WordPress.
Hi David,
Using the AMP for WP plugin, you can do this. First, make sure you have AMP enabled for Posts in the General settings under AMP Support. Then, go to AMP > Settings > Tools. In the Hide AMP Bulk Tools section, choose Hide by default from the dropdown next to Individual AMP Page (Bulk Edit). Now, for each post you edit, you will see a Show AMP for Current Page section. Here you can select Show to enable AMP for a given post. Hope that helps!
Hi, I have AMP enabled on my blog posts (Swift theme), and for some reason the H1 tag/post title disappears on the AMP version of my blog posts. How do I get the h1 tags on my blog to carry over to AMP?
I’m also noticing that our social sharing buttons aren’t working (on AMP posts). Clicking the Twitter share button populates a tweet that doesn’t have the page URL in it (just says “…via @mytwitterhandle” – doesn’t actually *share* the URL). Flipboard and LinkedIn sharing buttons doesn’t work at all – I just get an error message.
I can’t find any information about how to fix these issues. Hoping dropping a comment here will work – really appreciate the help in advance.
Thank you!
Hi Tina,
Thanks for your comment. I’m not sure why your post titles are not showing up, but I’d recommend double-checking all of your AMP settings. I use the Swift AMP theme too, and my post titles show up and share buttons work. You can try reaching out to AMP plugin support, they’ve helped me in the past with issues.
Hope that helps!
Thanks for this!
I didn’t know AMP for WP had updated. This plugin is freakin’ great now!
I was planning to build from scratch. The Page Builder is a game changer.
You’re welcome Michael.