
Has your site been hacked? If you have a website, you surely realize that keeping it secure is super important. There are a variety of plugins, both free and premium, which you can use to help protect your WordPress website.
I use the free version of Wordfence Security, and highly recommend it for anyone looking to increase site security. In this post, I’ll go over the plugin’s various settings to give you good idea how Wordfence works.
If you’re looking for quality shared hosting for your WordPress website, we highly recommend A2 Hosting. They offer unlimited SSD space, free automatic site backups, hosting optimized for speed and 24/7/365 guru technical support.
What is Wordfence Security?
Wordfence is a top-notch WordPress security plugin which helps protect your site against a wide array of malicious threats, including malware, hacking, DDOS and brute force attacks.
It has helpful features to keep your site safe, including:
- A website application firewall which effectively filters your site traffic. When it detects suspicious requests, it blocks that traffic.
- A malware scanner that performs scans of all your WordPress core files, as well as themes, plugins, and upload folders. It tracks any changes and can find suspect code.
Wordfence offers both a free and premium version of their plugin. The paid version has some extra features, including country blocking, scheduled scanning, and real-time firewall rules updates, among others.
Installing Wordfence
Head on over to Plugins > Add New in your dashboard’s left sidebar, and search for Wordfence. Then, install and activate the plugin.
Dashboard
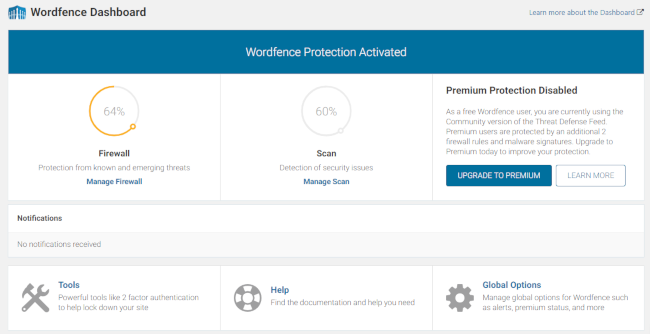
Once you activate the plugin, you will see a new Wordfence menu item with various sections. Clicking on it will take you to the Wordfence dashboard, which shows you important notifications, features and statistics that you can monitor in one place.
You can check whether the following items are enabled:
- Firewall
- Extended Protection
- Real-time IP Blacklist *
- Login Security
- Scheduled Scans
- Cellphone Sign-in *
- Live Traffic
- Country Blocking *
- Rate Limiting
- Spamvertising Check *
- Spam Blacklist Check *
* these items are ONLY available with the premium Wordfence plugin.
You will also be able to monitor malicious attempts to access your website (among other things), including:
- Threat Defense Feed – This displays the total amount of firewall rules and malware signatures that you are protected against. Premium users get improved protection from 17 extra rules and signatures.
- Top IPs Blocked – This shows you a list of IP addresses that have been blocked over the past 24 hours, 7 days and 30 days. In addition, it displays the countries where they originated, and the amount of blocked IPs from each country.
- Login Attempts – This lets you monitor successful and failed login attempts on your site, including username, IP address, as well as date and time.
- Firewall Summary – See all the attacks blocked for your website for today, this week or this month.
- Total Attacks Blocked – Check out a line chart with the amount of attacks blocked on the entire Wordfence network.
- Top Countries by Number of Attacks – This displays the number of attempted attacks on both your site and the entire Wordfence network over the past 7 days.
Scan
Under Wordfence > Scan in your dashboard’s left-hand sidebar, you can see both a summary and detailed activity related to Wordfence scans of your WordPress website files.
In addition, there’s a section at the bottom which displays New Issues that Wordfence found while scanning your site. You can mark these issues as fixed or choose to ignore them so they don’t show up in future scans of your site.
If all is well with your site, you’ll see a notice which reads “Congratulations! No security problems were detected by WordPress.”
Please note: The premium version of Wordfence’s Threat Defense Feed is updated in real-time, protecting your site immediately. The community version used with the free plugin is updated 30 days later.
Was your site hacked? Wordfence offers affordable help with hacked websites. Their team of security experts will clean your site and remove any malicious content, then follow up with a detailed report of their findings.
Scan Scheduling
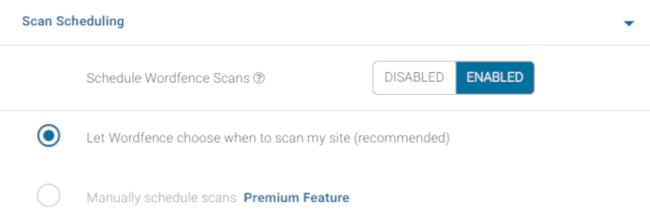
Scan scheduling is only available for the premium plugin, and it lets you increase your WordPress protection by giving you total control over when Wordfence performs scans of your website (up to once per hour). This is helpful because you can set them to run at non-peak times so as not to interfere with your site performance.
In addition, the premium version of Wordfence provides the following:
- Get Firewall and Scan engine rule updates for real-time protection as new threats emerge
- IP reputation monitoring
- Advanced comment spam filters
- Blocking for specific countries
- Cell phone sign-in
- Access to priority customer and technical support
You can read more info about scanning here.
They offer discounts of up to 90% for multi-year and multi-license purchases.
General Options
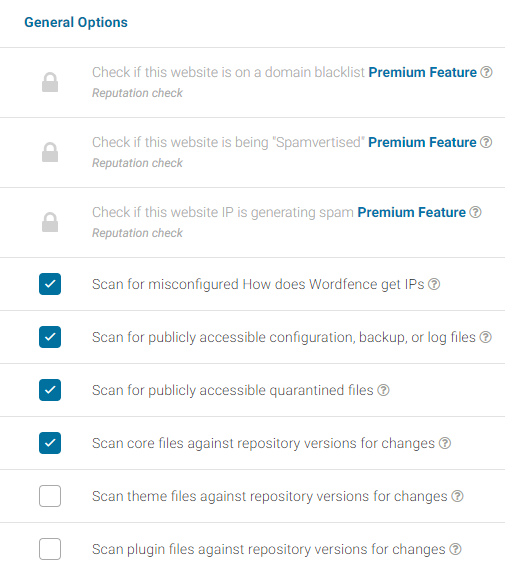
In the General Options tab within the Scan settings, you can configure options for which scans you’d like Wordfence to include.
The default settings will likely work just fine for your site, but you may want to adjust this depending on your particular needs.
Choose from the following:
- Scan for misconfigured How does Wordfence get IPs
- Scan for publicly accessible configuration, backup, or log files
- Scan for publicly accessible quarantined files
- Scan core files against repository versions for changes
- Scan theme files against repository versions for changes
- Scan plugin files against repository versions for changes
- Scan for signatures of known malicious files
- Scan file contents for backdoors, trojans and suspicious code
- Scan file contents for malicious URLs
- Scan posts for known dangerous URLs and suspicious content
- Scan comments for known dangerous URLs and suspicious content
- Scan WordPress core, plugin, and theme options for known dangerous URLs and suspicious content
- Scan for out of date, abandoned, and vulnerable plugins, themes, and WordPress versions
- Scan for admin users created outside of WordPress
- Check the strength of passwords
- Monitor disk space
- Scan for unauthorized DNS changes
- Scan files outside your WordPress installation
- Scan images, binary, and other files as if they were executable
- Enable HIGH SENSITIVITY scanning (may give false positives)
- Use low resource scanning (reduces server load by lengthening the scan duration)
You can also exclude certain files from scans which match certain wildcard patterns (enter one per line).
Additionally, you can limit the number of issues sent in the scan results email and set a maximum time for the scan duration (in seconds).
Firewall
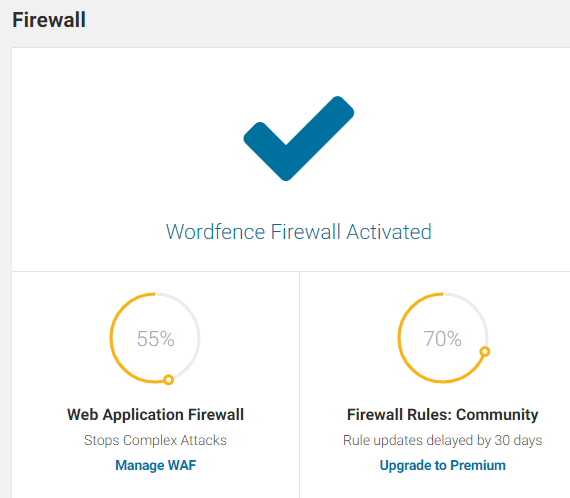
Wordfence includes a web application firewall, which is a PHP-based application level firewall.
Web Application Firewall
The basic level firewall is enabled by default, and it essentially runs as a WordPress firewall.
Basically, this allows Wordfence’s firewall to load with the rest of your site’s installed plugins, effectively protecting you from a wide variety of threats. The downside to using ONLY this basic level firewall is that it can miss threats that are designed to trigger before WordPress themes and plugins load.
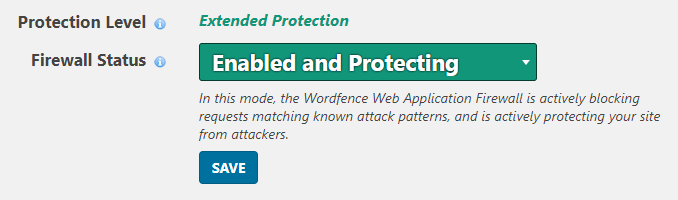
The second level of protection is called extended protection. It lets Wordfence run prior to WordPress core, themes and plugins, which results in improved protection against more advanced security threats.
Follow the steps below to setup the extended protection firewall:
- Go to Wordfence > Firewall in your WordPress dashboard’s left sidebar.
- Once there, click the Optimize the Wordfence Firewall button.
Wordfence will run some tests to detect your web server type and configuration. If you’re certain that your setup is different than the one which Wordfence automatically selected, feel free to change it.
On the next page, you’ll see a Continue button. When you click on it, Wordfence will prompt you to download your .htaccess file. Make sure you do this, just in case the extended firewall protection setup breaks your current .htaccess file.
After you download your backup file, click on the Continue button. Then Wordfence will update your .htaccess file to enable it to run prior to WordPress. If all goes as planned, you will be redirected to the firewall page where you will now see that your protection level is set to Extended Protection.
In addition, you’ll see that Learning Mode is set under Firewall Status. When Wordfence is first installed, it tries to see how you, other users and site visitors interact with your website so that it doesn’t incorrectly block legitimate visits. After 1 week, it will automatically update to Enabled and Protecting mode.
Below the Protection Level and Firewall Status areas, you will see a bunch of rules matching known attack patterns commonly seen and exploited. These attacks have patterns that are very specific and require minimal processing to determine if the request matches.
Whitelisted URLs – If there are some URLs that you don’t want Wordfence’s firewall to test, enter them in this area.
Advanced Configuration – In this area, you can specify whether you’d like to delay IP and country blocking until after WordPress and plugins have fully loaded. It will still process firewall rules early.
You can also preemptively block malicious IP addresses if you’re using the premium plugin.
Brute Force Protection
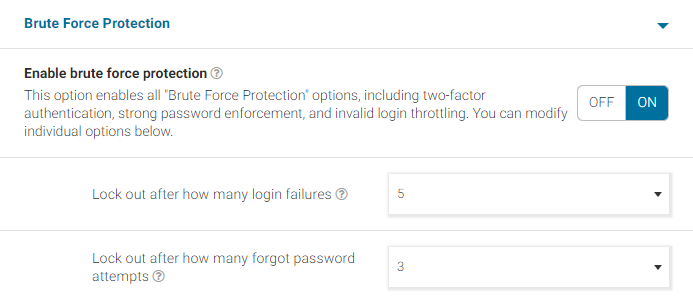
In this tab, you can configure all options for people trying to use brute force attacks on your site.
Rate Limiting
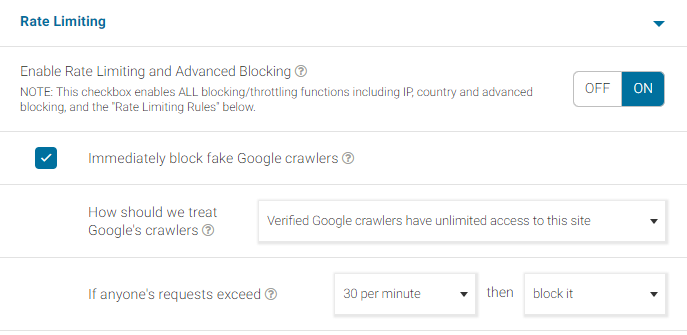
In this tab, you can set options for the following:
- Immediately block fake Google crawlers
- Specify how you treat real Google crawlers
- Block or throttle people who are requesting your site too frequently
- Block or throttle crawlers whose page views exceed a certain number
- Block or throttle crawlers whose not found (404) pages exceed a certain number
- Block or throttle a human’s page views if they exceed a certain number
- Block or throttle a human’s page views if their pages not found (404) exceed a certain number
- Block or throttle 404s for known vulnerable URLs exceed a certain number
- Specify how long an IP address is blocked when it breaks a rule
All items in the Brute Force Protection and Rate Limiting tabs can also be configured in the Options area of Wordfence’s settings.
Tom Dupuis of Online Media Masters has recommended settings for Rate Limiting Rules, which will improve the performance of your site and prevent it from using too many of your web server’s resources. Check out his optimized settings for Wordfence and many other items that will improve your site performance here.
Please note: If you optimize Rate Limiting and Advanced Blocking, it can interfere with automated backups, including those scheduled with the BackWPup plugin. I use the optimized settings, and just turn them off to run manual backups. Then I turn them back on once the backup is completed.
Blocking
Blocked IPs
Here, you can manually block IP addresses, and review who has been blocked, locked out or throttled for breaking various firewall rules.
In the Blocking tab, you will see all blocked IPs, including those blocked from accessing the site, locked out from login, as well as those throttled for accessing the site too frequently.
You will see the following info about blocked IPs:
- Location
- IP Address
- The reason the IP was blocked
- The amount of hits before the IP was blocked
- The amount of hits after the IP was blocked
- The amount of time remaining before the IP is unblocked
You can also easily clear all blocked and locked out IP addresses at the top of the tab if need be.
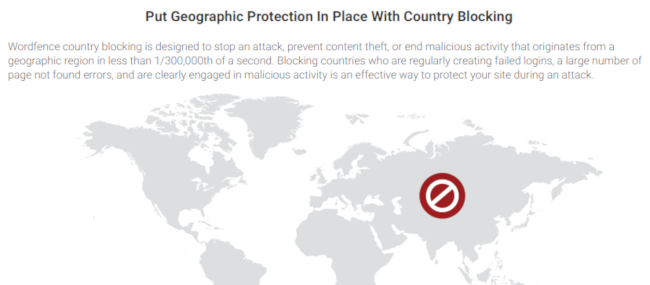
Country Blocking
This feature is only available in the premium Wordfence plugin. It lets you block attacks and malicious activity originating in a specific country.
In addition, it gives you the following options:
- What to do when Wordfence blocks someone. You can either display the standard Wordfence blocked message or redirect to a specific URL (where you can show a custom message).
- Block countries even if they’re logged into your site.
- Hide access to the login form.
- Block access to the rest of your website’s pages.
Bypass Redirect
If you’d like to allow certain users to access your site from countries on your blocked list, you can set up a bypass redirect.
Create a URL that you can direct users to. When they reach that URL, they will be redirected to a different page with a cookie to bypass all country blocking.
Bypass Cookie
You can also set up a bypass cookie. This way, when a user who is allowed to access your site visits a particular URL, a cookie will be set. It will then bypass country blocking in case he/she reaches your site from a blocked country.
Select which countries to block
At the bottom of the tab, you can easily select countries you’d like to block.
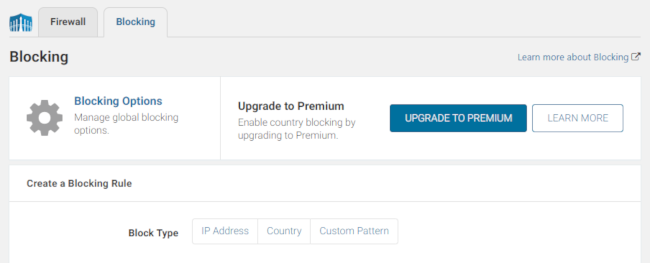
Blocking Rules

In this area, you can set up additional blocking rules, including:
- Blocking a single IP address.
- Blocking a whole range of IP addresses (e.g. 192.168.200.200 – 192.168.200.220).
- Blocking by hostname – Use this setting to make a DNS query for each unique IP address. Sites with a lot of traffic may not want to use this feature, as it can add considerable load to your web server.
- Blocking by user-agent (or browser) that matches a particular pattern. Examples could include *badRobot*, AnotherBadRobot*, *otherBrowserSuffix.
- Block visits based on a specific referrer website (e.g. *spammysite*, junktraffic*, anotherSiteSuffix, etc.). You can also enter a reason why you’re blocking a certain visitor pattern (this is only for your record keeping).
Below these options, you’ll see a current list of ranges and patterns that have already been blocked.
Tools
In addition to firewalls and blocking malicious visits, Wordfence offers a wide variety of additional helpful tools for your site, including:
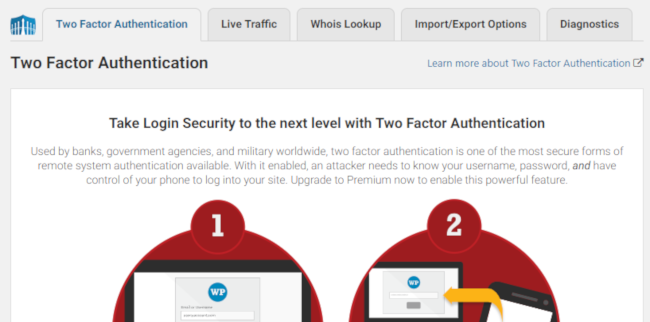
Two Factor Authentication *
The Wordfence Security premium plugin uses two-factor authentication, which is one of the most secure forms of remote system authentication used by banks, government agencies and military all over the world. It is recommended you enable it for all administrator level users.
In order to enable Two Factor Authentication, you’ll first need to sign up for a premium Wordfence account.
Live Traffic
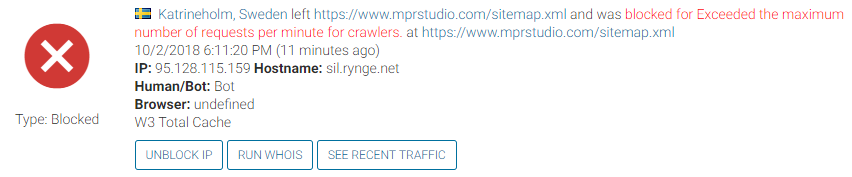
Here, you can see a full list of IPs requesting various pages and files on your website, and can block individual IPs and even entire networks.
Wordfence also uses a color-coded system to display the type of traffic listed – human, bot, warning, blocked.
You can Filter Traffic with the following dropdowns:
- All Hits
- Humans
- Registered Users
- Crawlers
- Google Crawlers
- Pages Not Found
- Logins and Logouts
- Locked Out
- Blocked
- Blocked by Firewall
In addition, you can use your own Advanced Filter with a date range and various groups, including:
- Type
- Username
- HTTP Response Code
- Firewall Response
- IP
- URL
You can also block suspicious IPs manually by visiting the Wordfence > Blocking section.
What I do: I keep Live Updates turned OFF because it takes up server resources, and can slow down your site.
WHOIS Lookup
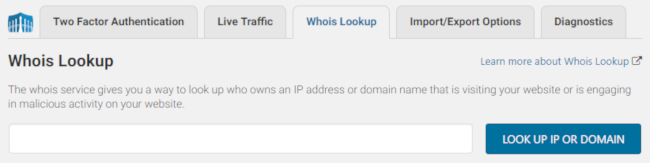
In this tab, you can look up the owner of an internet resource. You may be interested in knowing who owns an IP address if he/she is engaging in malicious behavior on your site. This feature is integrated with both Live Traffic and Advanced Blocking.
In order to use the WHOIS Lookup feature, simply enter a domain name (e.g. badsite.com) and hit the Lookup Domain or IP button to find out who the registered owner is, when the domain was registered, when it expires and some associated email contacts.
When Wordfence returns the results, it will make the email addresses and other items clickable, which can save you time if you’d like to contact people about malicious activity.
In addition to searching for a domain name, you can also enter an IP address. Wordfence will show you which network it belongs to, who owns it and who to contact if your site is getting malicious traffic originating from their server.
Import/Export Options
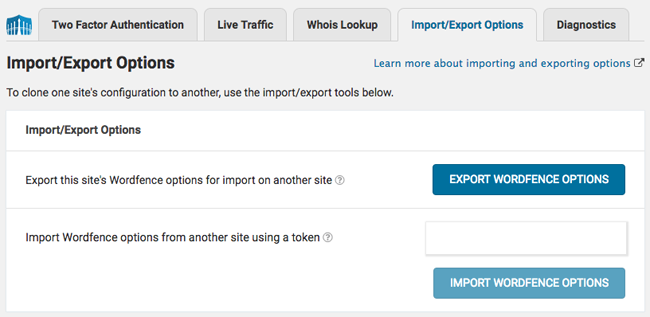
In the Import/Export Options tab, you can either import Wordfence settings from another site, or export the Wordfence Settings on the current site for use elsewhere.
Diagnostics
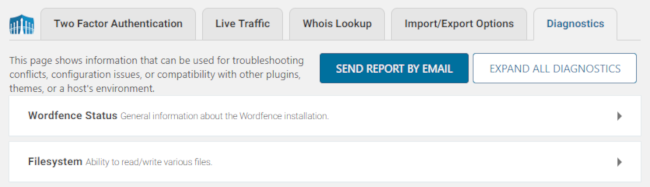
In this tab, you will see all kinds of information about various items in your WordPress installation, including the following:
- Filesystem
- Config
- MySQL
- PHP
- Connectivity
- IPs
- WordPress
- WordPress Plugins
- Must-Use WordPress Plugins
- Themes
- Cron Jobs
- Database Tables
- Log Files
Below all the tables, you perform tests to view your system’s configuration in a new window or see your host’s available memory.
In addition, you can manually refresh firewall rules and enable various options for debugging.
* Items marked with an asterisk are only available in the premium version of the plugin.
Other
Setting up security alerts in Wordfence
When you first install Wordfence, you will be prompted to add an email address where you’d like to receive security alerts. The plugin can send you notifications for a wide variety of security-related issues, including automatic IP blocks, login lockouts and much more.
In order to configure these options, go to Wordfence > All Options and scroll down until you reach the Alerts section.
Please note: If you enable all these options, you could get a ton of email from Wordfence in your inbox.
The default options seen in the screenshot above are usually enough from a security standpoint, but if you enable all of the alert notifications, you will get a ton of email from Wordfence.
What I do: I turn off the majority of these notifications because I get way too much email from Wordfence, which just clogs my inbox.
Conclusion
I hope this tutorial has proven helpful, and that you use the information in it to properly protect your WordPress website. In most cases, the default settings should provide adequate security for your site. Just make sure to enable Extended Protection in the Web Application Firewall section.
Do you have any questions? Please feel free to leave a comment below, and I’ll do my best to help you out. Unfortunately, I cannot guarantee to help fix your problem, but I’m sure you understand that.
Featured image credit:
Designed by Freepik
If you found this post helpful, please share it and spread the word!
Want more content like this? Sign up for my newsletter to receive helpful WordPress Tutorials, Tips and Tricks.


Hi, I set my url for the blocked user landing page, but it is only shown if the country is blocked, and when the user enter wrong password too much, showing the default wordfence landing page.
Hi Erfan. I have never used that feature to set the URL for the blocked user landing page, and don’t know why it would be showing the default one instead. Have you tried asking for help in the free plugin’s support?
I am not a blogger anymore. I do not have a wordpress website.
But I use the internet. I search for stuff, go back to certain websites, read again, react, search for contacts, etc.
And this Wordfence stinks. It blocks me from just getting a physical address for a company from which I had a reply via email contact. It blocks me on my mobile and my laptop. This is not worth it
Hi Marelize. Sorry to hear that Wordfence on other sites is blocking you. It could be configured to block visits from certain countries, and can also be set up so that certain browsing behavior triggers a block (via rate limiting settings).