
Are you looking to accept Bitcoin payments on your WordPress website? Whether you have a full-fledged online shop or simply want to accept donations, you may be wondering how to add the option for your customers to make Bitcoin payments on your site.
In this post, I will show you how to quickly and easily integrate Bitcoin payments with your WordPress site, step-by-step.
If you’re looking for quality shared hosting for your WordPress website, we highly recommend A2 Hosting. They offer unlimited SSD space, free automatic site backups, hosting optimized for speed and 24/7/365 guru technical support.
Advantages to accepting Bitcoin payments
The use of Bitcoin and other cryptocurrencies has grown quite a bit over the years, and it shows no signs of slowing down.
Your site could benefit from accepting Bitcoin payments in the following ways:
Security – Unlike payments made with credit cards, bank transfers or other traditional methods, Bitcoin requires no personal information to make a transaction online. While Bitcoin and other cryptocurrencies are linked to you in order to setup online payments, your information is not exchanged during the actual purchase. For people who are worried about making online purchases, this can give them peace of mind.
Completely digital – Bitcoin is a digital cash transaction system which doesn’t require third-party banks to process transactions. It is peer-to-peer, and organized through a digital network known as a blockchain. A blockchain is a ledger that keeps a secure and nearly-anonymous record of all transactions.
Convenience – When you receive cryptocurrency payments, there is no waiting period to access your funds. As soon as money is transferred from a customer’s wallet to yours, the money is immediately available. Please note: Payments cannot be reversed with Bitcoin, so you cannot easily issue refunds.
Fraud prevention – Every Bitcoin has a long hexadecimal code associated with it, which is extremely difficult to crack. Since payments cannot be reversed, you don’t have to worry about people requesting chargebacks and the resulting fees you’d have to pay for them.
Cost and simplicity – Bitcoin transactions come with very small processing fees, and in some cases there are no fees at all. Due to its peer-to-peer structure, you don’t have to worry about payment compatibility. As long as your customer has a Bitcoin wallet, they can make payments quickly and easily.
Since cryptocurrencies can be quite volatile, make sure your site accepts traditional payment options as well, not only Bitcoin.
Getting a Bitcoin wallet
In order to accept Bitcoin payments, you’ll need a Bitcoin wallet. This is simply a piece of software that is used to send and receive Bitcoins, as well as store them safely.
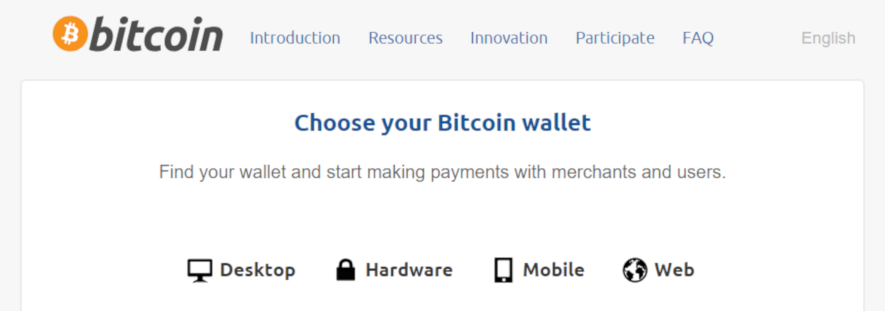
There are a number of Bitcoin wallets available, including those for the following:
Desktop/Laptop – Choose from Linux, Mac or Windows applications.
Specialized hardware – There is special equipment specifically for Bitcoin, including Digital Bitbox, KeepKey, Ledger Nano S and Trezor.
Mobile Applications – Select a mobile application for your specific device. Apps are available for Android, iOS and even Windows Phone.
Web-based – There are a number of web-based Bitcoin wallets, including Coinapult, Green Address, BitGo and Coin.space.
Please note: Bitcoin is completely different from any other kind of currency or payment method, so make sure to educate yourself about it and take the necessary steps to properly secure your wallet.
Signing up for a BitPay account
For this tutorial, we’ll be using the BitPay payment system. It lets you accept Bitcoin payments securely through your site. In addition, it offers Bitcoin exchange, conversion and transfer to your bank account or Bitcoin wallet.
Then, you can process the payments in the following ways:
- Convert the Bitcoin and direct deposit it in a connected bank account.
- Connect BitPay to a Bitcoin wallet if you’d like to store the Bitcoin payments without converting them.
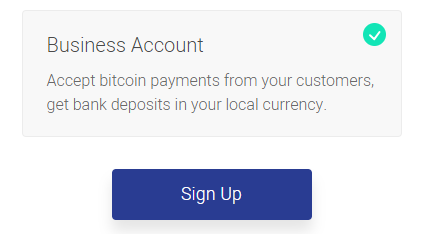
Go to the BitPay website, and click the Start Now button.

You’ll need to choose Business Account because you need the ability to accept Bitcoin payments from your customers.
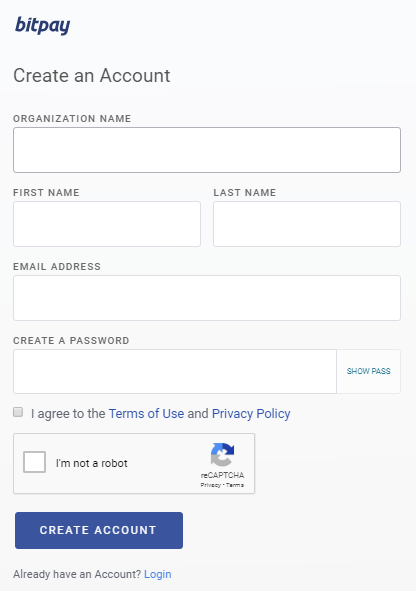
Next, you’ll need to fill in your organization name, first and last name, email address and choose a password. Check the box to accept their terms of use and privacy policy, and click the Create Account button.
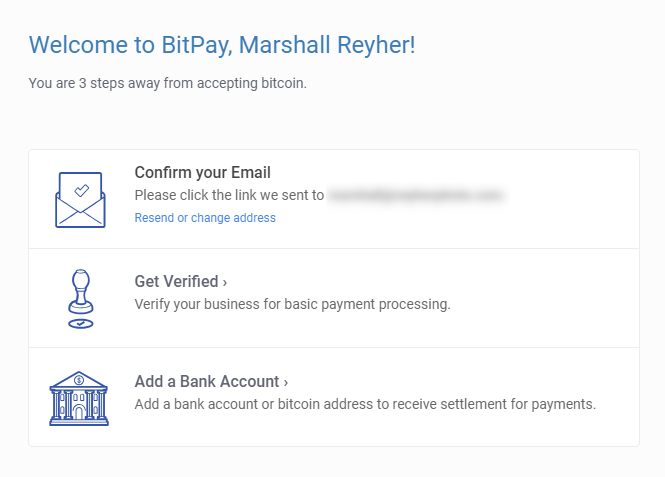
You’ve successfully created your account, but still need to do the following:
- Confirm your email address by clicking the link that they send to you.
- Verifying your business for payment processing.
- Add a bank account or Bitcoin wallet to receive payments.
Accepting Bitcoin on a non-eCommerce WordPress site
If your site is not setup as an online shop with WooCommerce or other eCommerce plugin, you can simply add a button for donations with HTML code generated on BitPay’s site.
Follow the steps below to generate a Bitcoin payment button for your site:
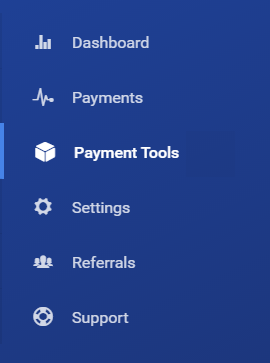
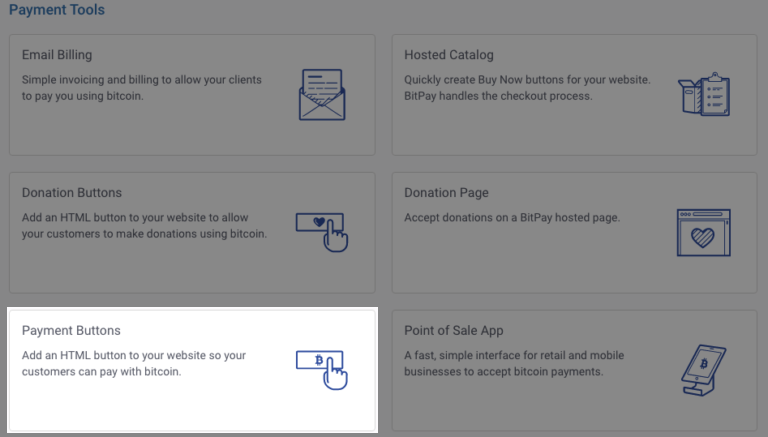
On the BitPay site, select Payment Tools in the left sidebar.
Then click on the Payment Buttons section.
Create a Checkout Button
Here, you can set the following options for your button:
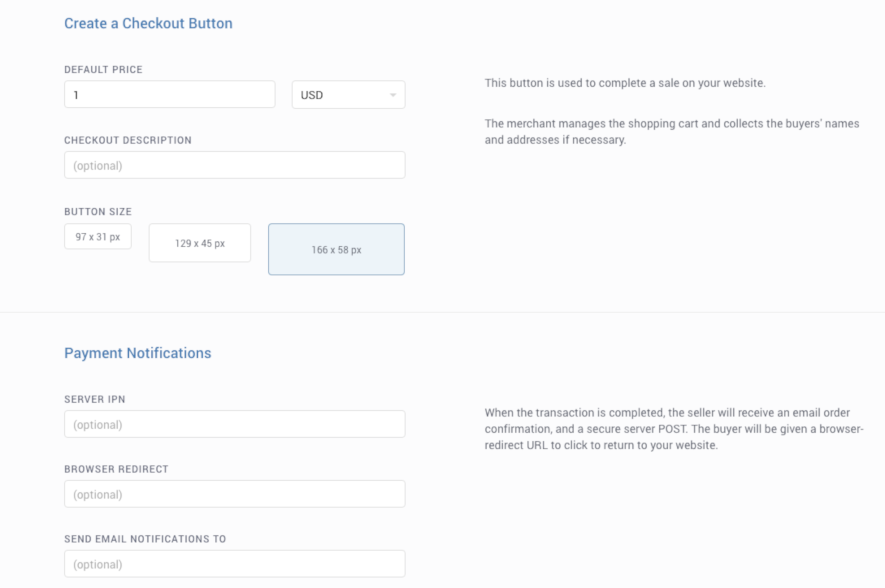
- Default price – Set an amount, then choose your currency from the dropdown.
- Checkout description – You can enter a name for this particular button.
- Button size – Choose from small (97 x 31px), medium (129 x 45px) or large (166 x 58px).
Payment Notifications
Server IPN – Don’t worry about this.
Browser Redirect – In this area, you can enter a URL where your users will be redirected after successful payment. If you’re selling a digital product, you could redirect them to a page with the download link. Alternatively, you could send them to a thank you page.
Send Email Notifications to – Enter an email address where you’d like to receive notifications when a purchase is made. The buyers will receive confirmations via email by default, so don’t worry about that.
Generated Code
In this area, you will find the generated HTML code that you can embed on your site. You will see a preview of the button on the right, along with a link to copy the code on the left side below the box.
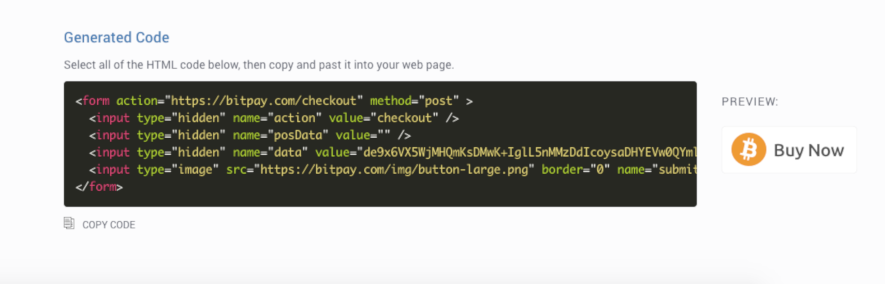
If you like the size of your button, go ahead and copy it. If not, you can go back and choose one of the other sizes.
With your copied HTML button code, head over to your WordPress dashboard. Here, find the page where you want to embed your button.
In the page’s text editor (it won’t work in the visual editor), paste the HTML code where appropriate and save your changes to preview it on your site.
Accepting Bitcoin on a WordPress site with WooCommerce
If you’re running a WordPress eCommerce site with WooCommerce, adding Bitcoin as a payment option is a little different. To start, install and activate the BitPay for WooCommerce plugin.
Once the plugin is activated, go to WooCommerce in your dashboard’s left sidebar and choose Settings. In the Payments tab, click on the BitPay item at the bottom of the table to configure its settings.

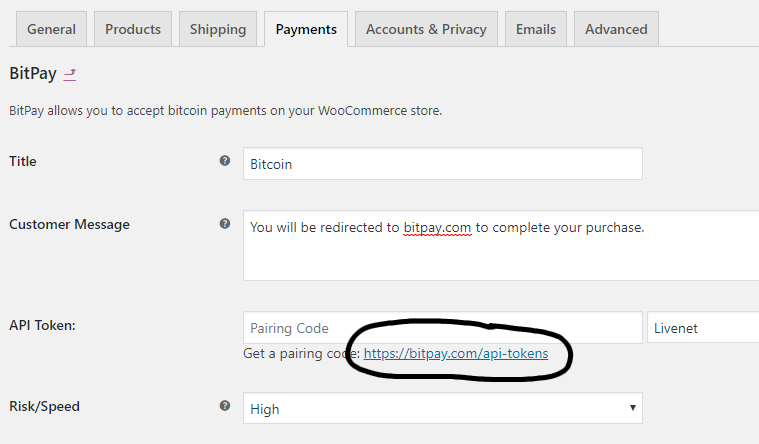
You can customize the Title and Customer Message fields if you’d like. Then, you’ll need to generate an API key by clicking the link in the API Token area, which will redirect you to BitPay’s site where you can log in and easily create a new token.
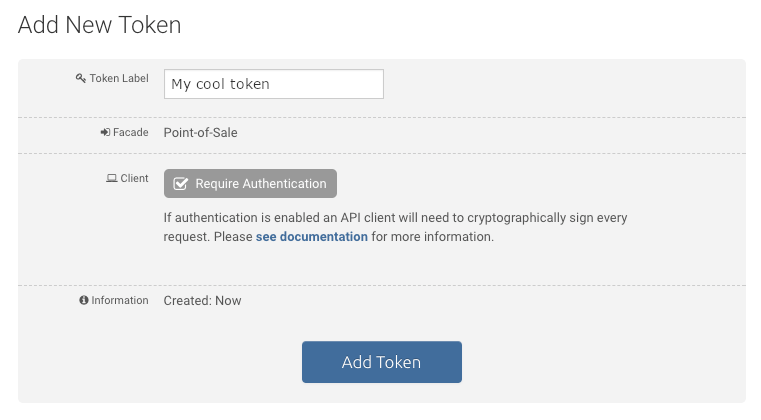
Give your token a label and click the Add New Token button at the bottom of the page.
Once the token is created, BitPay will give you a pairing code, which you’ll need to copy and paste in your BitPay settings for WooCommerce. After you’ve pasted the code, click the find button and make sure you save your settings.
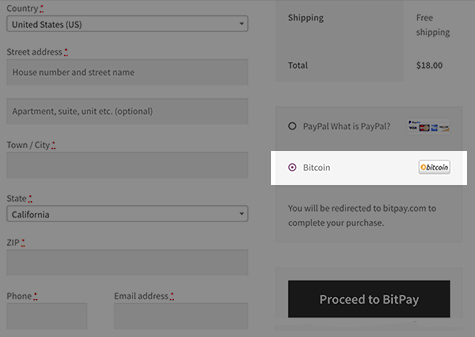
Now, your customers will see an option to pay with Bitcoin in your store’s checkout.
Connecting your bank account
When a Bitcoin payment transaction is made on your site, the funds will be stored in your Bitcoin wallet. Most likely, you will want to convert your Bitcoin to the currency of your choice, and then transfer the money to your bank account.
In order to activate direct deposit of funds in BitPay, log in to your account and go to Settings in the left sidebar and click on the Settlement tab. Then, choose Add A Bank Account in the first field.
Enter your bank account details, and click the Save button.
Now, you can go back to the Settlement page and select Edit in the Bitcoin Address field. Then, you can choose the percentage of Bitcoin that you’d like to store as Bitcoin, and convert the rest to currency which is sent to your bank account.
Conclusion
That wasn’t so bad, was it? I hope this comprehensive guide has taught you how to easily add bitcoin payments to your WordPress site, whether for donations or as a payment option for your online shop.
Feel free to leave any questions or comments below. I will try to help you out if I can (no guarantees though).
If you found this post helpful, please share it and spread the word!
Want more content like this? Sign up for my newsletter to receive helpful WordPress Tutorials, Tips and Tricks.

