Push notifications are clickable messages shown on a computer’s desktop or in the notifications on a mobile device. They let you easily notify subscribers of new content on your website even when they’re not online, and can be enabled on computers, tablets and even smartphones.
Enabling push notifications is a great way to get your audience returning to your site to check out your new content. You can use them to make sure your readers are notified in a timely manner.
Since your website is built using self-hosted WordPress, adding push notifications is a quick and easy process. In this guide, we’ll show you how to add push notifications to your site, and configure them for both computers and mobile devices (smartphones and tablets).
If you’re looking for quality shared hosting for your WordPress website, we highly recommend A2 Hosting. They offer unlimited SSD space, free automatic site backups, hosting optimized for speed and 24/7/365 guru technical support.
- Reasons to add push notifications to your WordPress website
- Step #1: Adding web push notifications to WordPress using OneSignal
- Step #2: Configuring OneSignal push notifications
- Step #3: Customizing the push notification popup
- Step #4: Customizing the bell notification icon
- Step #5: Sending push notifications from your WordPress website
- Step #6: Creating a welcome push notification for new subscribers (optional)
- Conclusion
Reasons to add push notifications to your WordPress website
Since over 70% of your site visitors will never return, it’s essential that you try to convert them into subscribers.
There are a number of channels you can use to get people to subscribe to your content, including:
- social media
- email marketing
- SMS marketing
- web push notifications
Of those mentioned above, email marketing is still the most widely-used and effective, but push notification are becoming more and more popular.
A few reasons why push notifications work well:
- As with email marketing subscribers, people need to explicitly agree to receive push notifications. This fact alone means that they’re already interested in your content, and thus more likely to engage with notifications.
- People can subscribe to push notifications with a single click.
- Nearly all push notifications are delivered because they don’t rely on any algorithms.
- Push notifications can be controlled by subscribers – they can be paused or completely turned off easily.
- They are unique, as not too many companies are using them.
Huge websites like Facebook, LinkedIn and Pinterest have started using push notifications because they realize how unbelievably effective they are.
Web push notifications are more engaging than email marketing, SMS and social media sharing. According to this infographic by Oracle, they have a 50% higher open rate than email marketing, and 2x CTR (click through rate).
Now that you know the benefits of push notifications, let’s see how simple it is to add them to your WordPress website.
Step #1: Adding web push notifications to WordPress using OneSignal
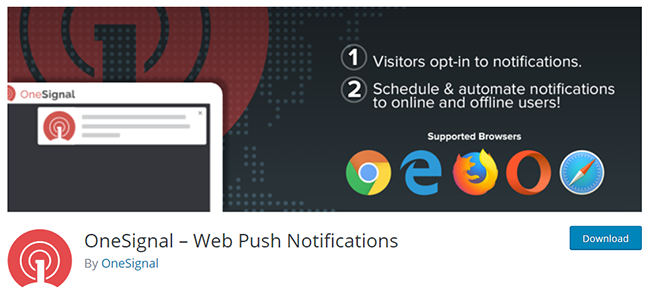
If you’re looking to add web push notifications to your WordPress, OneSignal is the way to go.
It is a free service which makes it super simple to add push notifications to any website.
To get started, you’ll need to install the OneSignal plugin. Go to Plugins > Add New and search for OneSignal.
Once you install and activate the plugin, you’ll see a new menu item in the sidebar of your WordPress dashboard called OneSignal Push.

Click on it to configure settings for OneSignal, which are divided into Setup and Configuration tabs.

In order to set up OneSignal, you will need both an API Key and APP ID, which you can get from the OneSignal website.
Step #2: Configuring OneSignal push notifications
Go to OneSignal.com, click the Start for Free button, then enter your name, email and Company or Organization Name. Next, click the Create Account button.
Alternatively, you can sign up with your Facebook, Google or GitHub account.
Please Note: OneSignal’s free plan includes unlimited mobile and up to 30,000 web push subscribers.
Once you complete the signup process, you’ll be taken to the OneSignal dashboard.
Choose a name for your app which helps you identify it (you can simply use your domain name to keep things simple). Then, click the Add App button.
On the next screen, you’ll need to choose a platform for your push notification app. Select Web Push and click the Next button.
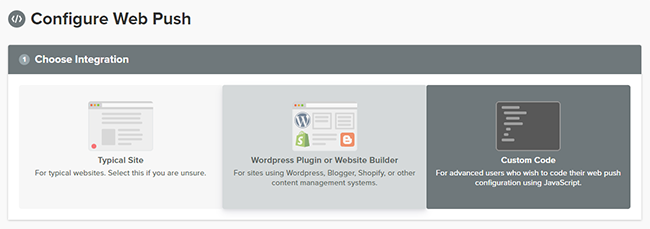
You will then be taken to a page where you need to choose the type of integration to be used. Select WordPress, then scroll down the page a bit.
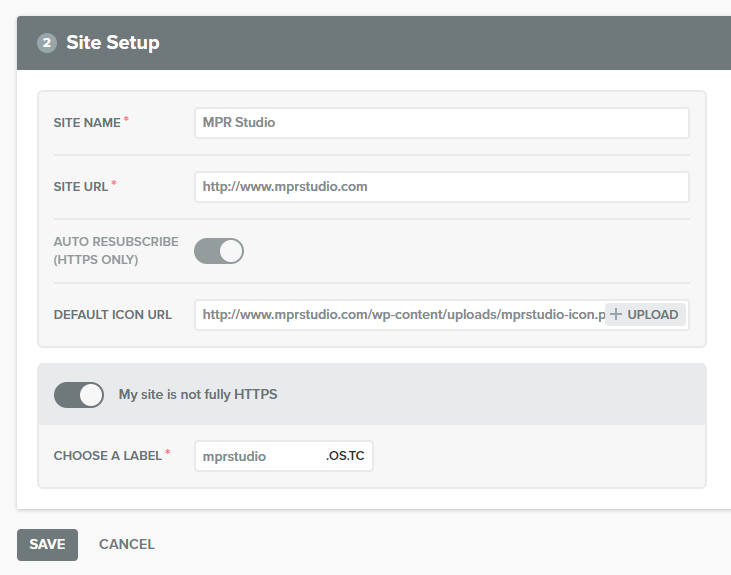
Here you’ll enter the following details:
- Site Name
- Site URL
- Default Icon URL (see instructions below to copy the image path from the image in your WordPress media library)
To get your site icon (favicon) URL, simply head over to your WordPress media library and locate your site icon. Then, click on the media item and go down to the Copy Link field and grab the URL.
Below the default icon URL field, you’ll see a toggle switch that you can enable if for some reason your site is not using SSL. If you turn it on, you’ll need to enter a label in the Choose A Label field. This label is a secure subdomain hosted on OneSignal servers, which will be used to send your site’s push notifications.
IMPORTANT: It is highly recommended that you use SSL on your website, and there’s really no reason not to nowadays. You can get free SSL certificates from Let’s Encrypt, and they’re easy to install on most web hosts.
Once you’ve entered all information on this page, click the Save button.
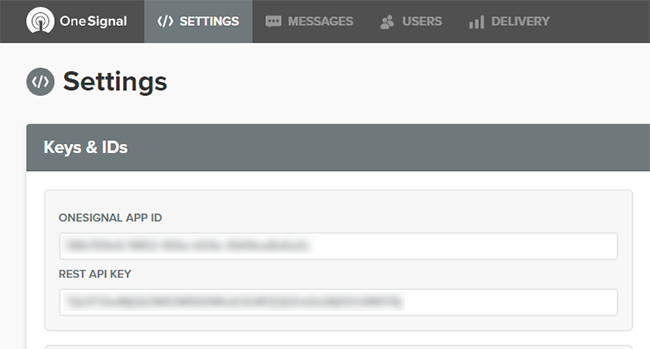
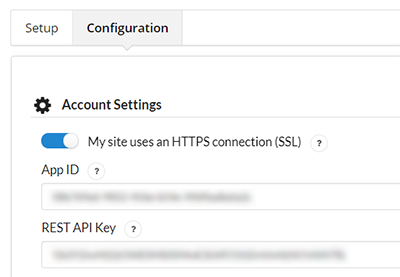
With your changes saved, you’ll now see your APP ID and API KEY, which you’ll need to copy and paste in the OneSignal plugin Configuration tab of your WordPress dashboard.
The App ID and REST API Key only let you send push notifications using Chrome and Firefox browsers.
In order to send push notifications in Safari, you’ll need to get a Safari Web ID.

Go back to the OneSignal site, and click on Settings at the top. Next, click the pencil icon next to Apple Safari under Web Push Platforms.
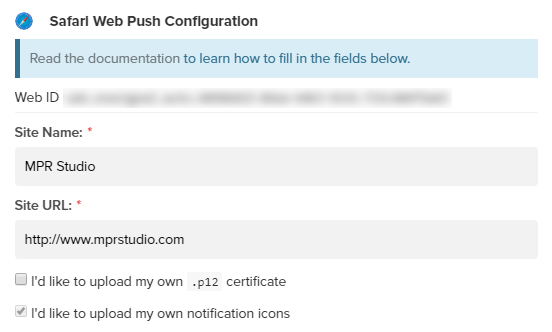
Here, you’ll need to enter the following information:
- Site Name
- Site URL
You can also upload a site icon, which is recommended. Click on the box next to “I’d like to upload my own notification icons.” Then, you’ll see the following screen where you can upload an icon from a source of your choice by clicking the Choose File button.
Once you click the Save button, you’ll see your Safari Web ID which you’ll need to copy and paste in the OneSignal configuration tab in WordPress.

Once you’ve pasted the Safari Web ID in the configuration tab of the OneSignal plugin in your WordPress dashboard, don’t forget to save your changes.
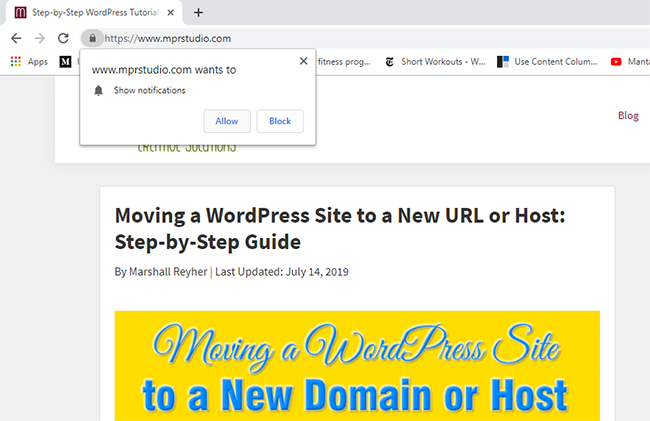
To make sure push notifications are working, you can visit your site in an incognito window in Chrome, Firefox or Safari.
You should see a push notification popup at the top under the browser address bar, as well as a bell icon in the bottom left or right-hand corner of your screen.
In addition to desktops, laptops and tablets, you will also see a push notification popup in mobile browsers.
Step #3: Customizing the push notification popup
The basic push notification popup is pretty straightforward. It displays your logo and uses basic language. Feel free to customize it and make it more personal.
In order to adjust the look of the push notification popup, click on the Configuration tab, and then scroll down to the HTTP Pop-Up Settings section.
Then, click the toggle switch next to Customize the HTTP Pop-Up Prompt text. Now, you’ll be able to enter personalized messages in the following fields:
- Action Message
- Auto Accept Title (Click Allow)
- Site Name
Step #4: Customizing the bell notification icon
The browser prompt for push notifications and popup displayed near the top of your browser window disappear as soon as a user closes them.
This makes sense, but what if a visitor changes her mind, and wants to subscribe to your push notifications?
OneSignal also has a bell icon which can be shown all the time, making it easy for someone to subscribe to push notifications even after closing the popup.
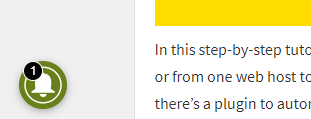
The bell icon can be fully customized to fit your brand or theme colors, which is a nice touch.
In the Configuration tab of OneSignal, go to the Prompt Settings & Subscription Bell area and enable the options you want to use.
Once you’ve turned on the toggle switches, you can then scroll down and adjust the settings for each enabled option.
Step #5: Sending push notifications from your WordPress website
OneSignal automatically sends web push notifications for all newly-published posts on your site. You can turn this off globally in the Configuration tab in the Automatic Notification Settings area.

This is helpful if you want to manually send out push notifications when you publish or update a post. You can do this by going to Document on the right side of the new WordPress Gutenberg editor, then scrolling down to the OneSignal Push Notifications dropdown section and checking the box next to Send notification on post update.
Then, when you click the update or publish button for that specific post, push notifications will automatically be sent to your subscribers.
Step #6: Creating a welcome push notification for new subscribers (optional)
In addition to sending push notifications for new site content, you can create one to welcome your new subscribers. To do this, go to the OneSignal Push link in the left sidebar of your WordPress dashboard.
Then, click on the Configuration tab and scroll down to the Welcome Notification Settings area.
Enable the toggle switch, and you can customize the Title, Message and URL fields if you’d like. You can also leave them set to the defaults.
Now, when a new user subscribes to push notifications, they will receive a welcome message.
Conclusion
Well, there you have it. In this tutorial, I’ve shown you how to quickly and easily add web push notifications to your site using OneSignal’s service in conjunction with their WordPress plugin.
While there are other web push notification plugins you could use, at MPR Studio we use and highly recommend OneSignal.
OneSignal is great because:
- They offer a free WordPress plugin with unlimited web and mobile push notifications for up to 30,000 subscribers.
- All of their plans (including the free one) include advanced features such as segmentation, localization, Google Analytics tracking, and a full-fledged API.
- It can be synced with all of the leading email marketing services to send your email newsletters using web push notifications.
If you have any questions or comments, feel free to leave them below. I will try my best to help you out and point you in the right direction.
If you found this post helpful, please share it and spread the word!
Want more content like this? Sign up for my newsletter to receive helpful WordPress Tutorials, Tips and Tricks.

