Are you planning to install an SSL certificate and move your WordPress website from HTTP to HTTPS? As of July 2018, Google’s Chrome browser has been displaying sites as Not secure in the browser bar if they do not use HTTPS (this does not look good for user trust).
In this tutorial, you will learn how to quickly and easily move your WordPress site from HTTP to HTTPS by adding a SSL certificate.
If you’re looking for quality shared hosting for your WordPress website, we highly recommend A2 Hosting. They offer unlimited SSD space, free automatic site backups, hosting optimized for speed and 24/7/365 guru technical support.
What exactly is HTTPS?
HTTPS is simply an encryption method which assures a secure connection between a user’s browser and web server hosting your website. This helps protect against hackers who may try to intercept information being shared.
People share personal information with various websites on a daily basis, whether it’s login info or credit card details when making a purchase. To protect this data, a secure connection must be used.
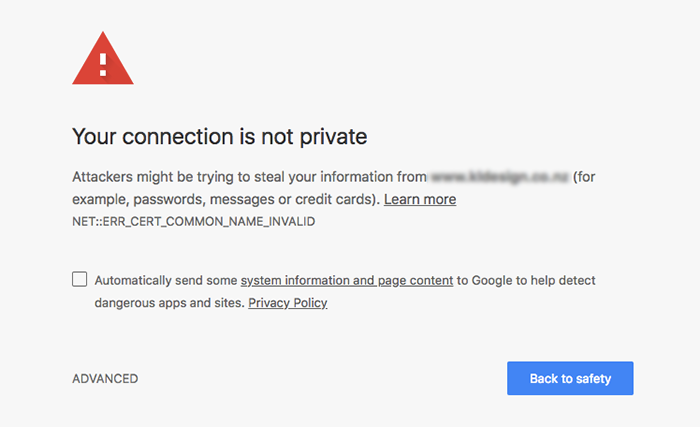
This is where SSL and HTTPS come into play. Every website is issued a unique SSL certificate to identify it properly. If a site is pretending to use HTTPS and its certificate doesn’t match, modern web browsers will show a warning to visitors (see screenshot above for the one shown in Google Chrome).
Why you should move to HTTPS
You may be wondering why you should move your WordPress website from HTTP to HTTPS, especially if you don’t collect sensitive personal information.
In 2018, Google said that they were planning to improve website safety by strongly urging people to switch from HTTP to HTTPS. As mentioned in the intro above, the highly-popular Google Chrome web browser explicitly shows all websites without an SSL certificate as Not Secure next to the site URL in the browser bar.
Authenticity and trustworthiness
The Not Secure label makes your site look bad and gives visitors a poor first impression of your business. This is yet another reason why it’s imperative that you make the switch from HTTP to HTTPS.

Not only does the padlock mean that your site traffic is encrypted, but it also makes your site look authentic and like one that can generally be trusted.
SEO benefits
Having an SSL certificate on your site gives you a slight ranking boost in terms of SEO. Basically, if two sites are identical in terms of content, the one using HTTPS will outrank the other in search results.
Faster site speed
Websites using HTTPS are significantly faster than those without. Site speed is extremely important, as visitors will simply NOT wait for your website to load. They will simply look elsewhere.
There are a number of factors that affect your site speed, including the theme and plugins you’re using, your web hosting and properly optimized images, among others.
Handling sensitive information
If you want to accept payments securely in your online shop, then having an SSL certificate is an absolute must. The majority of payment processors (including Stripe, PayPal Pro, Authorize.net) will force you to use HTTPS before you are able to accept any online payments.
What you need to use HTTPS on a WordPress site
To make your WordPress site use HTTPS , you just need to get an SSL certificate. Many reputable web hosts offer Let’s Encrypt SSL certificates for free, and let you install them directly in your account’s cPanel.
Installing a Let’s Encrypt certificate in cPanel
Log in to your cPanel and click on the Let’s Encrypt icon in the Security section.
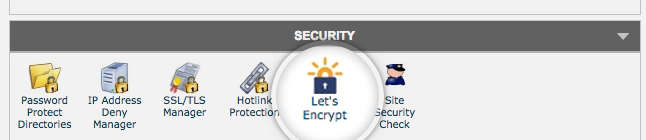
Here, you’ll see a list of the active Let’s Encrypt certificates in your hosting account (if you have any). To install a new certificate, simply select your domain from the dropdown and choose either Let’s Encrypt SSL or Let’s Encrypt Wildcard SSL (if you have subdomains).
Then, click the Install button and your SSL certificate will be added to your domain shortly.
If you’re using a hosting company which does not offer a free SSL certificate, then you’ll need to purchase one. Once you buy an SSL certificate, you can ask your hosting’s tech support to install it for you.
Setting up your WordPress site to use HTTPS
Once your SSL certificate has been installed on your website, you will need to adjust WordPress settings to use the HTTPS protocol on your site.
There are two ways you can do this:
- With a plugin
- Manually
IMPORTANT: Before you get started, you should make a full backup of your website. This way, if anything goes wrong you can quickly and easily restore your site.
Setting up HTTPS using a plugin
Using a plugin to set up HTTPS on your WordPress site is easier than doing manually.
To get started, you need to install and activate the Really Simple SSL plugin. Go to Plugins > Add New in your WordPress dashboard’s left sidebar and search for Really Simple SSL.
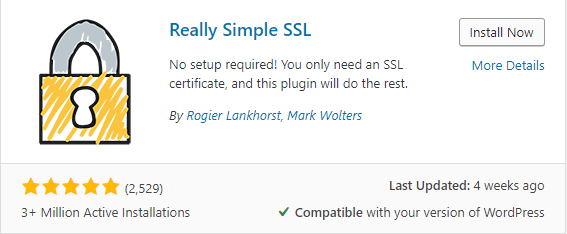
Once you install and activate it, go to Settings and click on SSL.
This plugin will detect the SSL certificate on your site, and does the following for you automatically:
- Checks for your SSL certificate.
- Configures WordPress to use https in all site URLs (e.g. https://yoursite.com).
- Sets up redirects from http to https for your entire site.
- Identifies URLs in your content that are still loading from http sources and tries to fix them (e.g. images and other media).
IMPORTANT: Really Simple SSL tries to fix mixed content errors with the output buffering technique, which can have a negative effect on your site’s performance. Generally, this should only affect the first page load, and should be minimized with a good caching plugin.
Setting up HTTPS manually in WordPress
While setting up HTTPS using a plugin is quicker and easier, doing it manually is a better solution. As a rule, you don’t want to use a plugin if you can accomplish what you need without it.
Configuring HTTPS manually is a little more complicated, as you will need to edit your WordPress theme files and add some code to them.
Updating the WordPress and site address
The first step to moving your WordPress site to HTTPS is changing the WordPress and Site Address. Go to Settings > General and add https:// to the beginning of both URLs.
To save your changes, click the Save Changes button at the bottom of the page.
Changing links in your content and MySQL database
The next step is updating any links within your content and MySQL database which include the old HTTP protocol. It’s always best practice to use relative URLs so that you don’t have to worry about this (e.g. if linking to your contact page, then you’d simply insert /contact/ as the link instead of https://yoursite.com/contact/).
There are some tools you can use to replace all of your links in bulk, including the Velvet Blues Update URLs plugin which we’ll use.
Since updating all links in your content and MySQL database is a somewhat risky task, you can easily screw up your site if you enter the wrong URL or the operation gets stuck. This is why it’s SUPER IMPORTANT that you back up your site beforehand.
Links that will be changed include the following:
- Media items, including images, PDFs and audio files.
- Internal links within your site content.
- CSS files and JavaScript, as well as assets referenced within them.
- and more
Adding 301 redirects in your .htaccess file
Now, you’ll want to set up a redirect which sends all your site visitors to the HTTPS version of your site automatically. To implement this, we’ll simply add a global redirect within your .htaccess file (an important system file on your server, normally in the root directory).
It is used to store info about your permalinks, so you likely already have the file. If you cannot see it in your FTP client, you may have to show hidden files.
In the event that you do not have a .htaccess file, you can simply create a plain text file and name it .htaccess. Then, upload it to the root WordPress directory.
<IfModule mod_rewrite.c>
RewriteEngine On
RewriteCond %{HTTPS} off
RewriteRule ^(.*)$ https://%{HTTP_HOST}%{REQUEST_URI} [L,R=301]
</IfModule>
With this 301 redirect in place, your site visitors (and Google robots) will now be redirected to the HTTPS version of your site. You will want to double-check that none of your site pages are available in both HTTP and HTTPS versions, as that would be duplicate content which is bad from an SEO standpoint.
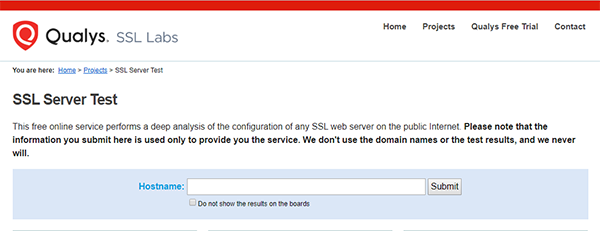
Testing your site
You can now check that your site works correctly using the SSL Test from Qualys. Simply enter your website URL and click the Submit button. Then, be patient and wait for your results.
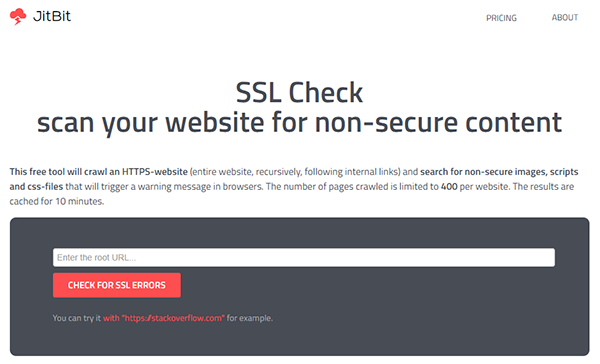
Once that test is done, you can also use JitBit’s SSL Check to search for any non-secure images, scripts and CSS files that would trigger warning messages in web browsers.
Updating your site environment
To make sure you site is totally HTTPS-ready, you’ll need to do a few more things.
Make sure your sitemap is updated – In many cases your SEO plugin will automatically update your permalinks to reflect your switch to HTTPS. If you’re using Yoast SEO, you may need to deactivate and then reactivate it to update your sitemap. In addition, you’ll want to make sure that https url is in your robots.txt file.

Add the HTTPS version to Google Search Console – You should add the new HTTPS version of your website to both Google Search Console and Bing Webmaster Tools. You can also fetch and crawl the new site, and submit your new sitemap with HTTPS in the url.
Switch to SSL in your content delivery network (CDN) – If you’re using a CDN (which helps to speed up your site), you should make sure that HTTPS is turned on there as well. Check the documentation of the CDN service you’re using, or ask their support for assistance if you’re unsure how to do this.
Update the URL in Google Analytics – In your site analytics, you will want to update your URL to include the new HTTPS prefix. You can do this by going to Admin > Property Settings > Default URL.
Save your social share counts – If you have social share counters on your website, you may need to do some things to preserve the proper counts. One thing you’ll definitely want to do is update the links to your website on all social media profiles (e.g. facebook, instagram, twitter, etc.).
Once you’ve taken care of the above-mentioned items, you’ve successfully moved your site from HTTP to HTTPS. Right now, only 0.1% of all sites online use SSL, so you’re definitely in the minority.
HTTPS troubleshooting
Moving your WordPress site to HTTPS is not always free of problems, and you may need to troubleshoot some things.
Mixed content warnings
The most common issues you’ll likely face after moving your site to HTTPS are mixed content warnings. These warnings show up when a web browser finds insecure links within your site content on an otherwise secure page. In most cases, you simply need to update links to media items, custom fonts and other items to make sure they include https://.
In most cases, you will check for any such problems BEFORE you publish your new secure WordPress website. If you see a mixed content warning, take a moment to figure out why and fix the problem.
Another tool you can use to help determine the root of mixed content warnings is Why No Padlock? It will let you know what’s wrong so you can easily fix it.
Temporary drop in search rankings
Switching from HTTP to HTTPS can negatively affect your search rankings in the short term. You’re probably confused now because I told you before that adding SSL to your site will help improve your search rankings.
When you move your site to HTTPS, Google treats your new URLs as separate from your old, insecure ones. Even though you successfully set up 301 redirects earlier, this won’t transfer all of the link juice you had on your old site.
Because of this, you might notice a slight drop in your search rankings temporarily. Worry not. Google prefers secure websites so your site will benefit in the long term.
Conclusion
Making your website secure is extremely important, and helps you build trust among your visitors and potential customers. They will know that they can freely share their sensitive information, and not worry about it ending up in the wrong hands.
In addition, your site will benefit from improved SEO and increased speed when you make the switch to HTTPS. It is now super simple to install a free SSL certificate from Let’s Encrypt, so there’s really no reason not to do it.
Hopefully, this tutorial has shown you how to move your WordPress website from HTTP to HTTPS quickly and easily.
If you have any questions or comments, feel free to leave them below. I will try my best to help you out and point you in the right direction.
If you found this post helpful, please share it and spread the word!
Want more content like this? Sign up for my newsletter to receive helpful WordPress Tutorials, Tips and Tricks.

