
In this step-by-step tutorial, you will learn how to easily move your WordPress site to a new domain or from one web host to another. Doing this manually is a somewhat technical task, but thankfully there’s a plugin to automate the process, making it MUCH easier.
With the All-In-One WP Migration plugin, you can easily export your MySQL database, all media files, themes and plugins. Then, you can seamlessly import everything to the destination site.
Read This: In this tutorial, we’re referring to the free version of the All-In-One WP Migration plugin. It has various limitations regarding website size and export destination, among other things. It will work just fine for most sites, but there are times when you may need to use one of ServMask’s premium extensions.
There are a number of reasons you’d want to move your WordPress site, including:
- Switching to a new web host
- Changing your domain name
- Moving a development site to the live URL
Regardless of why you want to move your website, All-In-One WP Migration will help you complete the process quickly and easily.
Let’s get started shall we?
If you have any questions about the process, please leave a comment at the end of the post and I’ll do my best to help you.
If you’re looking for quality shared hosting for your WordPress website, we highly recommend A2 Hosting. They offer unlimited SSD space, free automatic site backups, hosting optimized for speed and 24/7/365 guru technical support.
Installing All-In-One WP Migration
To get started, you’ll need to install and activate the All-In-One WP Migration plugin, which can be found in the WordPress repository. This means that you install and activated directly in your dashboard.
Log in to the WordPress dashboard of the site you’re moving.
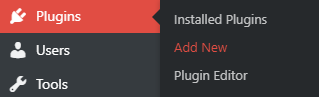
In the left sidebar, click on Plugins > Add New.
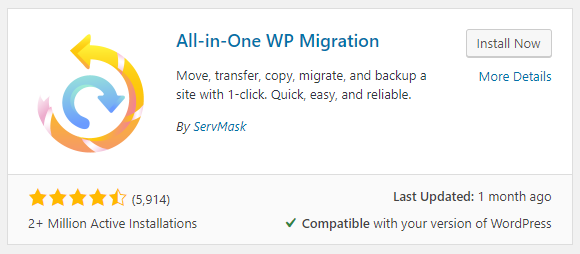
Search for “All In One WP Migration” and locate the plugin from ServMask.
Click on the Install Now button, followed by Activate.
Exporting your WordPress site
All-In-One WP Migration is a very minimal plugin, and as such, doesn’t really have any settings to configure prior to export. They use a very simple approach to migrating your site.
The plugin only exports your site content and MySQL database, not the WordPress installation itself. This means that you need to install WordPress on the destination site before importing the file you exported.

Go to Tools > All-In-One WP Migration in the left sidebar, and click on Export.
This will bring you to the following screen where you can configure the export.

In the Find/Replace box at the top, you can find and replace certain terms in the MySQL database if need be (I’ve never used this, but there may be cases where you’d want to).
Click on the Advanced options link to see the following options:
- Do not export spam comments
- Do not export post revisions
- Do not export media library (files)
- Do not export themes (files)
- Do not export must-use plugins (files)
- Do not export plugins (files)
- Do not export database (SQL)
- Do not replace email domain (SQL)
If you want to exclude certain items from being exported, check the appropriate boxes.
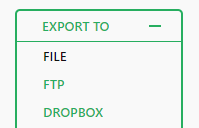
Next, click the Export To button near the bottom. In the dropdown menu, select File (the free version only lets you export to a file).
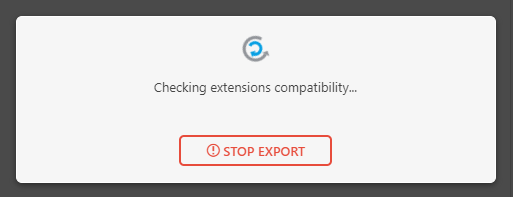
Then, you’ll see progress popup letting you know that the file is being exported.
The export process may take some time depending on the size of your site and internet speed, so be patient while you let the plugin do its thing.
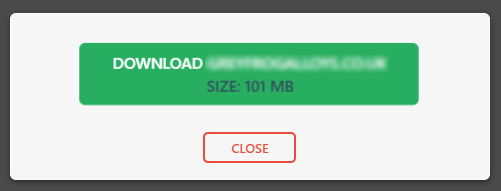
Then, click Download in the popup that appears once the export is finished. Save the .wpress file on your computer and make note of its location.
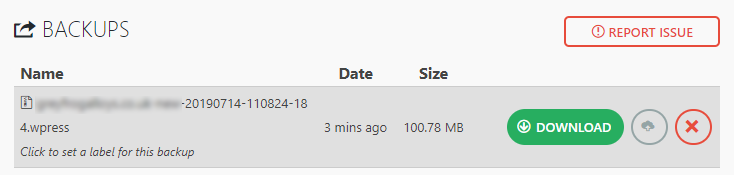
The exported file can also be found in the Backups section under All-In-One WP Migrations > Backups. You can always download the export file here as well.
Importing your WordPress site
Now you have your export file, so you’re ready for the second half of the migration process. No matter whether you’re moving your site from a local site to a new server or from one web host to another, the process is same.
In order to import your site, you’ll need to have WordPress installed on the destination site. If your host uses cPanel, then installing WordPress is really simple. You can also do it manually if need be, but it’s a little more work. Check out my WordPress setup guide for step-by-step instructions for installing WordPress.
Once you have a fresh copy of WordPress installed on your destination URL, proceed with the steps below.
Install and activate All-In-One WP Migration on the site that you’re moving to.

In the left sidebar, go to Tools > All-In-One WP Migration and click on Import.
This will bring you to the screen below.
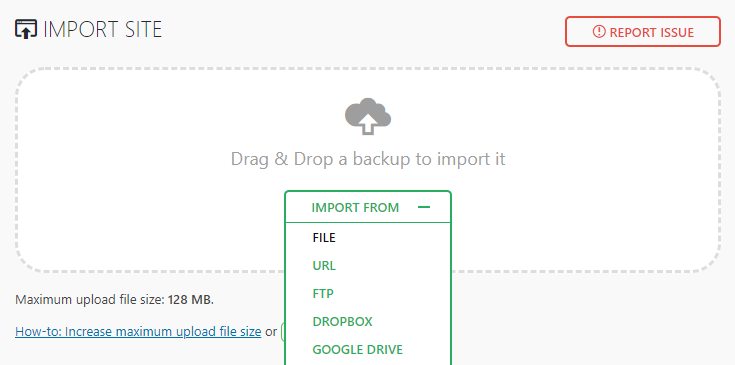
Locate the .wpress file you exported before. Then, you can do either of the following to import the file:
- Drag and drop it in the window provided
- Click the Import From, select File from the dropdown, locate the file on your computer and click Open.


Once the import process has finished, you’ll see a popup with a message letting you know that your database, media items, plugins and themes will be overwritten if you proceed. Click the Continue button to complete the import process.
Now, you’ll see a popup letting you know that all your data has been successfully imported. Log out of your WordPress dashboard.
Log back in to your WordPress dashboard using the username and password from the site you exported.
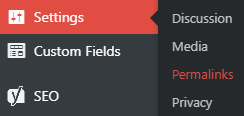
Go to Settings > Permalinks and click on the Save Changes button at the bottom of the page.
Now that you’ve successfully imported your site, you’ll want to check to make sure everything looks good and works as it should.
Conclusion
As with any technical task, moving your WordPress site from one domain or host to another may seem overwhelming. Thanks to All-In-One WP Migration, moving your website is a quick, simple process that won’t make you want to pull your hair out.
Feel free to browse my growing collection of helpful step-by-step WordPress tutorials.
If you have any questions or comments, feel free to leave them below. I will try my best to help you out and point you in the right direction.
If you found this post helpful, please share it and spread the word!
Want more content like this? Sign up for my newsletter to receive helpful WordPress Tutorials, Tips and Tricks.

