
Email marketing is much more effective than social media when it comes to staying in touch with your readers. Not only can it can help you generate more traffic from repeat visitors, but it can boost your conversion rate too.
Building an email list and newsletter can help you harness your blog’s full marketing potential.
You can send out all kinds of emails, including:
- Fresh content – blog posts, podcast episodes, YouTube videos
- Company updates
- Upcoming events
- Promotional offers
In this comprehensive tutorial, you will learn how to set up an email list using WordPress and MailChimp.
What is an email list?
It is a list of people who have subscribed to receive regular email updates from you or your company. Generally, people are added to your email list by opting in on your website. This can be either a pop-up or embedded form where they enter their name and email address. You can gather more information from them based on your specific needs, but most people keep it simply and only collect name and email address.
IMPORTANT: To comply with the CAN-SPAM Act, it’s important that you NEVER add a bunch of email addresses to an email list, but that they explicitly consent to receiving your emails by signing up themselves. In addition, you must make it easy for people to unsubscribe by including a link in the footer of all your emails.
Sending out email newsletters is an excellent way of staying in touch with your readers. You can even automate certain aspects of your newsletters with the help of an email marketing service.
There are many available services to choose from, including the following:
- MailChimp
- Constant Contact
- AWeber
- GetResponse
- ConvertKit
- SendinBlue
Email is a very effective form of communication, and lets you easily notify your readers of new products, special promotions, upcoming events or company announcements.
Why is email marketing important?
Email marketing is known to be one of the most effective ways to reach readers, and often outperforms social media in terms of the amount of clicks and CTR per campaign.
You may be wondering why email marketing performs so well? The answer is simple. Email is much more personal than social media, and therefore generally converts better. It is also private, which helps create a better connection between you and your readers.
Reasons to start building an email list:
Better reach – When you post on Facebook, Instagram or Twitter, your updates will often not be seen by your followers due to the nature of those platforms. Their algorithms basically decide who sees your stuff and who doesn’t because they want you to pay for advertising. When you send an email, it is much more likely to be seen by the recipient. While there is no such thing as “guaranteed reach,” sending an email is one of the better options.
Content ownership – With social media, you don’t own the content that you post. You are always susceptible to having your account shut down and losing all your followers. While this generally won’t happen if you follow the rules, you have much more control and options with an email list.
Great form of communication – While some may think that email is kind of outdated, this is definitely not the case. It is still one of the most reliable forms of electronic communication, and it is here to stay. Building an email list is generally easier than getting a lot of followers on social media.
When you send an email, it gets delivered to all your subscribers and there is a much better chance that they’ll actually see it. Of course, sometimes your email may be marked as junk or spam and therefore not seen, but more on that later.
How to start building your email list
In order to get started building an email list, you will need to select an email marketing service.
These companies spend a lot of money and time working on their email infrastructure, and can almost ensure that your email will arrive in the recipient’s inbox.
Even gigantic tech companies use third-party email marketing services to send out emails. In addition to excellent email deliverability, they provide you with a wide variety of marketing tools you can use to make your emails more effective.
Choose an email marketing service
There are a number of quality email marketing services you could use, but we are going to focus on MailChimp in this tutorial.
Here are a few reasons why Mailchimp stands out:
It is free up to 2,000 subscribers – For small businesses on a budget, you can get started for free on MailChimp. While their basic plan lacks a few features available in their paid plans, it’s more than enough to start your email marketing efforts.
Simple and easy-to-use interface – With any online tool or software, user experience is super important. MailChimp’s interface is both easy to use and well-designed, which makes for a pleasant user experience.
Detailed analytics – In email marketing, it is vital that you understand your subscribers’ behavior. MailChimp provides you with useful user data, such as:
- Open and click rates
- How your campaigns are performing compared to the industry average
- Who has subscribed and unsubscribed
Sign up for a Mailchimp account
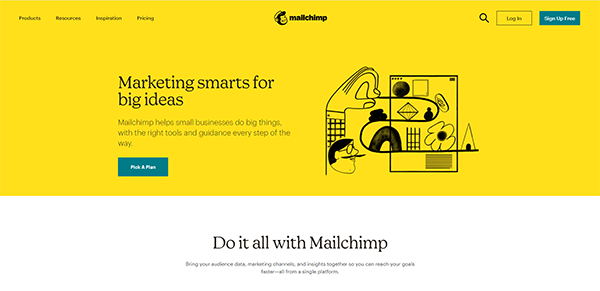
To sign up for an account with Mailchimp, go to https://mailchimp.com/ and click the Sign Up Free button.

Then, you will need to enter the following:
- Username
- Password
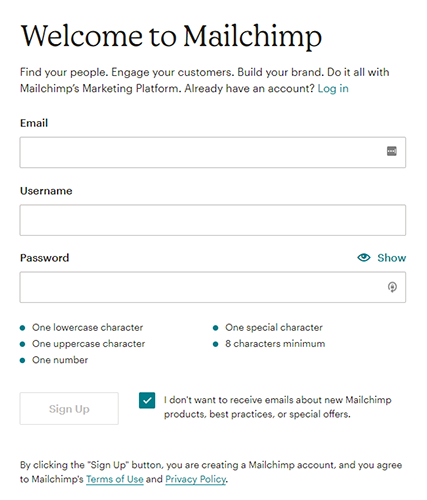
Specify whether you want to receive emails about new Mailchimp products, best practices or special offers, then click the Sign Up button.
After signing up, you will receive an activation email. Click the link to activate your account.
Enter your details
You will be asked for required profile information the first time you log in to your account. This is used to help provide you with content that is relevant to you and your business’s needs. It also helps Mailchimp make sure that your account is compliant with their Terms of Use.
You will need to enter the following to complete the signup process:
Name – This is the name associated with your account profile. It is unique to you and can be used to access multiple accounts.
Email Address – An email address where Mailchimp can easily reach you. This doesn’t have to be the same one you use as a reply email address in your campaigns.
Organization Questions – You will be asked for some information about your company that Mailchimp will use to provide you with relevant content and guidance.
Organization Name – The official name of your company or organization, which will appear on every email along with your physical address.
Website URL – The website URL for your company, organization or personal webpage.
Physical Address – A mailing address where you can receive snail mail. It is required by law to include your physical address on every email you send out. This could be a business address, personal address or a P.O. Box.
Once you enter the above information, follow the prompts to finish the signup process and log into your account.
Verify your email domain
To make sure your From email address is hosted at a domain that you control, you will need to verify your domain. You will need to go through Mailchimp’s verification process before you can send out any emails.
It is much better to send out email campaigns from a personal or company domain. A number of free email providers have DMARC authentication policies implemented, which can negatively affect the delivery of email campaigns coming from a free provider’s From email address.
In order to verify your email domain, do the following:
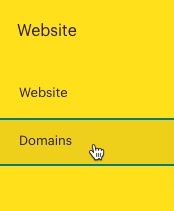
Click on the Website icon in the sidebar, then select Domains.
Under Email Domains, click the Verify Email Domain button.

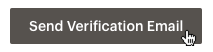
Enter the email address that you’d like to verify and click Send Verification Email.
Keep an eye out for the verification email. You can either click the Verify Domain Access button within the email or enter the verification code in the popup window in your MailChimp account, then click Verify. After the screen refreshes, you will see a success message at the top of the screen or on a popup.
Once verified, you’ll see the following message.
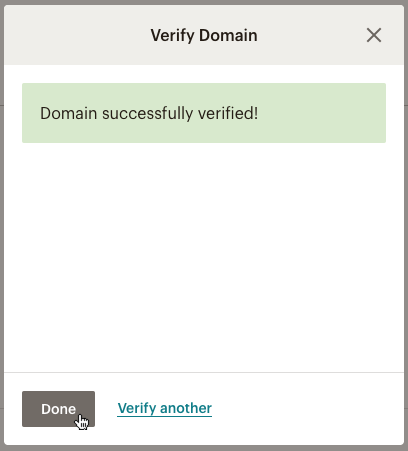
You have successfully verified your domain, and will now be able to send email campaigns.
Create a Mailchimp audience
Before you can start adding people to your email list, you will need to create an audience in Mailchimp. Your audience is where you will store and manage all your email list contacts.
Some things to keep in mind regarding your audience:
- The number of audiences you can use in your account depends on which plan you are using.
- Mailchimp recommends using a single primary audience. If you need to organize or target specific contacts within an audience, you can do so with the help of tags and segments.
IMPORTANT: Before you create your audience, make sure you’re familiar with and adhere to Mailchimp’s anti-spam rules and audience requirements.
When you set up a Mailchimp account, an audience is generated for you automatically using the details you provided. If you need to create a new audience, follow the steps below.
- Click the Audience icon in the left sidebar.
- Select the Audience dashboard.
- Click either the Current or Manage Audience drop-down and select View audiences. If you have more than , choose View audiences.
- Click the Create Audience button in the confirmation box.
- Enter the details of your audience in the fields provided.
- Check the Contact information for your audience and edit if need be.
- Under Form Settings, select the opt-in method you’d like to use for your audience. If you select the Enable double opt-in checkbox, new subscribers will receive an opt-in email which they must confirm in order to be added to your list.
- Enter your email address where you want to receive audience notifications, and select which ones.
- Once finished, click Save.
Now that you’ve created an audience, you can import contacts or set up a signup form to get new subscribers.
Add an opt-in to your site
Now that you’ve set up your Mailchimp account, you’re ready to start collecting email addresses and growing your list. There are a few different ways you can do this.
You can use a popup CTA or form to capture new subscribers.
Capture email subscribers with a popup
You can use a popup to grow your email list with the Popup Maker and MC4WP: Mailchimp for WordPress plugins.
Go to Plugins > Add New in the sidebar of your WordPress dashboard and search for Popup Maker.
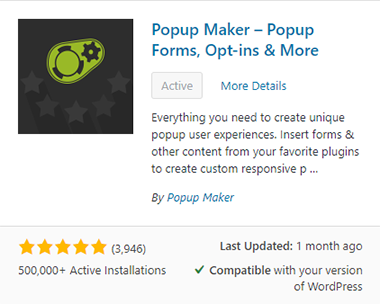
Click on Install, and then Activate. Then, do the same with MC4WP: Mailchimp for WordPress.
Once you have both plugins installed and activated, you’re ready to create your first popup call-to-action.
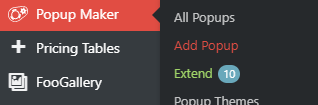
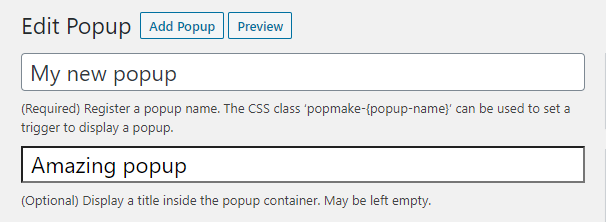
Go to Popup Maker > Add Popup in the left sidebar of your dashboard. Choose a name for your popup and enter a title which will appear at the top of your popup. You want to use something catchy that will encourage people to sign up for your list.
Go ahead and hit Save Draft.
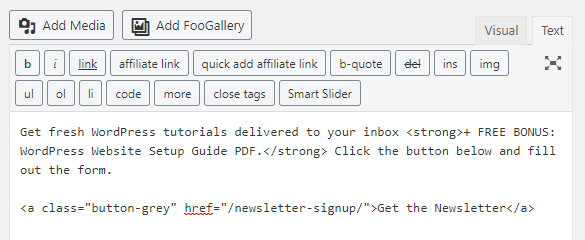
Next, add content for the body of your popup in the editor. Here, you can include a sentence. Then, we’ll use a shortcode from MC4WP: Mailchimp for WordPress, which we’ll configure in a moment.
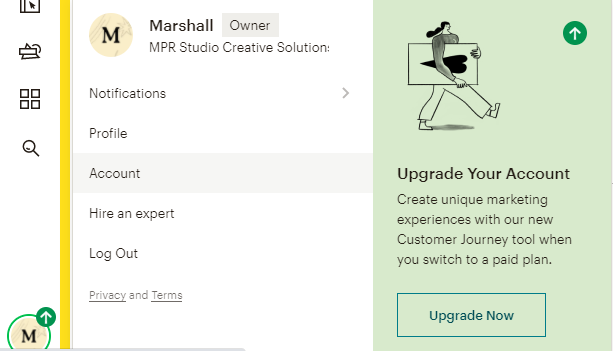
First, log in to your Mailchimp account and click on your profile icon in the lower left-hand corner. Then, click the Account link.
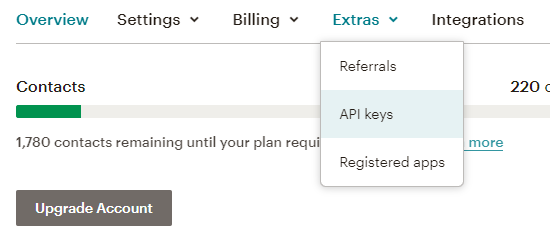
Then, hover over the Extras tab and choose API Keys.
On the next screen, simply click the Create A Key button and then copy your newly-created key.
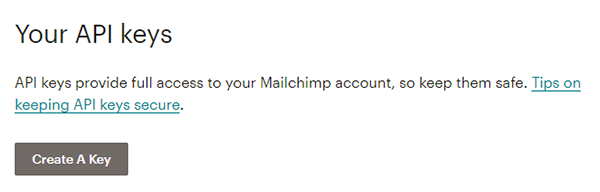
IMPORTANT: API Keys provide complete access to your Mailchimp account, so keep them safe and don’t share them with anyone.
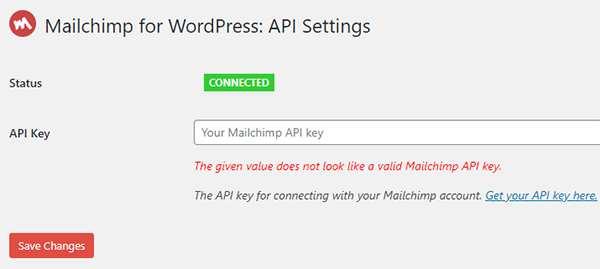
Next, go to MC4WP in the sidebar and select Mailchimp.

On the next screen, enter your Mailchimp API Key and hit the Save Changes button.
Now, you can configure the fields you’d like to use for your popup. In most cases, Name, Email Address and Submit are all you’ll need.
Go to MC4WP > Form and give your form a name (something simple and relevant like “Subscribe” works just fine).

Under List Fields, click on Name and then configure the options you want to use.
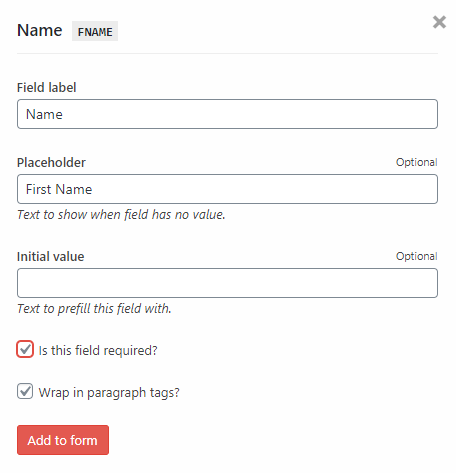
Then, click Add to form.
Repeat this process for Email Address, and then do the same for Submit button too.
Once you’ve saved your form, you want to copy the shortcode, which you will paste on your popup.
Go back to the popup that you saved before, and add the shortcode you just copied from the MC4WP form settings.
Save your popup, and preview it on the front end to see what it looks like. If you’re happy with it, then it’s good to go. Otherwise, adjust it as you see fit.
Capture email subscribers with a form
You can also capture email subscribers using a form on your website. This could include an embedded form that you create using the Form Builder in your Mailchimp account or a contact form with a checkbox that is connected to your email audience.
Create a form with the Mailchimp form builder
Mailchimp makes it easy to create an embedded form using their form builder. It is comprised of three tabs – Build It, Design It and Translate It.
Build It – Here, you can add structure and content to your signup form and response emails. You can add or remove audience fields, and change their settings too.
Design It – In this tab, you can edit the style, color, font, and graphics of your signup form, as well as the response emails. Design changes made here will be inherited by all your other pages and response emails. This is good because it helps build brand consistency, and saves you time too.
Translate It – Here, you can translate your signup form and response emails, or simply customize the default text. Mailchimp supports over 50 languages. Even if you don’t need to translate anything, you can still modify default text on form buttons and in error messages.
Once you’ve created your form with the form builder, you can select a form option, customize settings and generate code to embed on your website.
Follow these steps to get the code to add to your site:
- Click the Audience icon the left sidebar of your Mailchimp account, then select Audience Dashboard.
- If you have more than one audience, select the Current audience dropdown and choose the one you want to use.
- Click the Manage Audience dropdown and select Signup forms.
- Select Embedded forms and then select from Classic, Condensed, Horizontal or Unstyled. Customize the Form Options as per your needs.
- Select all the code in the Copy/paste onto your site field and copy it.
- Paste the copied embed form code in any HTML-ready area where you want the form to appear on your website (it could go on a page, post or in a text widget).
IMPORTANT: In my experience, it’s best to have Javascript disabled in the form code, or use the Unstyled form on WordPress websites.
For more about signup forms in Mailchimp, click here.
Create a form with Contact Form 7 & Chimpmatic Lite
Beyond adding an embedded form as mentioned above, you can also easily use Contact Form 7 in conjunction with Chimpmatic Lite to add subscribers to your Mailchimp list. It’s a smart idea to make it super easy for people to sign up for your email list, so it doesn’t hurt to use multiple methods.
On my site, I have a newsletter popup, newsletter signup page in the main navigation menu, as well as a link to that page in the sidebar.
To get started, download and activate both Contact Form 7 and Chimpmatic Lite. Follow my Contact Form 7 guide for help adding your contact form.
Once you’ve created the form you want to use, you’re ready to integrate it with your Mailchimp list using Chimpmatic Lite.

Follow these steps to properly connect your form to Mailchimp:
- Go the Chimpmatic Lite tab of your contact form and enter your Mailchimp API Key. Then, click the big red Connect and Fetch Your Mailing Lists button.
- Choose the mailing list you’d like to use from the dropdown.
- Enter the email and name tags as they appeared in your form. Don’t forget to click the Save button.
Advanced Settings
There are a number of advanced settings for Chimpmatic Lite. To access them, simply click the button near the bottom.
There are some important fields here that you will want to use.
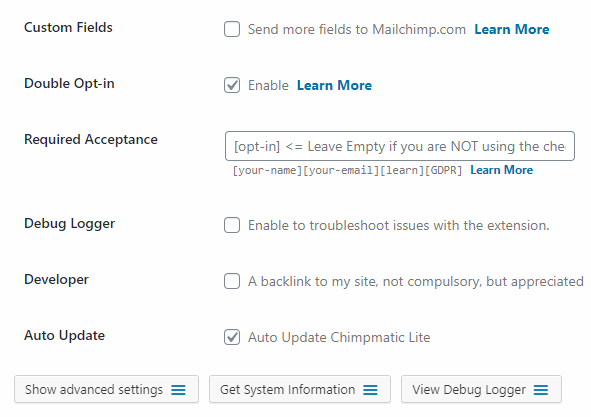
Custom Fields – If you’d like to send more fields to your Mailchimp list, you can add them here by clicking the box and configuring them.
Double Opt-in – I suggest enabling this to prevent spam signups. I’ve had problems with some jerk signing others up without their knowledge, which was a pain. Turning on double opt-in solved that problem.
Required Acceptance – If you’re using an opt-in box to add subscribers to your list, you can enter the tag in this field. Otherwise, leave it blank.
Debug Logger – This is strictly to see any problems if something is wrong with Chimpmatic Lite.
Developer – You can include a backlink to the plugin developer’s site by checking this box.
Auto Update – As with WordPress core, themes and plugins, I suggest enabling auto update.
Conclusion
Building an email list is an excellent way to stay in touch with your readers, regardless of whether you use it to notify them of new content, product promotions, upcoming events, company news or something else. It is generally more effective and personal than any other single marketing channel, and something that you should not overlook.
Hopefully, this WordPress + Mailchimp email marketing tutorial has helped you get your email list set up quickly and easily. If you have any questions or comments, please leave them below and I will try to help you out.
If you found this post helpful, please share it and spread the word!
Want more like this? Sign up for my newsletter to receive helpful WordPress Tutorials, Tips and Tricks.

