One of the reasons self-hosted WordPress is such an amazing CMS is the amount of both free and premium plugins available. What is a plugin? Simply put, a plugin is an extension which adds extra functionality to your WordPress website. There are currently over 55,000 plugins in the WordPress repository, and there are also many premium ones offered on separate developer and vendor websites as well.
When you install a plugin from the WordPress repository, you can easily update it from within your WordPress dashboard.
If you’re looking for quality shared hosting for your WordPress website, we highly recommend A2 Hosting. They offer unlimited SSD space, free automatic site backups, hosting optimized for speed and 24/7/365 guru technical support.
Why would a plugin need to be updated manually?
- In rare cases, a plugin update within the WordPress dashboard will fail and can even break your site. This can happen due to incorrect file permissions, version number or other server configuration issues. If the 1-click plugin update fails, you’ll need to download the plugin .zip file, extract it and manually upload it via FTP.
- With any plugins you’ve downloaded from a vendor’s website, you’ll need to upload and update those manually as well.
Before you start manually updating a plugin, create a backup of your WordPress site. Many hosts automatically back up your site on a regular basis, but it’s good to back it up yourself just in case.
Step #1: Downloading the newest version of the plugin
The first step is to download the latest version of the plugin from its official source, be that a vendor website or the WordPress repository. The downloaded file will likely be a compressed .zip file, which you’ll need to extract.

Step #2: Getting an FTP client if you don’t already have one
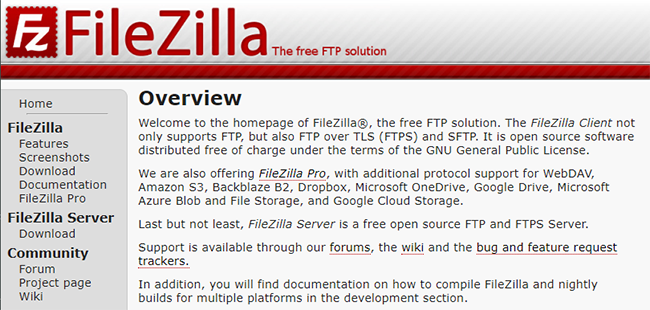
You will be uploading this plugin folder via FTP, so you’ll need a FTP client. I use and highly recommend FileZilla, which works for both Mac and PC. In order to connect to your site using FTP, you’ll need to enter your website name, username and password. You can get all these details from your web host (usually found within cPanel).
Step #3: Renaming and downloading the old version of the plugin
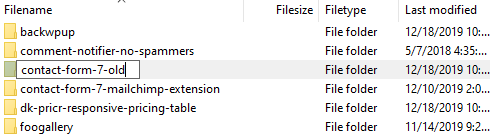
Once you’ve logged in to your site through FTP, you will want to go to the /wp-content/plugins/ folder. Once there, go ahead and locate the folder which contains the plugin you want to update, and rename it. You can right-click on the folder and select Rename from the dropdown. To keep things simple, you can simply add -old to the folder name.
Once you’ve renamed the old plugin, download it to your computer and delete it from your /wp-content/plugins/ folder. This is a smart move just in case something goes wrong and you need to revert back to the old version of the plugin.
Step #4: Uploading the newest version of the plugin
Now, you’re ready to upload the newest version of the plugin. You can simply drag the unzipped folder into your /wp-content/plugins/ folder and be patient while it uploads.
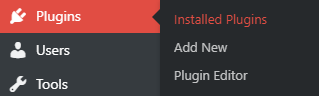
Once the upload is complete, log in to your WordPress dashboard and go to Plugins > Installed Plugins in the left-hand sidebar. Then, check the updated version of the plugin you just installed to ensure everything is working correctly.
Conclusion
That’s all it takes to upload a plugin manually via FTP. If you have any issues with something not working after having updated a plugin, you can always roll it back by removing the -old from the folder you downloaded to your machine and uploading it back to your site.
To keep your WordPress site secure, it’s absolutely essential that you make sure everything is up to date. This includes WordPress core, plugins and themes.
Hopefully, this tutorial has shown you how to quickly and easily update a plugin manually via FTP. Feel free to leave any comments or questions below, and I’ll try my
If you found this post helpful, please share it and spread the word!
Want more content like this? Sign up for my newsletter to receive helpful WordPress Tutorials, Tips and Tricks.

