Are you looking to move your Squarespace website to WordPress? Many people choose Squarespace for its ease of use and drag-and-drop simplicity. The platform makes it super easy to create new pages and posts, as well as upload a variety of media types (images, videos and audio files).
While Squarespace is beginner-friendly, it has limited functionality in many regards. WordPress is much more flexible, and a far superior content management system for your website. In this post, you will learn how to quickly and effectively move your Squarespace site to self-hosted WordPress.
Please Note: Migrating your site from one CMS to another IS NOT simply a matter of moving over the content. It is essentially building a brand new website from scratch.
If you’re looking for quality shared hosting for your WordPress website, we highly recommend A2 Hosting. They offer unlimited SSD space, free automatic site backups, hosting optimized for speed and 24/7/365 guru technical support.
Reasons to migrate
Design
When you build your website on WordPress, you have unlimited options to choose from in terms of theme selection. There are thousands of both free and paid themes available, so you’re sure to find something perfectly suited for your website.
Plugins
One of the reasons WordPress is so popular is the amount of plugins available, including those for SEO, security, website speed and much more. You simply will not find another content management system with as many options as WordPress.
Cost
With self-hosted WordPress, you only need to pay for domain name registration and web hosting. A2 Hosting has good introductory rates, and a lot of people in the know recommend them for shared hosting.
eCommerce
If you’re building an online store, WordPress is an excellent platform. WooCommerce is one of the best eCommerce solutions, and there are many compatible themes to choose from. You can integrate any payment processor easily, including PayPal, Google Checkout, Stripe, Payoneer, Skrill and more.
Check out the video below for helpful instructions to move your content from Squarespace to WordPress:
Pre-migration steps
There are a few things you need to take care of before moving your site from Squarespace to WordPress. Follow the steps below to make sure you’re totally ready for your site migration.
Create a list of your Squarespace URLs
There is a chance that your URL structure (or permalinks) will change once you move to WordPress. You’re going to be totally optimizing your new site, so you want to use short, concise URLs.
If your Squarespace site receives a decent amount of traffic, then it may be a good idea to redirect your old page and post URLs to their new equivalents.
Go through your site and copy all the URLs for every page and post. Then, paste them as a list in a document. It may be helpful for you to take screenshots of each page or post and put them under each URL in your document. This way, you can easily match up everything once you’ve created pages and posts on your WordPress site.
If your site on Squarespace received very little traffic, don’t even worry about creating a list of your old URLs. Instead, you can focus your energy on growing the traffic to your shiny new WordPress site.
Sign up for web hosting
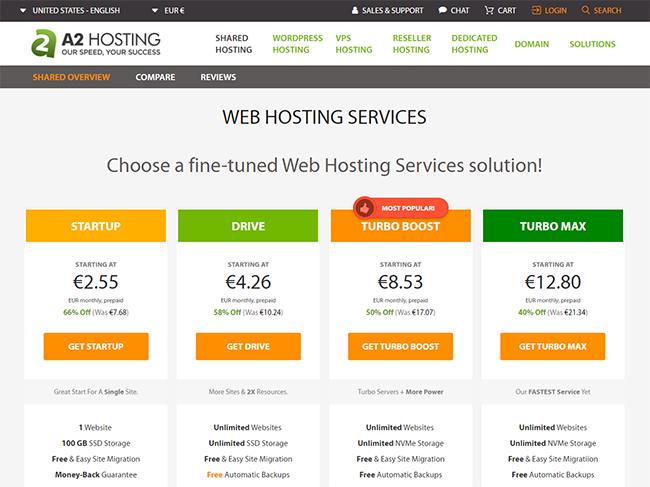
Squarespace is a fully-managed web service, which means they hosted your old site for you. With self-hosted WordPress, you will need to purchase hosting.
While I’ve never personally used them, I have heard that A2 Hosting is a solid choice when it comes to shared web hosting.
UPDATE: In the past, I used and highly recommended SiteGround, but they suck now so you should AVOID THEM AT ALL COSTS!
You can receive a generous 50% discount when you sign up, so make the most of it and sign up for the maximum length of time allowed (3 years, payable up front). After the introductory time period is up, you’ll pay their full rates.
Set up a temporary domain

Are you using a custom domain on Squarespace? If so, you’ll need to set up a temporary domain. It will serve as an online storage space where all your site content will “live” until you point your domain to your new site.
After you sign up for hosting service, your host will help you set up a temporary domain that you can use for migration.
If you had a free trial site on Squarespace (with squarespace.com in the URL), you do not have to set up a temporary domain.
Instead, you’ll need to register a new domain name. Your old free domain was hosted on Squarespace’s servers, and you will need to find a new one.
Install self-hosted WordPress
Once you’ve purchased hosting, you’re ready to install WordPress. Most quality hosts offer a 1-click installation through cPanel. Follow the steps below to install WordPress.

Log in to your cPanel, and click on the WordPress Installer. You will be guided through the setup process.

Then, click the Install button at the top left.
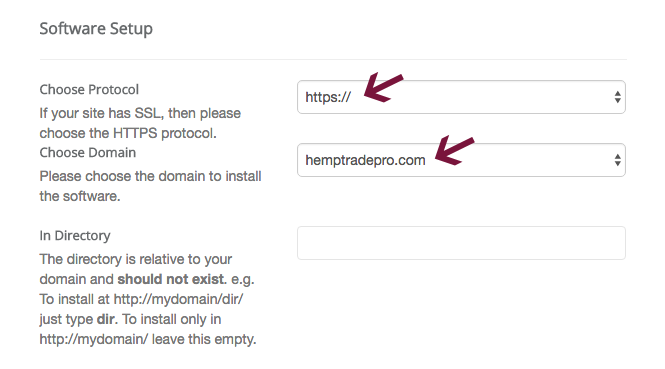
Select your protocol:
- http://
- http://www.
- https://
- https://www.
I highly recommend installing SSL on your website. You can get a free SSL certificate from Let’s Encrypt, so there’s really no reason not to use it.
If you’re planning on running an eCommerce site, you can upgrade to a paid SSL certificate later. For now, select one of the two https:// options and install a free Let’s Encrypt SSL certificate.
Chances are your host will let you install a SSL certificate with a couple clicks through cPanel. If not, you could contact them and ask how to install an SSL certificate or simply google “install SSL on (your host name here).”
I just added SSL to a bunch of my sites, and it only took a couple minutes.
Having an SSL certificate installed on your site is a small ranking factor, according to Google. This basically means that if two sites are the same in terms of quality and SEO, the one with SSL will outrank the one without it.
After your choose your protocol, select your domain from the dropdown.
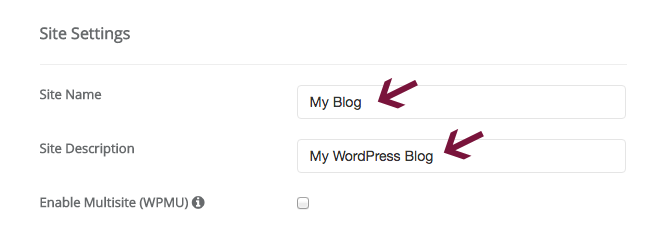
Under Site Settings, enter your Site Name and Site Description. These can easily be changed later, so fret over it too much.
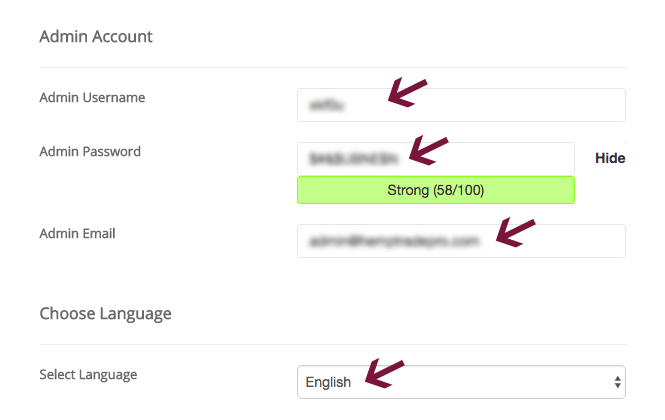
In the Admin Account area, enter your Admin Username. Don’t use admin as your username, for safety reasons 🙂 Softaculous will create a username and password for you automatically, but feel free to change them.
Under Admin Email, enter the email address where you want to receive notifications.
Select the language of your installation, and leave everything else as is.
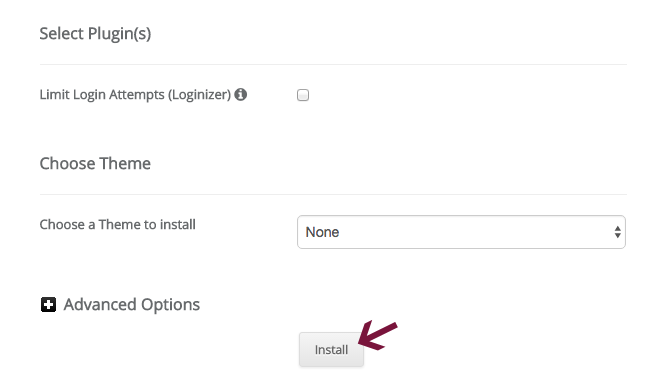
Click the Install button and be patient.
If you need more detailed instructions on setting up WordPress, take a look at this comprehensive WordPress setup guide.
Squarespace to WordPress migration
Now that you’ve set up a fresh installation of WordPress, you’re ready to start migrating your content. There are a couple different methods you can use, and I’ll go over them below.
While the manual method may take longer than the semi-automated one, it gives you complete control of all your content.
Manual migration (copy & paste)

Is your Squarespace site on the smaller side? If it only has a few pages and/or posts (20-30 total), then manually copying and pasting your content is the way to go.
When moving your content manually, you have a couple options:
- Make all the pages and posts you’ll need before you start the copy/paste process.
- Create pages and posts one by one as you move your content over.
If you’d rather not create a bunch of pages individually, you can use the Bulk Page Creator plugin.
To create multiple pages at once, simply enter a comma-separated list with no spaces in the Page Name field under Add Pages. Then, click the Update Site button.
This plugin only works to create pages in bulk, not posts. With posts, just create them one by one.
I know it’s monotonous and not that much fun… but it’s worth it.
Moving text

Now that you’ve created all your new pages and posts, you’re ready to move text from Wix to WordPress. To do this, simply copy the text from each Wix page or post, and paste it into the WordPress site’s equivalent.

Please note: When pasting text into WordPress, use the Text editor to prevent any weird formatting issues.
Moving images
You will also need to move all the images (and other media items) that you had on your Squarespace site.
You can do this a couple different ways:
- Drag the image into a folder on your computer
- Right-click (or control-click on Apple) on the image and choose Save As.
Once you have all your images saved to your computer, you can upload them to the WordPress media library.
Pro Tip: When you’re moving your page and post content from Squarespace to WordPress, it will be easiest to move both your text and media items simultaneously. This way, you don’t waste time moving two separate things to each page/post.
Semi-automated migration

If you have a large site with many posts and pages, then you may want to choose a more automated approach. Unfortunately, Squarespace only offers limited export functionality.
There is a chance you’ll only be able to export some of your content automatically. With anything that is not exported properly, you can copy and paste it.
Squarespace has the ability to export the following items:
- All your site’s pages, including gallery pages
- A single blog page and all of its posts
- Text and image blocks
- Text from Embed Blocks, Twitter Blocks and Instagram Blocks, but with minimum structure.
- Blog post comments
There are a bunch of items that CANNOT be exported from Squarespace, including:
- Products
- Folders
- Index, Event, Album and Cover Pages
- Audio, Video and Product Blocks
- Draft Pages and Posts
- Style changes and Custom CSS
As you can see, Squarespace is quite limited in regards to what you can export. With WordPress you’ll have more freedom to do exactly what you want with your site.
Exporting Squarespace content
Now, let’s get started with the export so you can leave this rigid platform behind.
Log in to Squarespace and head over to Settings. Then, under Advanced, click Import/Export.
On the next screen, click the Export button. A popup with the WordPress logo will appear. Click on the logo to start the export process.
You can track the progress of your site export on the left under the buttons. Once it’s complete, click the Download button and save the file to your computer.
Importing Squarespace content to WordPress
Now that you have your XML file from Squarespace, you can import it into WordPress.
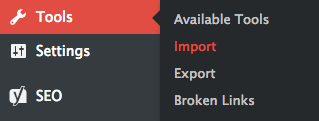
Log in to your WordPress dashboard and go to Tools > Import in the sidebar. Squarespace provides exported content as an XML file which is compatible with WordPress.

Click on Install Now under WordPress at the bottom of the table. Once the installation is complete, select Run Importer.
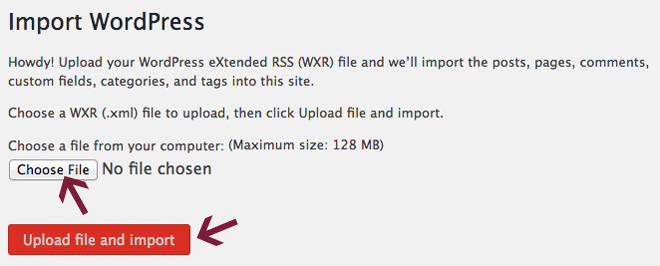
On the next screen, click Choose File and locate your Squarespace XML file. Then click the Upload file and import button.
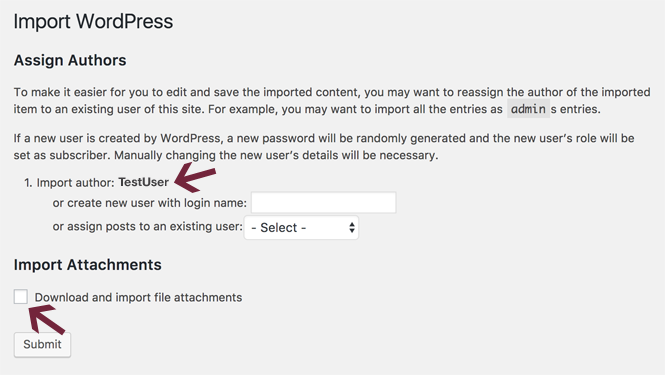
Now, you’ll have the option to assign an author for the imported content. You can select an existing admin user, create a new user or import the Squarespace user and update their privileges.
It’s easiest to just assign all of your imported content to the main admin user of your new WordPress site. If you need to change the author for individual posts or pages, you can easily do so later.
After you assign the content to the appropriate user, go ahead and check the Download and import file attachments box under Import Attachments.
I can’t guarantee this will work, but it’s worth a shot.
Once you set everything correctly here, click the Submit button and your content will be imported to your WordPress site.
Upon completion, you will see a success message. Now, you can take a look at your pages and posts to make sure they look good.
Importing Squarespace images to WordPress

Images from your Squarespace website cannot be imported using the WordPress importer, so you will need to use a different method to import them.
You can either import all your images manually like I mentioned earlier, or use a plugin to speed up the process.
This plugin works by looking at the HTML source code of all posts and pages on a given site, and locating the img tags. Then, it takes all the images and uploads them to your WordPress site.
- To get started, install and activate the Import External Images plugin.
- Next, go to Media > Import Images. If you’d like to exclude any pages or posts from being crawled for HTML img tags, enter them.
- Click the Save button and you’re done.
This plugin has not been updated in over 3 years, but you can see if it will work.
Pro tip: You want to make sure every facet of your shiny new website is optimized, including images. You’re better off using the manual method and making sure your images are sized correctly for your new WordPress site.
You want your site to be user-friendly, and load quickly. There are few things more annoying for your visitors than making them wait for gigantic photos to load. Don’t piss them off, and optimize all your site images.
Post-migration steps
After you complete the migration from Squarespace to self-hosted WordPress, there are a few things you’ll need to take care of.
Selecting a new theme/design
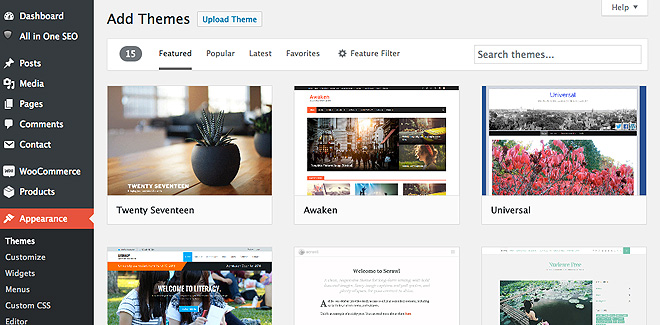
One of the reasons Squarespace is so popular is its drag-and-drop interface. It can be used to build a site without ever touching a single piece of code. While you certainly don’t need to be a developer to use WordPress, it takes some getting used to.
There are a variety of drag-and-drop site builder themes and plugins available on WordPress, including the following:
- Divi theme
- Visual Composer
- Beaver Builder
- Page Builder by SiteOrigin
Using the above-mentioned tools will be different than Squarespace’s site builder, but it’s worth learning them if you want to build your site exactly how you want.
Drag-and-drop themes and plugins tend to add a lot of bloat (or unnecessary code) to your website, which negatively affects its performance.
In most cases, you’re better off choosing a pre-built free or premium theme for your website.
There are a number of things to consider when choosing a theme. See how popular it is and read some reviews about it. With pages and posts created and some content uploaded to your site, you can preview it by installing a few themes and switching between them.
See which theme fist your site the best, and activate it. It’s likely you’ll change your theme at some point, so don’t worry about it too much now.
Don’t worry about finding a design that is similar to your old Squarespace site, but choose something new and exciting. There are countless WordPress themes, so you will definitely find something which perfectly fits your needs.
Creating widgets

Now that you’re using WordPress, there are a number of widgets that you can place in various areas of your site.
What is a widget, you ask? It is simply a block that can be placed in different locations to add functionality or improve the structure of your website. They can be easily dragged and dropped into widget-friendly areas under Appearance > Widgets.
The most common place for widgets is in the sidebar area/s of your website, but they can sometimes be added to your site’s header, footer, area below the header and other areas. It all depends on the theme you’re using – they’re all different and some feature widgets in very unique places.
There are many default widgets available in WordPress, including the following:
- Archives – shows a monthly archive of your website’s Posts.
- Audio – displays an audio player.
- Calendar – displays your site’s Posts in a calendar view.
- Categories – a dropdown or list of your site’s categories.
- Contact Details & Maps – shows your contact details and a map.
- Content – displays text and images in a flexible grid.
- Custom HTML – adds HTML code.
- Custom Menu – shows a custom menu.
- Image – displays an image.
- Meta – adds Login, RSS and WordPress.org links.
- Pages – displays a list of your site’s Pages.
- Posts – shows your site Posts in a flexible grid.
- Recent Comments – displays the most recent comments on your site.
- Recent Posts – shows the most recent Posts on your site.
- RSS – displays entries from an RSS or Atom feed.
- Search – adds a search form to your website.
- Tag Cloud – displays your site’s most used tags.
- Text – used to display text or HTML.
- Video – shows a video from your media library or YouTube, Vimeo or other video hosting site.
Adding contact forms

You should also create contact forms for your new site to make it easy for people to reach you. There are many contact form plugins to choose from, and my personal favorite is Contact Form 7. I use it on all of my sites, and highly recommend it. You can configure forms just the way you like, add auto responders and even integrate many other services with it.
Creating navigation menus
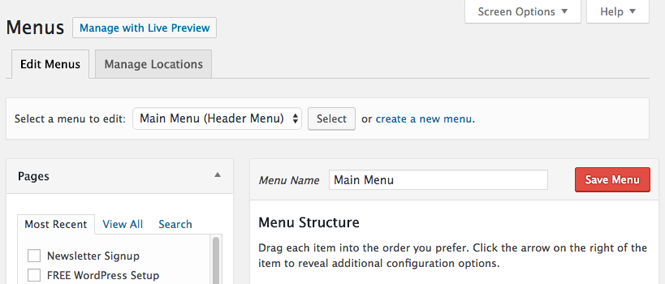
You will also have to recreate your menus. Make sure your visitors can navigate your site easily by have a well-structured main menu.
In WordPress, it’s super simple to create a new menu. Hover on Appearance, then click Menus. Give your menu a name and click Create Menu. Once you’ve created your menu, you can add pages, custom links, posts and other items to it.
After you’ve added everything you want to the menu, specify where you want to display it under Menu Settings at the bottom.
The main navigation area can be labeled a few different ways, including:
- Main Menu
- Top Menu
- Header Menu
Click on Save Menu to add it to your site, then take a look at your site to make sure it’s in the proper place and working correctly.
With many themes, you can also add menus by clicking Customize in the top WordPress bar when viewing a page or post on your site (not in the Dashboard).
Adding photo galleries
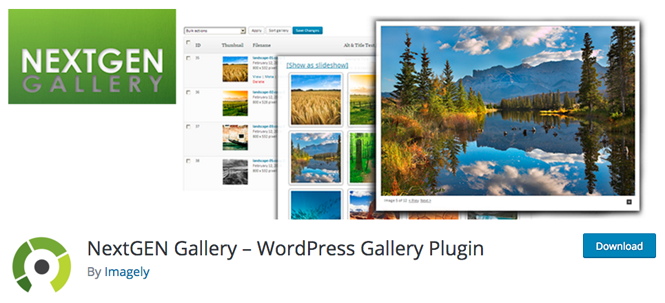
If your site requires galleries of any kind, you will likely want to download a plugin for that as well. While you can add a WordPress gallery without a plugin, it is not very functional or customizable.
I use and highly recommend the free version of NextGEN Gallery. It has over 15 million downloads (wow!), and has been around since 2007.
If you need advanced functionality, you can purchase the premium version.
Make sure you optimize all your images before uploading and adding them to a gallery.
Update: I am now using FooGallery for most of my galleries, as it is a lightweight gallery plugin which is important for site speed.
Updating permalink structure

Now that you’ve moved to WordPress, you should simplify your permalink structure. You want to make sure that you’re creating your new site with best practices in mind and using long, outdated URLs is not the way to go.
With your Squarespace site, your URLs were long and complicated. According to Google, it’s best if you use a short and concise URL structure.
If you were using a free Squarespace URL, then it used the following structure (or similar):
With a custom domain on Squarespace, your permalinks were similar to the example above, but without “.squarespace” in the URL.
At the beginning of this tutorial, I told you to make a list of your Squarespace URLs. The reason for this is so that you can set up redirects from your old URLs to the new ones.
If your site received very little traffic and had few incoming links, then don’t even worry about setting up redirects. Focus instead on increasing the quality traffic to your new and improved site.
Now, WordPress defaults to Post name, which is the URL structure that you want to use.
To set up redirects, you can use the Redirection plugin. It lets you easily redirect visitors from your old Squarespace pages and posts to the new WordPress equivalents.
While some sites may recommend that you use the same URL structure as on Squarespace, this is terrible advice. Take advantage of everything WordPress has to offer, and improve everything you possibly can.
Adding must-have plugins
One of the reasons WordPress is such a popular CMS is the amount of plugins available. From SEO to security to site speed and more, there are thousands of plugins that can be easily added to your website to add all kinds of functionality.
No matter what kind of site you have, you should install the following plugins right away:
Yoast SEO – Lets you easily optimize your site for SEO.
Wordfence – Security plugin which helps protect your site from malicious attacks.
BackWPup – Free backup plugin you can use to schedule both partial and complete site backups
W3 Total Cache – This caching plugin takes dynamic elements of your site and makes them static, greatly improving your site speed.
When installing plugins, don’t go nuts and add tons of them. Instead, think about what kind of features you’re looking for, and then choose the best plugin for each one.
Make sure you read reviews and check when the plugin was last updated before you decide to install and activate it.
Updating internal links
After you finish moving your site, you will want to take a look at all of its internal links, including those to all pages, posts and media items.
Since you updated your permalink structure, your internal links will be broken. Take a look through all of your pages and posts and update links that need to be fixed.
Instead of going through your site manually, you can use Broken Link Checker to find all your non-working links. Simply install the plugin and let it search for broken links throughout your site.
When it locates broken links, it will display them in two places:

In a Broken Link Checker widget on your WordPress dashboard
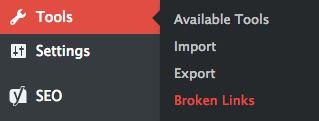
… and under Tools > Broken Links.
The Broken Link Checker plugin is really great, and it even lets you update any broken links all in one place. There is no need to go to the source URLs to fix them.
Once you find and fix all of your broken links, you should deactivate this plugin as it tends to slow down sites.
To check for broken links in the future, you can either:
- Activate it periodically (once a month or so) to check for broken links, then deactivate it once finished.
- Use an online tool such as Online Broken Link Checker (this is the best option).
No matter what you choose to do, check your site’s links from time to time. It’s important for user experience that all the links on your site work properly.
Transferring your domain
If you were using a premium domain registered on Squarespace, you’ll probably want to move it now that you’re hosting your site elsewhere. This is totally optional, but there’s really no reason to keep your site registered with Squarespace.
To transfer your domain to a new registrar, follow these steps:
Step #1 – Unlock your domain
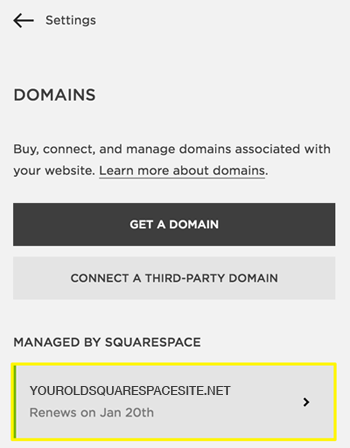
- In the Home Menu, click on Settings, and then Domains.
- Choose the domain you’d like to transfer
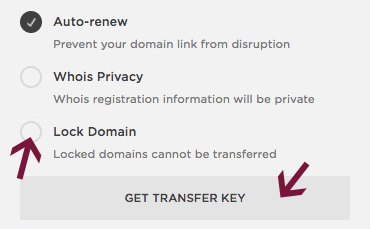
- Scroll down and deselect Lock Domain.
- Then click on Get Transfer Key at the bottom.
- Copy the transfer key.
Step #2 – Transfer your domain
In order to transfer your domain to another registrar, you’ll need to provide them with the transfer key you just copied. If you need help, contact your new registrar or google “transfer domain to + name of new registrar.”
If you had a free Squarespace site (which included .squarespace.com in the URL), you’ll need to find and register a new domain name.
There are a number of domain name registrars to choose from, including:
- register.com
- namecheap
- gandi.net
- name.com
Many registrars (including those mentioned above) offer both domain name registration and hosting, but sometimes it’s a good idea to keep them separate.
Please note: After you transfer your domain, you’ll have to point your DNS to your host within your registrar’s control panel.
Ensuring your site works properly
After this giant migration project, you want to make sure that everything on your site is functioning correctly.
Take an extra look through your internal links, navigation menus and media items on every page and post to ensure that everything works the way it should.
Frequently Asked Questions
Will I have to choose a new website design when I move from Squarespace to self-hosted WordPress?
Should I set up redirects from my old Squarespace posts and pages to their new WordPress equivalents?
What WordPress plugins do you recommend for my new site?
How about hosting? Which web host should I choose for my WordPress website?
Conclusion
Moving your website from one platform to another is quite the task, and I’m sure you’re ready for a nap. I hope that this guide helped you migrate your site from Squarespace to self-hosted WordPress quickly and easily.
Can you think of anything that I missed? Is there anything you feel should be added to this post? I always try to make my tutorials as thorough as possible, but please reach out if you think it could be improved.
Are you struggling with any part of your website migration? Please leave a comment below, and I will try to help out or at least point you in the right direction. I cannot guarantee to help fix your problem, but will do my best.
If you’re looking to move your site from other platforms to self-hosted WordPress, check out these other migration guides:
- Weebly to WordPress
- Blogger to WordPress
- Wix to WordPress
- Joomla to WordPress
- Drupal to WordPress
- WordPress.com to self-hosted WordPress
- Medium to WordPress
- Tumblr to WordPress
If you found this post helpful, please share it and spread the word!
Want more like this? Sign up for my newsletter to receive helpful WordPress Tutorials, Tips and Tricks.


Thanks for the helpful guide! One question: When would you consider safe to cancel the Squarespace subscription? I assume that both websites can’t be live at the same time, right?
Hi George, I’m glad you liked the guide. I would say you can cancel your Squarespace website subscription as soon as you have all your site content backed up and moved. Both sites won’t be live at the same time, so when your new WordPress site is up and running, you can kill the Squarespace one.