Do you currently have a blog on Blogger which you’d like to transfer to self-hosted WordPress? If your answer is yes, that’s awesome. WordPress will provide you with much more flexibility in terms of site design and functionality.
Many people start their sites on Blogger because it’s free and very easy to use. It is a good platform for someone just starting to blog, but WordPress is a much better choice – it provides countless customization options and all kinds of amazing features to enhance your site.
WordPress appeals to website owners for a number of reasons, including the following:
- There are a bunch of plugins you can install on your site with all kinds of functionality.
- You have a wide array of free and premium themes to choose from, and can even hire a developer to make you one from scratch.
- Since WordPress is open source software, you can easily add all kinds of features to it.
- You own all of your site data and can control what you choose to share with third parties.
- If you run into problems, you can likely find help in one of the many support forums for WordPress.
You can also check out the video below to help you move from Blogger to self-hosted WordPress.
If you feel as though you’ve outgrown Blogger and want to move your site to self-hosted WordPress, follow this guide for step-by-step instructions.
Please Note: Migrating your site from one CMS to another IS NOT simply a matter of moving over the content. It is essentially building a brand new website from scratch.
If you’re looking for quality shared hosting for your WordPress website, we highly recommend A2 Hosting. They offer unlimited SSD space, free automatic site backups, hosting optimized for speed and 24/7/365 guru technical support.
Pre-migration steps
Before you even think about migrating your content, you’ll need to take some preliminary steps.
Getting a domain name (if you need one)
If you have a free domain on Blogger (one with .blogspot.com at the end of it), you’ll need to find and register a new domain name.
Are you already using a custom domain on Blogger (e.g. mydomain.com)? If so, you will simply need to point the DNS to your new web host. For the WordPress installation, you’ll need to use a temporary domain and switch to your live site later.
Purchasing hosting
Since you’re moving to a “self-hosted” site, you’ll need to get a web hosting account set up. Basically, a web host provides you with space for your website files on one of their servers.
Since you’re just starting out with your WordPress site, a shared hosting plan will suffice. You can always upgrade later if need be.
Update: I used to use and highly recommend SiteGround, but they suck now so STAY AWAY! I have never used A2 Hosting, but have heard good things about them from those who know a thing or two about shared hosting.
Installing WordPress
You just purchased hosting, so you’re ready to install WordPress on your website. Most good web hosts offer a 1-click WordPress installation option through cPanel, and it’s very easy to use.

In cPanel under WordPress Tools, click on the WordPress Installer and you’ll be guided through the whole setup.

Then, click the Install tab.

Select your protocol:
- http://
- http://www
- https://
- https://www
I recently added SSL to a bunch of my sites, and highly recommend you do the same. Let’s Encrypt provides free SSL certificates, so there’s no reason not to use one on your site.
According to Google, making your site secure slightly affects its ranking in the search engines. If there are two sites that are the same in terms of quality and SEO, the one with SSL will outrank the one without.
Once you choose your protocol, choose your domain from the dropdown list.
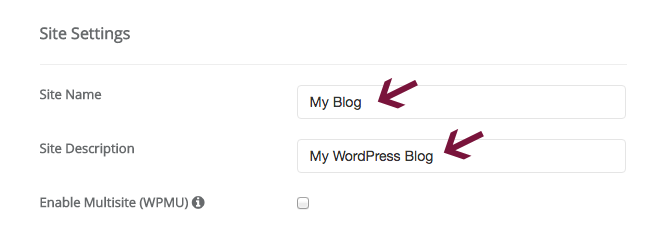
Under Site Settings, add your site name and description. This doesn’t have to be perfect now because you can always change it later.
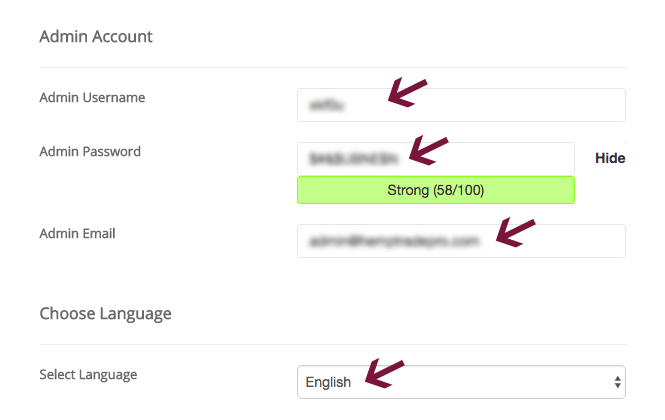
In the Admin Account area, enter an Admin Username. Make sure you don’t use admin as your username for safety purposes. Softaculous will create a username and password for you automatically, but feel free to change it if you’d like.
Under Admin Email, enter the email address where you want to receive notifications.
Then, select the language of your installation and disregard everything else.
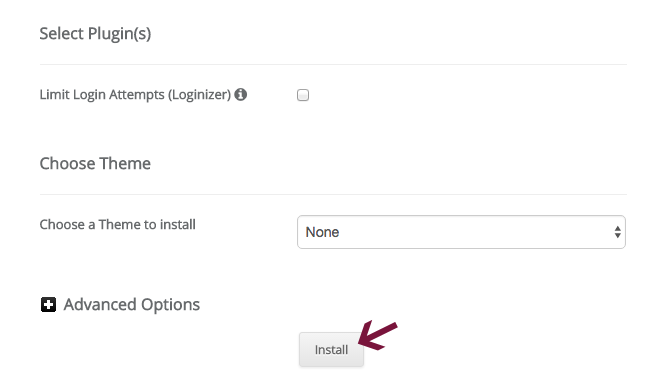
Click on the Install button and be patient.
Want more detailed instructions on setting up WordPress? Take a look at our step-by-step guide.
If you’d rather not deal with the installation yourself, you can sign up for our FREE WordPress Setup and let us take care of it for you.
Exporting your Blogger content
The first migration step is to export your Blogger content. Log in to your Blogger dashboard and click on Settings.

Then, click Other.

Under Import and back up at the top of the screen, click the Back up Content button.
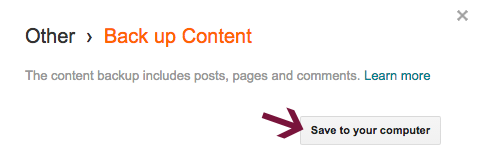
Finally, click the Save to your computer button and wait for the XML file to finish downloading (should be pretty quick).
Importing Blogger content to WordPress
Now that you’ve got your Blogger content as an XML file, you’re ready to import it into WordPress.
Under Tools in the left sidebar of your WordPress dashboard, click on Import.

Then, click on Install Now under Blogger at the top of the table.

Wait until it’s finished installing, and then click on Run Importer.

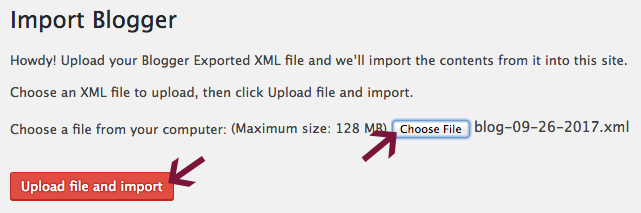
On the next screen, click the Choose File button and select the XML file that you exported from Blogger to your computer.
Finally, click the Upload file and import button.
All of your Blogger posts, comments and users will be imported to WordPress. Once it’s done, you can assign an author for the imported posts.
In most cases, the import should have worked just fine. In the event that your XML file was too large, you may need to increase your maximum file upload limit.
You have imported your Blogger content to WordPress, but there are still a few things to take care of.
Moving Blogger pages to WordPress
The Blogger importer only helps you move posts from your Blogger site to WordPress.
For any pages that you want to move to WordPress, you’ll have to move the content manually.
Follow the steps below:
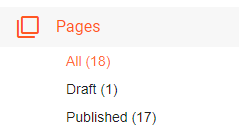
First, log in to your Blogger site, and click on Pages.
Then, hover over a page title and click the Edit link that appears below it.

Once on the page, click the HTML button in the upper left, then highlight and copy all the text.
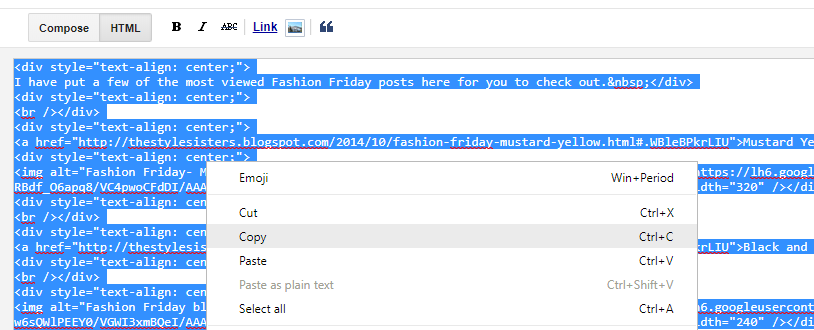
Last but not least, paste the copied HTML in your newly-created WordPress page.
Repeat this process for all pages you want to move.
Setting up permalinks
What is a permalink? Simply put, a permalink is a link to your site’s pages and posts. Generally speaking, you want to use a short and concise permalink structure for SEO.
When it comes to setting up your permalink structure on your new WordPress site, you have a couple options:
Option #1: Using redirects
If your old site received a lot of traffic, then you likely want to set up redirects to your new site. This will ensure that people visiting your old Blogger site URL will land on your new WordPress site.
If you choose to set up redirects to your new WordPress site, you should make your new URL structure as close to your Blogger one as possible so that all your posts are redirected properly.
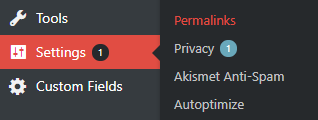
Set your permalinks by going to Settings > Permalinks in your dashboard’s sidebar.
On that page, enter the following in the box next to Custom Structure:
/%year%/%monthnum%/%postname%.html
Using the above permalink structure ensures that your new WordPress post URLs are similar to those you used on Blogger.
It is possible that the blog post URL in WordPress (referred to as slug) will not match your old Blogger ones.
You can easily fix this by creating a PHP file and running the following code snippet (source: isitwp). Simply create a file using a text editor, and add the following code.
<?php
require_once('wp-load.php');
$res = $wpdb->get_results("SELECT post_id, meta_value FROM $wpdb->postmeta WHERE meta_key = 'blogger_permalink'");
$wpdb->print_error();
foreach ($res as $row){
$slug = explode("/",$row->meta_value);
$slug = explode(".",$slug[3]);
$wpdb->query("UPDATE $wpdb->posts SET post_name ='" . $slug[0] . "' WHERE ID = $row->post_id");
$wpdb->print_error();
}
echo "DONE";
?>
Name it something like repair.php or similar and upload the file to your WordPress directory.
Then, simply visit yoursite.com/repair.php to run the script. You will see the word Done on the page, indicating that the script has run successfully.
IMPORTANT: Once completed, you can delete the repair.php file from your WordPress directory, as it only needs to run one time.
Option #2: Disregarding redirects
On the other hand, if your Blogger site received very little traffic, then I would suggest not even worrying about setting up redirects. Instead, use a shorter, optimized permalink structure and focus on building quality traffic to your new site instead.
Not sure which option to choose? I strongly believe in optimizing your site as much as possible, so I would lean towards updating your permalink structure to make it SEO-friendly and not necessarily worrying about redirects.
It all comes down to the amount of traffic and backlinks to your Blogger site. If it was wildly popular, then you’re better off setting up redirects.
The truth is that the majority of Blogger sites probably don’t have much traffic, so in many cases setting up redirects is probably not worth your time. Make your new site optimized using short and concise URLs.
Redirecting from Blogger to WordPress
In order to properly route traffic from your old Blogger site to your new WordPress site, you will need to redirect it by adding some HTML code within your Blogger control panel.
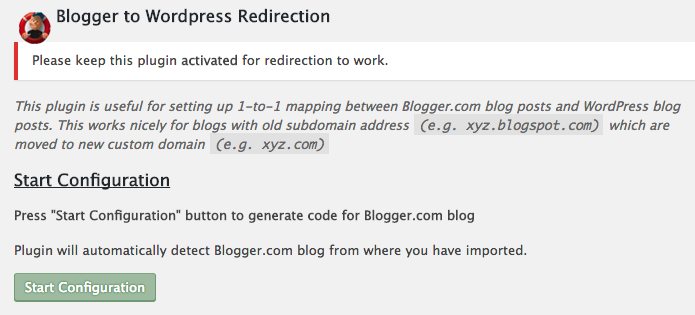
To set up the redirect, you’re going to use the Blogger to WordPress plugin. First, download and activate the plugin.
Then, go to Tools > Blogger To WordPress Redirection. Then, click the Start Configuration button to get started.
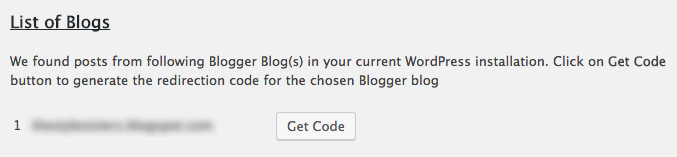
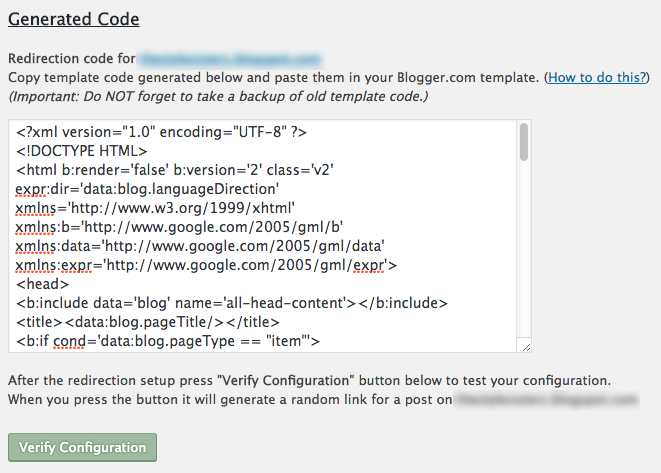
Then, click on the Get Code button to generate HTML code.
Copy the code, then log in to your Blogger account.
Within your Blogger control panel, click on Theme in the left sidebar.
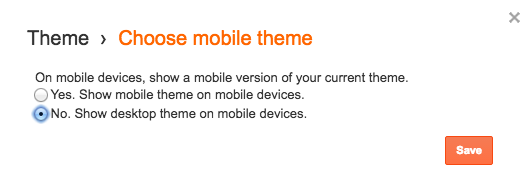
First, click the gear icon below the Mobile preview. Make sure you select No, and save your changes.
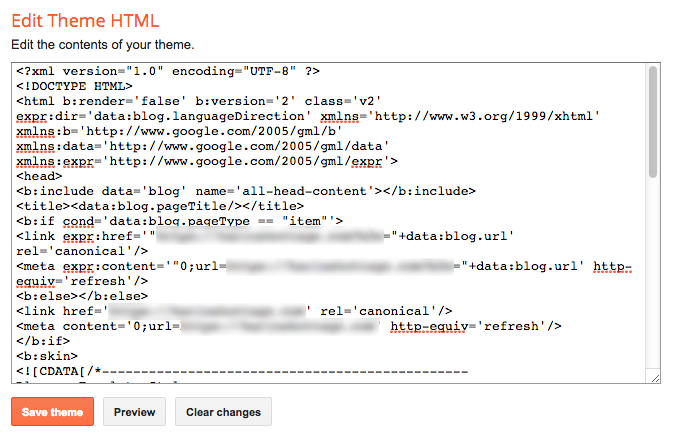
Next, scroll down to the bottom of the page and click the Revert to classic theme link.

In the Edit Theme HTML section, paste the code you copied above, enter it in the box and click the Save Theme button at the bottom.
Now, your Blogger to WordPress redirect should work flawlessly. To check, you can click the Verify Configuration button at the bottom of the Blogger to WordPress plugin page.
Redirecting your feeds
If you had RSS subscribers on your old Blogger site, you will want to redirect your old feed to your new one.
Simply log in to your Blogger dashboard and go to Settings > Other (just like you did earlier).
Then, in the Site feed section, click on Add next to Post Feed Redirect URL and enter your new feed address (e.g. it will probably be yoursite.com/feed/)
Once you’ve added your new RSS feed address, click the save settings button in the upper right-hand corner of the page.

Importing images from Blogger
When you import your Blogger XML file to WordPress, it should add all your Blogger images to your WordPress media library. In some cases, it doesn’t bring in all the files.
If for some reason you don’t have all your image files in WordPress, you can run the Import External Images plugin. It will import any missing images into WordPress.
Make sure that you optimize your site images for SEO.
Post-migration steps
All of your content from Blogger has been moved over to self-hosted WordPress, right? That’s great, but you still need to take care of a few things.
Choosing a theme
When migrating from one platform to another, you need to choose a new theme for your site. You won’t be able to use the same design you were using on Blogger unless you hire a developer to recreate a theme which mimics it. DON’T do this unless you absolutely must because it’s a waste of time and money.
Simply choose a fresh theme for your shiny new site.
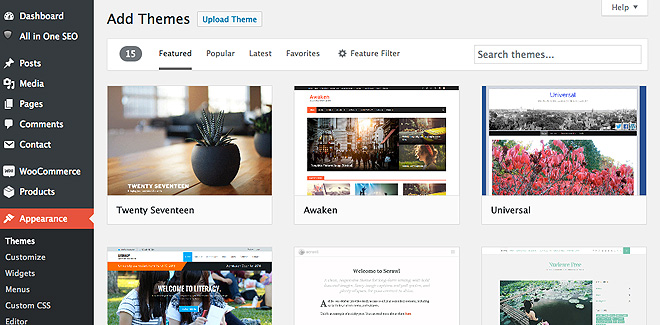
There are thousands of free themes in the WordPress theme directory, and countless premium themes as well.
Look around and do a little research before you select your theme. Check out ratings and read some reviews about it.
You want to make sure that you choose a well-coded, quality theme which won’t negatively affect your website’s performance.
Some themes – including many multi-purpose ones – are bloated and should be avoided at all costs.
Creating navigation menus
You will also need to recreate any menus you were using on Blogger. Having a well-structured site which is easy to navigate is very important for your site visitors.
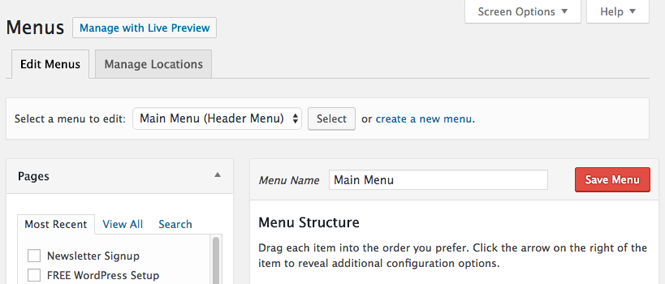
It’s very easy to create a new menu in WordPress. Head over to Appearance in your dashboard’s left sidebar and click on Menus. On the next page, click on Create Menu and add needed pages, posts, custom links, posts and any other items you’d like.
Once you’ve created your menu, you can specify where you’d like to display it on your site. Themes tend to have different names for the Main Menu, including Top Menu or Header Menu, among others.
Go to the Manage Locations tab near the top of the page, and click on the dropdown field to select the menu you’d like to display in your main navigation. Then click Save Changes and take a look at your site to make sure it’s in the right spot and working correctly.
Adding contact forms
Did you have any contact forms on your Blogger site? If so, you’ll need to recreate those for your new site.
Contact Form 7 is one of the most popular plugins for creating a wide variety of forms, and it’s totally free.
From adding autoresponders to your forms to integrating them with MailChimp and much more, you can add all kinds of functionality to your contact forms.
You can also consider the following contact form plugins:
- Ninja Forms
- Gravity Forms
- WP Forms
- Contact Form by BestWebSoft
Setting up widgets
What is a widget, you ask? It is simply a content block which you can place on your site, often in the sidebar or footer. Different themes have widget areas in various places, and they can be added easily under Appearance > Widgets or in the Customize area on the front end of your site.

Among the widgets you can add to your site are the following:
- Archives – displays a monthly archive of your site’s Posts.
- Audio – adds an audio player.
- Calendar – shows your site’s Posts visually in a calendar.
- Categories – displays a list or dropdown of categories.
- Contact Details & Maps – shows contact details and a map.
- Content – adds text and/or images in a flexible grid.
- Custom HTML – adds HTML code.
- Custom Menu – displays a custom menu.
- Image – shows an image.
- Meta – shows Login, RSS and WordPress.org links.
- Pages – shows a list of your website’s Pages.
- Posts – displays your site Posts in a flexible grid.
- Recent Comments – shows recent comments on your site.
- Recent Posts – displays a list of your most recent Posts.
- RSS – displays entries from an RSS or Atom feed.
- Search – a website search form.
- Tag Cloud – shows your most used tags.
- Text – used to display text or HTML.
- Video – adds a video from your media library or a video hosting site (e.g. YouTube, Vimeo, etc.).
In addition to those mentioned above, there are theme-specific widgets as well. Once you activate your chosen theme, decide what kind of functionality you need on your site. Then, add the widgets that match your website’s specific needs.
Creating photo galleries
Did you have any photo galleries on your Blogger site? If so, you’ll need to find a gallery solution for your new site.
While WordPress natively supports galleries, the functionality leaves much to be desired so you’re better off finding another solution.
Certain themes have nice galleries built-in, but I’ve listed a few plugins below in case yours doesn’t.
In the past, I was a big fan of NextGEN Gallery, but recently learned that it can really slow down your site. I recently installed FooGallery, and really like its simplicity and ease of use.
Adding essential plugins
One of the reasons WordPress is such a popular content management system is its vast array of amazing plugins. Whenever I create a website, I automatically install a handful of super-helpful plugins, including those for SEO, security, site speed and more.
To start off, you should install the following FREE plugins:
- Yoast SEO – Easily optimize every aspect of your on-page SEO.
- Wordfence – Protects your site against malicious activity.
- BackWPup – Helpful backup plugin you can use to schedule automatic partial and complete site backups.
- W3 Total Cache – Caching plugin which helps speed up your site considerably.
Do you want to learn more about these fantastic plugins and their features? Check out this post.
There are so many WordPress plugins to choose from, and it can be hard to decide which ones to use. As a rule, you don’t want to go nuts and install a ton of plugins. Instead, select the ones you really need and use those.
When choosing a plugin, make sure you check when it was last updated and read some reviews about it.
Checking and fixing internal links
After you complete your site migration, you should take a look at all of its internal links, including those to your site’s pages, posts and media items. If you’ve updated your permalink structure (hopefully), you will likely have a few broken internal links. Go through all your posts and pages, and edit links that need fixing.
If you moved your site from yoursite.blogspot.com to yoursite.com, you’ll need to manually update all your internal links.
If you ONLY changed your permalinks (e.g. DID NOT move from yoursite.blogspot.com to yoursite.com), you can use the Broken Link Checker plugin to update all your internal links. Once installed, it will search for broken links in your site’s pages, posts, comments and other content.
When it finds broken links, it will show them in two places:
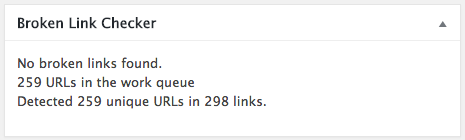
In the Broken Link Checker widget on your WordPress dashboard.
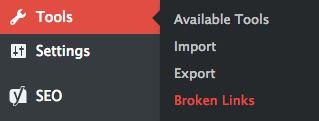
and under Tools > Broken Links.
This plugin is super helpful – it even lets you fix broken links directly through a single interface instead of having to navigate to each source to make changes.
After you fix all of your links, you should deactivate and delete Broken Link Checker. It is a plugin which tends to use a good amount of your server’s CPU resources, which can slow down your site a great deal.
Instead of keeping it, you should use a tool like Online Broken Link Checker to periodically check your site’s links for any broken ones. Simply enter your URL on their site every so often (once a month is fine) to make sure all your links are still working correctly.
Making sure your site works properly
The last post-migration step is to look through your site to make sure everything is working and displaying properly. Simply navigate through all of your posts and pages to look for any problems.
You want to make sure that everything is working correctly, so user experience is as good as possible.
Frequently Asked Questions
Will I have to choose a new site design when I move from Blogger to self-hosted WordPress?
Should I set up redirects from my old Blogger posts and pages to their new WordPress equivalents?
What WordPress plugins do you recommend for my new site?
How about hosting? Which web host should I choose for my WordPress website?
Conclusion
Moving your site from Blogger to self-hosted WordPress can be quite the chore, but it’s well worth it. I hope that this guide helped you migrate your site quickly and painlessly.
Care to add anything? Did I miss something? I try to make all my tutorials as thorough as possible, but am always open to suggestions to improve them.
Are you struggling with your site transfer? Leave me a detailed comment below and I will try my best to help you.
If you’re looking to move your site from other platforms to self-hosted WordPress, check out these other migration guides:
- Weebly to WordPress
- Squarespace to WordPress
- Wix to WordPress
- Joomla to WordPress
- Drupal to WordPress
- WordPress.com to self-hosted WordPress
- Medium to WordPress
- Tumblr to WordPress
If you found this post helpful, please share it and spread the word!
Want more like this? Sign up for my newsletter to receive helpful WordPress Tutorials, Tips and Tricks.


Hey! This was a great tutorial, but I have 1 question – I want to migrate an old Blogger site to my existing WordPress site. My WordPress site has a few 100 articles on it. If I migrate my old Blogger site to my existing WordPress site, will it migrate the Blogger theme too? I don’t want to mess up my existing WordPress content or theme. Thanks!
It will not migrate the Blogger theme to WordPress, just the content.
thanks for the content about migration my blogger blog to WordPress blog …
You’re welcome. I’m glad it was helpful.
Hi Marshall,
Yes, I already have my custom domain. Thank you for the guide, I’ll follow steps described.
Have a nice day
You’re welcome Julien. Enjoy your day as well.
Hi, in the process, if we already have a domain name for our blogger blog, you mention to use a temporary domain.
But next, how do we go from this temp domain to our definitive domain (after its transfer on our new hosting system). Do I miss a step ?
Hi Julien,
Are you using a custom domain for your blogger blog? If so, you will need to update your DNS to point to your new hosting account. Then, you will need to transfer your new WordPress website from your temporary URL to the proper URL. First, I would install a fresh version of WordPress on your proper URL, then use this guide to move your site. Hope that helps!
You wrote an excellent article. I like this article very much. I will try according to your content and tips. Thanks for your informative content.
Thanks Maria, appreciate it.
WordPress is a solid blogging platform to start your blogging career with. But over time, when you understand the true potential of blogging for proving yourself, for developing your affiliate business, and for earning money via blogging, you will need to migrate your Blogger blog to a self-hosted WordPress blog.
Numerous newbie bloggers begin their blogs on BlogSpot first of all because of not spending any penny for the hosting and less for a domain. Though over time, multiple of them can able to know that the self-hosted WordPress which means a blog on WordPress is the great choice for an entirely customized blogging.
That’s the point when this searching and finding on how to move from Blogger to WP will work for sure. I believe that this all your information will help many of the bloggers who’re planning to switch on the WordPress. Kudos!!!
Hi Karin,
You can check out steps 6 and 7 in this guide (https://firstsiteguide.com/move-blogger-to-wordpress/), which discusses setting up permalinks and redirects. If you want to set up redirects for posts, then you should use a similar structure with the date in the URL. Note, this is not the best idea for SEO purposes. It may be a better idea to optimize your new site and forget about redirects. I noticed that your new site’s post URLs have .html at the end. You really don’t need this, as it’s not an ideal permalink structure.
Hope that helps!
I have moved everything over from blogger to wordpress and it looks great but…none of my old links on blogger take you to the actual post, only to the home page of my new wordpress blog. Can you help me? Also I noticed since reverting my blogger back to classic it only shows up as html not as blog posts on the site. I am so close to having everything function properly but this last thing is driving me crazy. Please help.