If you decided to build your own website from the get-go, there is a good chance that you used a website builder like Weebly to create it. While this may seem like a good – and inexpensive – choice for a simple do-it-yourself website with a handful of pages and posts, it is certainly not the best option for a quality, SEO-optimized website.
WordPress offers increased flexibility over Weebly, and is superior in nearly every regard. If you need a simple blog, creative portfolio or even ecommerce shop, take my advice and create it using the self-hosted version of WordPress. It has a variety of super useful plugins to choose from and thousands of themes suited for nearly any kind of site you’d ever want to create. In the vast majority of cases, WordPress is the best content management system you can use.
Please Note: Migrating your site from one CMS to another IS NOT simply a matter of moving over the content. It is essentially building a brand new website from scratch.
If you’re looking for quality shared hosting for your WordPress website, we highly recommend A2 Hosting. They offer unlimited SSD space, free automatic site backups, hosting optimized for speed and 24/7/365 guru technical support.
You can also check out the video below for instructions to move your blog posts from Weebly to WordPress:
Pre-migration steps
There are a few steps you’ll need to take before you make the jump from Weebly to WordPress. Look over the list of items below to make sure you’re totally ready to switch platforms. While it may seem overwhelming, it is totally worth it to upgrade your site to self-hosted WordPress from Weebly.
Changing domain name registrar
If your site was originally built on Weebly, then it’s likely you registered your domain name through them as well. In this case, you may want to switch to a different registrar, like NameCheap or even GoDaddy.
Most likely, this is not a mandatory step, but if you’re moving your site away from Weebly, then you might as well move the domain registration as well. Weebly generally charges more for domain name registration, so it’s wise to register it elsewhere.
It’s also possible that you were using the free version of Weebly with “.weebly.com” in the URL. If this is the case, you will need to look for a new, .weebly.com-free domain name that you will use on your WordPress site.
Once you purchase a new domain name, you can add a redirect to your new WordPress site. You do this by simply adding a line of code.
- Log in to your Weebly account and click Edit Site.
- Choose Settings and navigate to the SEO tab. Scroll down until you get to the Header Code area and add the following line of code (replacing yoursite.com with your new WordPress site’s URL):
<meta http-equiv=”refresh” content=”0;url=http://www.yoursite.com/”>

Once you’ve finished adding the line of code, click Save and then Publish for the changes to take effect. Test to make sure the redirect is working by visiting your old Weebly site URL. If you’ve done everything correctly, it will redirect to your new WordPress website. Voilà!
Purchasing hosting
Weebly is an all-inclusive online service, which means that they host all the websites on their platform. With the self-hosted version of WordPress, you will need to purchase hosting. If you’re looking for quality web hosting at an affordable price, I have heard good things about A2 Hosting.
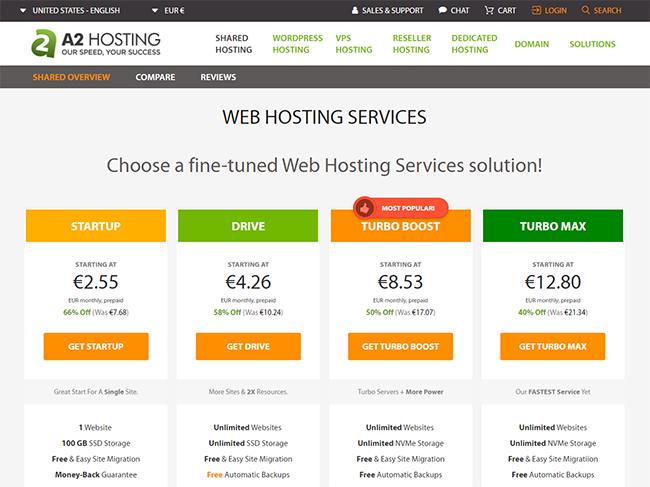
UPDATE: I used to use and recommend SiteGround, but they’re total garbage now so stay away! Their support has gotten worse (sometimes they totally disable online chat), prices keep going up and there are mysterious CPU overages that they cannot explain. When trying to do any work on my sites, I would constantly get 500 Internal Server errors.
Don’t purchase the cheapest hosting possible because you get what you pay for… and you’ll get a crappy, slow website that makes your visitors want to rip their hair out.
I don’t know about you, but when I land on a slow website I leave and never return. There is something so unprofessional about a site that takes forever to load. Show your customers that you care about their browsing experience and get quality hosting.
Setting up a temporary domain

Until you complete your site migration, you will have to set up a temporary domain for your WordPress site. Most major hosting providers will let you use a temporary domain, which you can name however you’d like (usually something like dev.yoursitename.com). Once the move is finished and you don’t need access to your old Weebly site, you can point your site to the correct, permanent URL and trash the temporary domain.
Please Note: If you had a FREE domain with .weebly in it, you DO NOT have to setup a temporary domain to migrate your content. Simply register a new domain, purchase hosting and move on to the next step.
Installing WordPress
After you setup your temporary domain, you will need to install WordPress. For the purposes of the migration, you can just use the default theme (currently TwentyNineteen). Once you get all of your content moved, you can worry about selecting a different theme that better matches your site content. For now, just focus on getting everything moved to WordPress.
You will generally want to wait until you choose a theme before you upload all of your media items. Themes have different content area widths, and you want to make sure your images are sized correctly for the theme you choose. Image size has a direct impact on your website speed, so optimize them from the start.
In addition to sizing media items properly, you should use an image optimization plugin to further reduce file sizes. I use EWWW Image Optimizer, which has been downloaded over 500,000 times.
Moving all of your content
Moving your content is another thing you’ll need to consider when migrating your website from Weebly to WordPress. Blog posts, pages and media items (images, PDFs, etc.) will all need to be moved to their new, upgraded home on the web. In this post, I will go over all the information you need to move from Weebly to WordPress, and share some tools to make the process as pain-free as possible.
If your site is small, you may be able to easily copy and paste all of your text content from posts and pages. Then, you can download all of your images by right-clicking (control+click on Apple) and saving them. You can also drag them to a folder on your desktop.
You will only want to try this method if you have a handful of posts and/or pages (20 or less) or a boatload of patience.
With larger sites, you’re better off using automated migration, or even outsourcing it if you don’t feel comfortable taking on the task by yourself.
Redirecting old Weebly URLs to new WordPress URLs

When moving from Weebly to WordPress, it’s a great idea to use simpler, shorter URLs without .html at the end. For now, just make note of all your Weebly page and post URLs so that you can redirect them later. The whole idea behind this migration is to improve your site and its functionality, so you want to optimize every facet of your new site, including the URLs.
Weebly to WordPress migration

Now that we’ve gone over what you need to consider before switching from Weebly to WordPress, you’re ready to start the migration process.
You have a few options when it comes to moving your content. There are numerous free online tools and helpful plugins that you can use to effectively get your new site up and running.
I will go over a few different options, including manual migration (copy and paste), automated migration and outsourced migration (paying someone else to do it for you).
Manual migration (copy & paste)

If your site has a small amount of pages and/or posts, the easiest way to move from Weebly to WordPress is to simply copy all your text content from Weebly and paste it into WordPress.
You’ll have to move all of your images as well – do this by saving them on your machine, then uploading them into your WordPress media library.
With a fully manual migration, you have total control of the migration process. For small sites, it is the best choice.
Step 1 – Creating Pages & Posts

Before you start moving your content, you’ll need to create the pages and posts on your new WordPress site.
Simply go through your Weebly website’s pages, and then create the same ones on your new site by going to Pages > Add New in the WordPress dashboard.
Then, do the same thing with all the blog posts on your Weebly site (if you have any). To create new posts, navigate to Posts > Add New.
There is a simple trick to keep your blog posts in the correct order. Start publishing your oldest blog posts first and work your way to the newer stuff. This will ensure that all your posts are in the same order they were on Weebly.
If you’d rather not create all the pages and posts manually, you can use some plugins to automate this process. Check out the Bulk Page Creator plugin to create pages in bulk or the Quick Bulk Post & Page Creator to create both posts and pages.
Step 2 – Copying and Pasting Content

Once you’ve created all the new pages and posts in WordPress, you are ready copy and paste all of your text content.
To do this, you’ll simply go to a page or post on your Weebly site and copy the text on that page. Copy the title, subheadings and body text, then paste all of that information on the corresponding WordPress page or post.
Repeat the process until you’ve successfully copied all of your written content onto your new site.
You may want to make note of the images that you are using on pages and posts, so you can easily add them to your new site. The next step is to move all the images and other media items to their new home.
Step 3 – Moving Media Items (Photos, PDFs, etc.)

To move all of your media items, you should first download them to your computer. You can do this a couple different ways:
- Drag the photo into a folder on your computer.
- Right-click (or control-click on Apple) on the image and choose Save As.
Once you’ve saved all the images on your machine, you can add them to your WordPress media library.
Pro Tip: It may be easier to move your images at the same time as your text content. If you’re already on a page or post with an image, it makes sense to upload the image while you’re there instead of pasting the text and returning to upload the image later.
Automated migration
If you’d rather not deal with a fully manual move from Weebly to WordPress, then an automated migration may better suit your needs.
You will be using a number of helpful plugins, and some of your content may need to be corrected after import. Plugins do not always work perfectly, so be prepared to make some adjustments.
I performed a partially automated Weebly to WordPress migration for HempToday (a site with over 100 pages/posts) and there were a number of items which I had to later troubleshoot and fix. I used the automated migration for all pages, but manually created new blog posts because I needed finer control over all details (publish date, permalinks, etc.). It was easier to just create them from scratch than import them all and go back to fix them later. After migration, I manually changed all the permalinks and had to update a bunch of internal links (to pages, posts and images) throughout the entire site.
Step 1 – Export & Import Posts

Weebly provides an RSS feed that can be used to help automate the transfer of blog posts to WordPress (or any other platform for that matter).
In order to save your RSS feed, follow these steps:
- Click the RSS button on your Weebly site, and your feed will open as an XML file in your web browser.
- Next, go to File > Save Page As. It will default to a text file with .txt on the end. Simply change the .txt to .xml and you have an XML file ready to import to WordPress.

Once you’ve saved your Weebly RSS feed as an XML file, you’ll need to download a plugin to import it into WordPress. Weebly uses the ATOM format, so the default WordPress importer cannot be used to easily import it.
Download the WP All Import plugin to import your XML feed file into WordPress. It works really well, and enables you to map all of the fields in your feed to WordPress.
Once you’ve successfully imported your old Weebly XML feed into WordPress, you’re ready to proceed to the next step.
Step #2 – Convert Pages

Weebly only provides a feed for blog posts, but not pages. To get the HTML files for all the pages on your Weebly site, you should export the entire site. In Settings > General, enter your email address and click the Email Archive button.
Once you have the exported site backup on your computer, you can use the HTML Import 2 plugin to bring in all the pages. It has not been updated in quite a while, but still works and is worth using if you have a bunch of pages to move.

In addition to importing HTML pages, the above mentioned plugin also imports any linked media files in both pages and posts. This means that it should effectively upload all the media items that you exported from your old Weebly site.
When using plugins to help you automate certain tasks, it’s always a good idea to check and make sure everything went smoothly. Sometimes things do not work as expected, and you should always double-check posts and pages on your site.
Step #3 – Check Media Items
The 3rd step in this automated migration process is to check that all your media items were imported correctly. The HTML Import Plugin mentioned earlier does a good job importing linked media files into your pages and posts, so everything should be groovy.
It’s a good idea to go over your pages and posts to make sure all the media items are in their proper place. If you notice any missing items, you can manually save and upload them to your WordPress media library. Sometimes the URLs to the media items get messed up, and you’ll see a missing image icon instead of the actual photo.
The plugin will most likely have done a good job at getting everything moved over to WordPress, but again, it’s wise to double check everything.
Outsourced migration
If you don’t feel comfortable using the manual and automated migration methods mentioned above, you can always use an online tool or pay someone else to perform a full service migration for you.
There are a number of online services that offer such migrations, including CMS2CMS (they actually move content between most major content management systems).
Step #1 – Run the Demo Migration

CMS2CMS offers a few different packages, and you can even try out a demo migration before you move your entire site. They claim to only offer limited support for Weebly, but it may work for you. It depends on the complexity of your site. You may have to fix some items after the migration, but run the demo and see how it works.
To run the demo, follow these steps:
After you register an account or log in using facebook or google, you’ll be able to specify your website details and then run a demo migration.
In the demo, you’ll be able to enter the source (Weebly) and destination (WordPress) URLs. In addition, you’ll be given a number of extra options, including:
- Migrate media items (images, PDFs, etc.)
- Optimize new URLs for SEO
- Delete target data (erases all current content on WordPress site if you have any).
- Suggested design options
- Redirect URLs (you can do this later with a plugin)
Once you’ve selected all the options you want, select Start Migration. The demo migration will only move 10 pages of content and any related media items (images, PDFs, etc.). You can see how the migration worked, then run the complete migration if you’re happy with the results.
Step #2 – Perform Full Migration
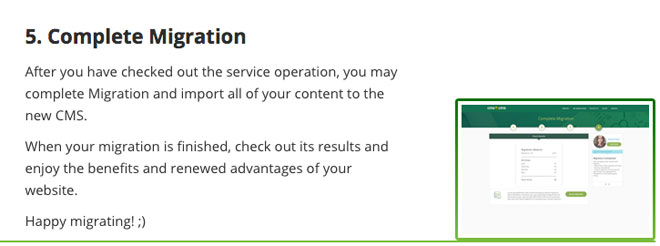
If you’re satisfied with the demo migration, you can migrate your site in its entirety. CMS2CMS’s do-it-yourself migration doesn’t come with technical support, but you can choose to purchase any of 3 migration insurance options – restart within 7 days for $5, 14 days for $7 or 30 days for $9.
It’s a very good idea to purchase migration insurance, in the event that something goes awry. There is always a possibility that you’ll run into a problem, and it’s smart to make sure you can redo the migration.
Full Service Migration Option

If you’re not comfortable performing the migration yourself, you can hire CMS2CMS to run the migration for you. Their premium full service packages start at $299, and they have various offers to complete migrations of very large Weebly sites to WordPress.
Post-migration steps
Once you’ve completed the move from Weebly to WordPress, you’ll need to make sure your new site is totally ready.
Choosing a new theme/design
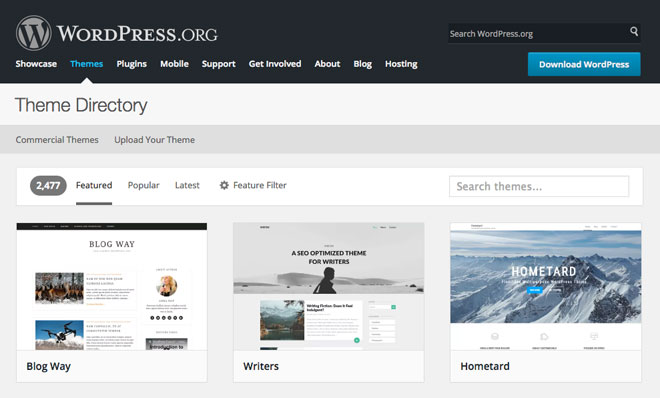
Many people choose Weebly for its simple drag-and-drop interface, which can be used to build a site without ever touching a single line of code. When you move to WordPress, you will have to prepare for something new.
There are various drag-and-drop website builder themes and plugins available for WordPress, including: Divi theme, Page Builder by SiteOrigin, Beaver Builder and Visual Composer. Using these new tools will certainly be different than what you were used to on Weebly, but it’s worth learning them if you want to customize your new site and don’t know how to code.
Generally speaking, drag-and-drop website builder themes and plugins add a lot of unnecessary code to your site (often referred to as bloat), which can negatively affect its performance. You may be better off choosing a pre-built free or premium theme for your site, and skipping the drag-and-drop page builder tools altogether.
When selecting a theme, take note of its popularity and read some reviews about it. The best way to see what your site will look like is to upload some of your content, install a few themes and switch between them. See which one fits your site best, and go with that. Don’t worry, you can always change your theme later… and you probably will at some point.
Don’t worry about keeping the design the same as your Weebly site, and simply look for something new and interesting. There are many WordPress themes, so you’ll certainly be able to find something which perfectly suits your needs.
Creating forms and widgets

If you were using any contact forms and/or widgets on your Weebly site, you’ll have to recreate them. You can download a plugin for any contact forms you may need. I highly recommend Contact Form 7, and use it on all of my websites.
Widgets are a built-in feature in WordPress, but some may only be available with certain themes. In some themes, you can place them in various locations (sidebar, header area, footer, etc.), but the most common place for them is in your site’s sidebar/s.
There are many default widgets, including the following:
- Archives – displays a monthly archive of your site’s Posts.
- Audio – displays an audio player.
- Calendar – a calendar showing your site’s Posts.
- Categories – a dropdown or list of categories.
- Contact Details & Maps – displays your contact details and a map.
- Content – shows text and images in a flexible grid.
- Custom HTML – lets you add HTML code.
- Custom Menu – adds a custom menu to your sidebar.
- Image – show an image.
- Meta – displays Login, RSS and WordPress.org links.
- Pages – shows a list of your site’s Pages.
- Posts – displays Posts in a flexible grid.
- Recent Comments – most recent comments on your site.
- Recent Posts – list of most recent Posts on your site.
- RSS – displays entries from RSS or Atom feeds.
- Search – a website search form.
- Tag Cloud – shows your most used tags.
- Text – used to display text or HTML.
- Video – add a video from your media library or YouTube, Vimeo or other video hosting site.
Updating permalinks

It’s likely that your Weebly website used a URL structure which includes .html at the end (e.g. http://yoursite.com/page-title.html). When you switch over to WordPress, you’ll want to change this. Google says to use a simple URL structure, so get rid of the .html at the end and start fresh with shorter permalinks.
The best thing to do is update your permalink structure, and manually set up redirects from your old URLs with the help of the Redirection plugin. When someone visits one of your old URLs – either through a link or directly – they will be taken to the new WordPress page or post equivalent. This is important for user experience. Instead of receiving a 404 error page, they’ll be redirected to the correct content.
If for some reason you desperately want to keep your old URL structure, you could use a plugin to setup your new WordPress site URLs exactly the same as your old Weebly ones.
To do this, go to Settings > Permalinks and choose Custom Structure. Then, you will add /blog/%postname% in the text field and click save to update your permalink structure.
This is only the first step if you want to keep your old URLs. You still have to add the .html part. To do this, you’ll need to install and activate the Add Any Extension to Pages plugin.
Once activated, visit Settings > Add Any Extension to Pages and enter .html, then click Update Settings.
Pro Tip: I recommend NOT doing this, because setting up a new permalink structure on WordPress is more concise and user-friendly.
If you had a site that received very little traffic, then I wouldn’t even worry about setting up redirects. Just focus on building traffic to your new and improved WordPress site.
Checking and correcting all links

When moving your site, you will inevitably have some broken internal links. Your old site used a certain permalink structure with .html at the end, and you should use simplified, shorter URLs for your new WordPress site (as I mentioned above). Because of this, your old internal links may point to the wrong URLs and will need to be updated.
Look through all posts and pages and edit each link to make sure they’re pointing to the correct place.
Ensuring site works properly
When you use plugins to help automate certain aspects of site migration, you may need to fix a few things. Using plugins to help automate your migration is definitely a time-saver if you are moving a very large site. If your site is on the smaller side, it will be easier to move everything manually (and check to make sure everything works as you move it).
After you move all of your content from Weebly to WordPress and take care of all the post-migration steps, you’ll want to look through your entire site to make sure it is working properly. You will want to take a look at a variety of items on your site, including the following:
- Internal links, including those to other pages, posts and media items.
- Size of media items on your pages/posts. It’s best to optimize images and size them for the theme you’re using. You could also size them twice as large to accommodate retina displays (they show everything in a higher resolution).
Frequently Asked Questions
Will I need to choose a new design when I move from Weebly to self-hosted WordPress?
When should I cancel my Weebly hosting account?
Can I keep my domain name registered with Weebly and just move my hosting?
Can you recommend free WordPress plugins for my new site?
How about hosting? Where should I host my WordPress website?
Conclusion
Moving your site from one content management system to another can seem like an overwhelming task, especially for those of you who are technically challenged. My hope is that this guide serves as an excellent reference which helps make your move from Weebly to WordPress as smooth and painless as possible.
Did I miss anything? Is there anything else you would add to this post? I tried to make it as thorough as possible, but please let me know how it could be improved.
If you’re struggling with any aspect of your site migration, please leave a comment below. While I cannot guarantee to fix your problem, I will do my best to help you or at least point you in the right direction.
If you’re looking to move your site from other platforms to self-hosted WordPress, check out these other migration guides:
- Squarespace to WordPress
- Wix to WordPress
- Joomla to WordPress
- Drupal to WordPress
- Blogger to WordPress
- WordPress.com to self-hosted WordPress
- Medium to WordPress
- Tumblr to WordPress
Do you need help creating a WordPress website? Sign up for your FREE WordPress Setup today.
If you found this post helpful, please share it and spread the word!
Want more like this? Sign up for my newsletter to receive helpful WordPress Tutorials, Tips and Tricks.


I am moving to another website editor (not WP) but this is the closest info I got. Because I have redirecting errors in Weebly that I cannot fix, I want to move everything manually (copy-paste and all that business) and basically build everything from scratch while keeping my old urls. Would this affect my SEO or should search engines just recognise my urls and keep my ranking? Thanks
Hi Shadi,
If proper redirects are in place, search engines will see that the old content redirects to the new content, so you should be good. It is possible for your rankings to slip a little temporarily.
Thanks for this article. I am migrating from weebly to WordPress. Weebly charges $20 to move this over which is important if you have many sites you want to move over. Is there a tool that you can run after the migration to see what errors/things need to be fixed. Like redirects, etc.
I am looking at DIVI WordPress theme.
I’m glad my article helped you out. I am not sure if there’s a tool to see what errors need to be fixed after migrating. When I do Weebly to WordPress migrations, I manually keep track of anything that I need to check once the site is moved. Hope that helps!
Hi I have 100 posts on my weebly site so it is across 4 pages of 25 posts each. When i try to create the RSS feed xml file for pages 2/3/4, the content is always of page 1. How do i get an xml file of all 100 posts or 4 files – one for each page? I will then import to WordPress
Thank you for the step by step. My website was brand new on Weebly, so I will be copy pasting all of my info to WordPress. How to I uninstall Weebly once I have my WordPress ready to publish?
Hey Amy, you will simply cancel your plan with Weebly. Is your domain registered with them too?
Hi
Edit to the first post submission:
I use and transfer my existing domain to the new host. If I dont want to use the weeby URL structure with HTML, I still have to use the redirect plugins to do the redirections, right? The existing weebly permalinks could still be found in search engine, and that’s the reason you need to do redirects? Pardon my novice questions.
Hi Kym,
While you don’t have to set up redirects, it is recommended for user experience and to help you keep your rankings. Google will eventually update search results to reflect your new URLs. The main reason for redirects is so that when a user clicks on your old links (either in Google results or from a link elsewhere), they are redirected to the new URL with the information they are seeking. When they receive a 404 error, it’s bad for user experience. I hope that helps.
I am trying to import a blog feed from weebly to a new WP site. When I follow these steps and get to the step of importing the feed through the RSS tool on WP I get the following error:
Import RSS
Fatal error: Uncaught Error: Call to undefined function set_magic_quotes_runtime() in /home/edeninc6/public_html/wp-content/plugins/rss-importer/rss-importer.php:72 Stack trace: #0 /home/edeninc6/public_html/wp-content/plugins/rss-importer/rss-importer.php(178): RSS_Import->get_posts() #1 /home/edeninc6/public_html/wp-content/plugins/rss-importer/rss-importer.php(204): RSS_Import->import() #2 /home/edeninc6/public_html/wp-admin/admin.php(311): RSS_Import->dispatch() #3 {main} thrown in /home/edeninc6/public_html/wp-content/plugins/rss-importer/rss-importer.php on line 72
Any suggestions?
Hi Jen,
Are you using this plugin https://wordpress.org/plugins/wp-all-import/? Based on the error you received, you’re using the built-in RSS Importer, not WP All Import.
Look at Step 1 again under Automated migration.
Hope that helps!